NVIDIA drivers are software packages installed on your computer and allow the GPU to communicate with your operating system. NVIDIA has been popular in the graphics card industry for over two decades. And it has become so popular that its products are now used in many computers across the globe. They are required to run games, graphics-intensive programs, and other high-performance graphics processing applications.
As NVIDIA drivers provide an interface between your hardware and software, it's essential to keep them updated as they can bring about new features and fixes for bugs that may have surfaced in previous versions.
However, if you don't want NVIDIA drivers on your computer or want to roll back to an earlier version of them, or if you are having slowed down performance, games run slow, and several other related issues. This complete step-by-step guide will show you three outstanding methods to uninstall NVIDIA driver components from a Windows system.
3 Ways to Uninstall NVIDIA Drivers on Windows
Uninstalling NVIDIA drivers on windows can be a bit tricky. There are several methods to uninstall NVIDIA, but here are the three most straightforward and fastest ways of uninstalling your NVIDIA drivers.
Method 1: Uninstall Nvidia Graphics Drivers with Device Manager
Device Manager is a built-in feature of Windows that allows users to manage all the devices currently attached to their computer. Device Manager can be used to uninstall device drivers and eliminate unneeded devices. Device Manager does not show all devices by default, and some are intended to be hidden by Windows. We'll explain in detail how to use this method in Windows 10 for readers who want to check hidden devices.
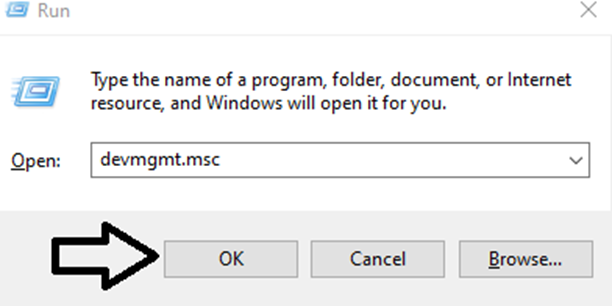
Step 1: Search for "devmgmt. msc," by pressing Windows + R on your keyboard. As described in the image below, click "OK."
Step 2: You've arrived in Device Manager. Select 'Show hidden devices from the 'View' menu bar.
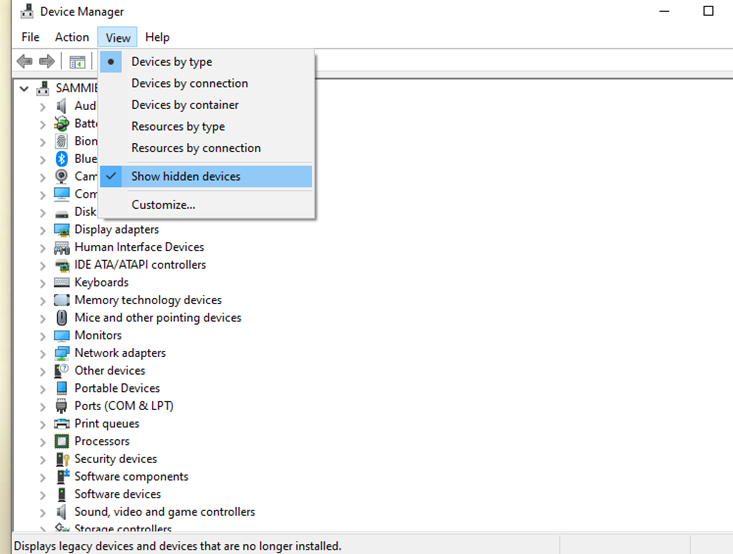
Step 3: The list then displays all hidden devices in the device manager. You can check the categories to locate the Nvidia graphics device associated with the faulty driver. You can now right-click on "Nvidia graphics device" and select 'Uninstall' to delete the listing.
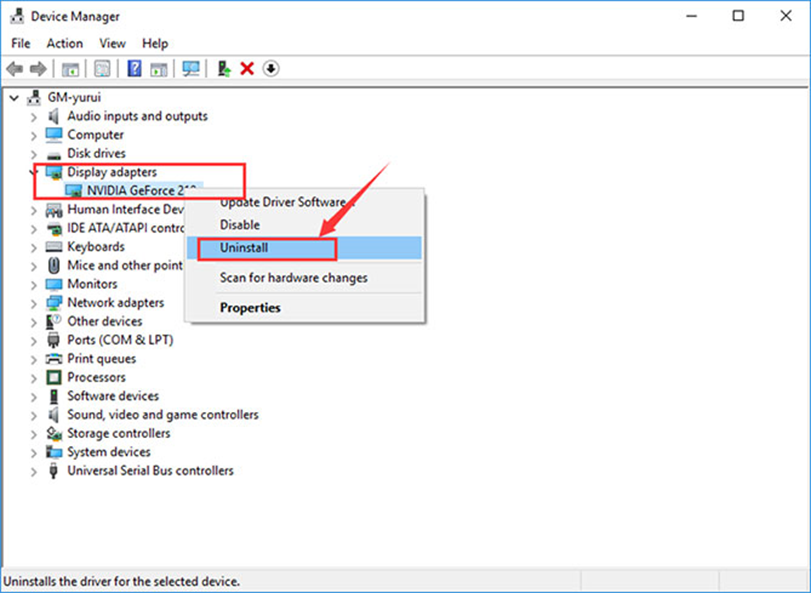
You can now reboot your system in normal mode to verify if the whole driver files have been removed.
Method 2: Uninstall Nvidia Graphics Drivers with Control Panel
Apart from the first method, Windows has another built-in feature called "Control Panel" that enables users to easily uninstall drivers with its "Uninstall a program" feature. You can easily find all drivers you are currently using, such as display drivers, audio drivers, and network drivers, can be found here.
Users can use Control Manager to control and manage the system's numerous processes effortlessly. These procedures include device management and completely uninstalling programs from the system.
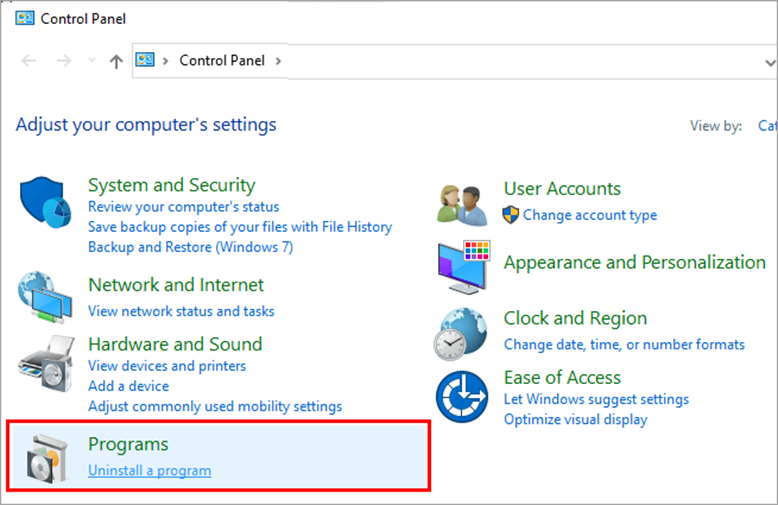
Step 1: Click the "Windows button", then select "Control Panel," as illustrated in the screenshot below;

Step 2: According to the image below, another window will be opened; select "Programs."
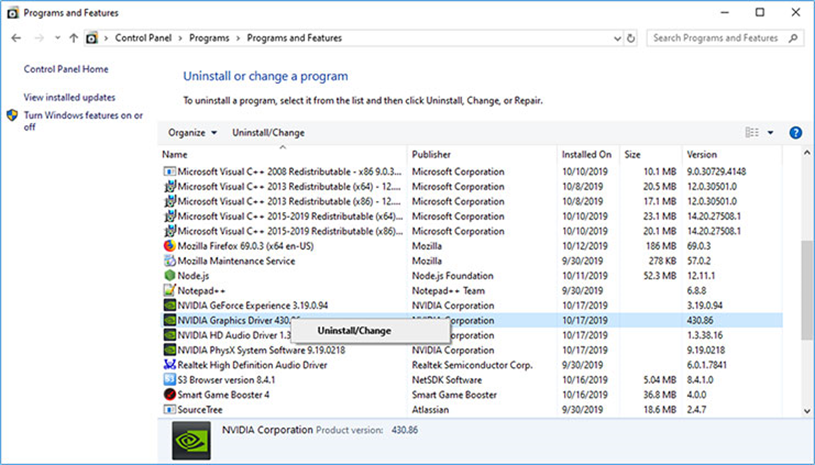
Step 3: A list of installed apps will be displayed, including Nvidia graphics drivers. To uninstall or change software you don't need, right-click on it and select 'Uninstall/Change.'
Method 3: Uninstall Nvidia Graphics Drivers with Driver Easy
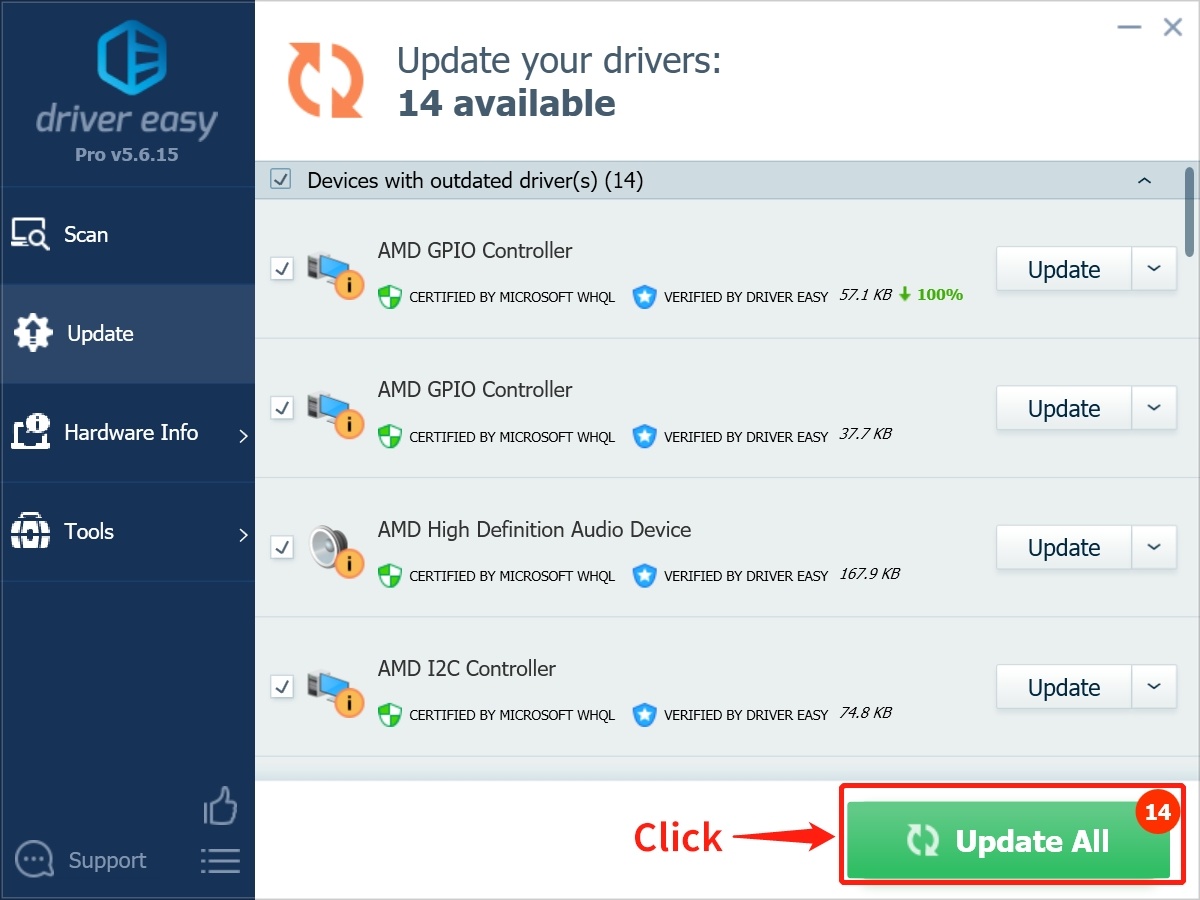
Driver Easy is a simple-to-use tool that helps you update drivers and keep your computer at peak performance. You can use it to scan, diagnose, and fix all of your PC's hardware, including the Nvidia Graphics Drivers. You don't need to manually search for the drivers, download them, and then uninstall them with the PRO version.
Driver Easy will automatically scan your computer, detect all the outdated drivers on your system, and then give you a list of missing drivers or out-of-date. You can select which drivers you want to update and click the "Update" button to install them. Driver Easy will backup your current drivers before installing so you can revert if needed.
Driver Easy will also help keep your drivers up-to-date in the future by updating them automatically with just a few clicks! Just set it and forget it!
Price: Its 1 PC version costs $29.95/year, 3 PCs version costs $59.90/year.
Compatibility: Windows
Step-by-step Guide:
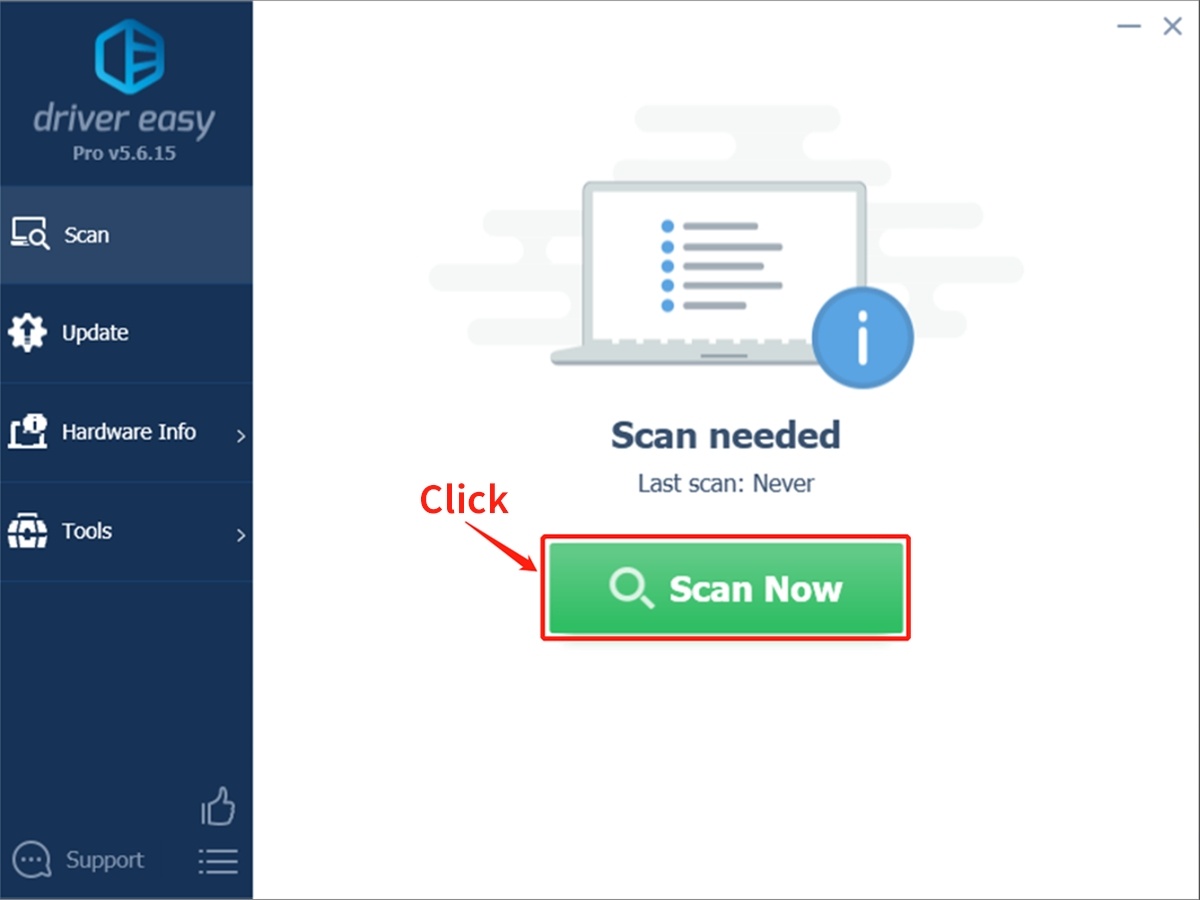
Step 1. Download and install Driver Easy, then run it and click Scan Now.
Step 2. Wait patiently until Driver Easy finish scanning your computer and listing any hardware with missing, outdated or mismatched drivers.
Step 3. Click Update All to download and install all the new drivers automatically.
Or
Step 1: Download and install Driver Easy.
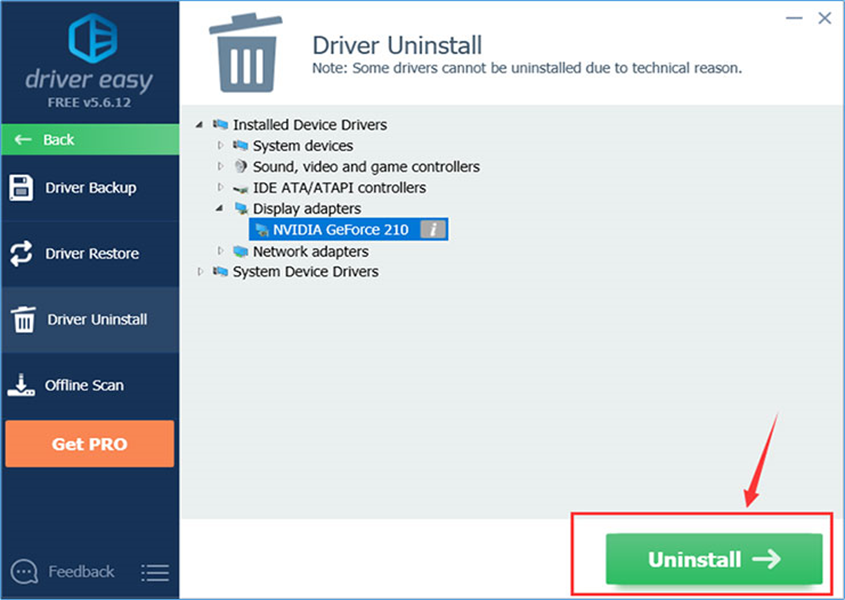
Step 2: Run Driver Easy and select "Tools" in the drop-down box. Click on "Driver Uninstall".

Step 3: To continue, locate one problematic or useless driver and click the 'Uninstall' option.
Bottom Line
Now you've got the complete guide on uninstalling NVIDIA drivers on Windows. You can easily uninstall NVIDIA drivers with the device manager, control panel, and driver. By following these steps, you'll be able to get rid of your NVIDIA drivers and make sure they don't come back.