SSDs are faster, reliable, and durable. They function quietly and possess good resistance against physical wear and tears. SSDs are designed to have shorter access times and consume less power than HDD.
To obtain a better drive and PC performance, many computer users often replace the HDD with a new SSD. The best option to avoid data loss and reinstallation of apps, files, and OS is to clone the HDD to SSD.
If you’re seeking to clone your HDD to SSD in Windows 11/10 to get better performance, this page shows you how to run this task without reinstalling Windows and apps in Windows 11/10 and other Windows versions quickly and safely.
What will you do Before Cloning HDD to SSD?
There are specific preparations needed before you begin cloning your HDD to SSD. The Preparation includes:
1. Backup your data and free up disk space
It is essential that you backup your data and free disk space to avoid data loss during the cloning process. Backing up your files helps you access them when needed if they get lost, corrupted, or damaged.
2. Plugin and initialize your SSD
The next preparatory step is to install and initialize the new SSD. You can correctly do this with the following steps:
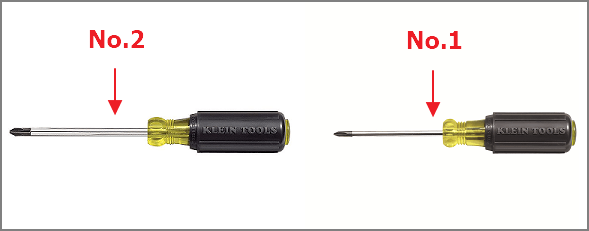
Step 1: Open up your computer/laptop with a screwdriver. Use image No.2 for the desktop computer and image No.1 for the laptop.
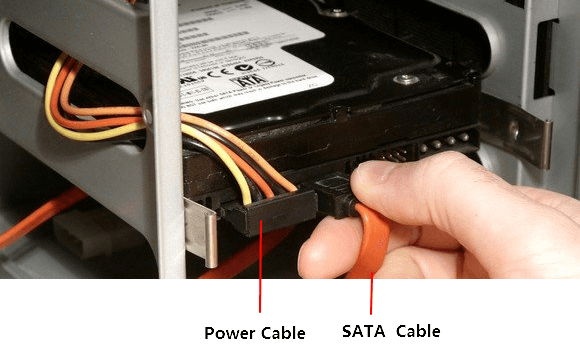
Step 2: Plug the SSD into your computer. If you’re using a SATA SSD, insert it into the computer using a power cable and a SATA cable.
If you’re using an M.2/NVMe SSD, insert it into the SSD port and fix back its screws.

Step 3: After inserting the SSD, close the computer case and reboot.
Step 4: Once the Windows 11/10 boots up, press Windows + R on the keyboard, type in diskmgmt.msc, and press enter to access Disk Management.
Step 5: Right-click the new SSD and choose Initialize Disk. Select either MBR or GPT as the disk type.
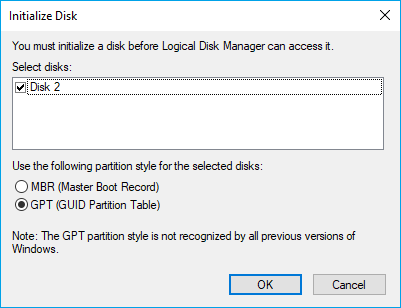
However, ensure the disk type is the same as the HDD, and if the HDD is installed with Windows 11, set the type to GPT.
3. Download and install a reliable disk cloning software
You’ll need to download and install disk cloning software to carry out the cloning exercise. There is numerous hard drive cloning software online, but we recommend you download the EaseUS Disk Copy Pro to make it easy. This tool clones each partition or disk drive sector for an exact original copy with no data loss. It is the best tool for upgrading your OS to a new and larger hard drive. Also, it’s useful for the quick and perfect cloning of all files in a drive.
Reasons for recommendation:
- It creates backups and migrates the operating system to a new hard drive. Thus, saving you the long duration of having to reinstall your system and prevent severe damage.
- It easily clones data on your existing HDD onto an SSD and speeds up your PC.
- It quickly creates a bootable USB/DVD/CD to clone the disk if a system fails.
- It’s designed with a simple, easy-to-use interface and one-click auto migration settings. You can transfer files without any hassle and error.
Price: It starts $19.90/Monthly.
Compatibility: Windows
How to Clone HDD to SSD using EaseUS Disk Copy
Once you have made the necessary preparation, then proceed with the following steps to clone HDD to SSD safely:
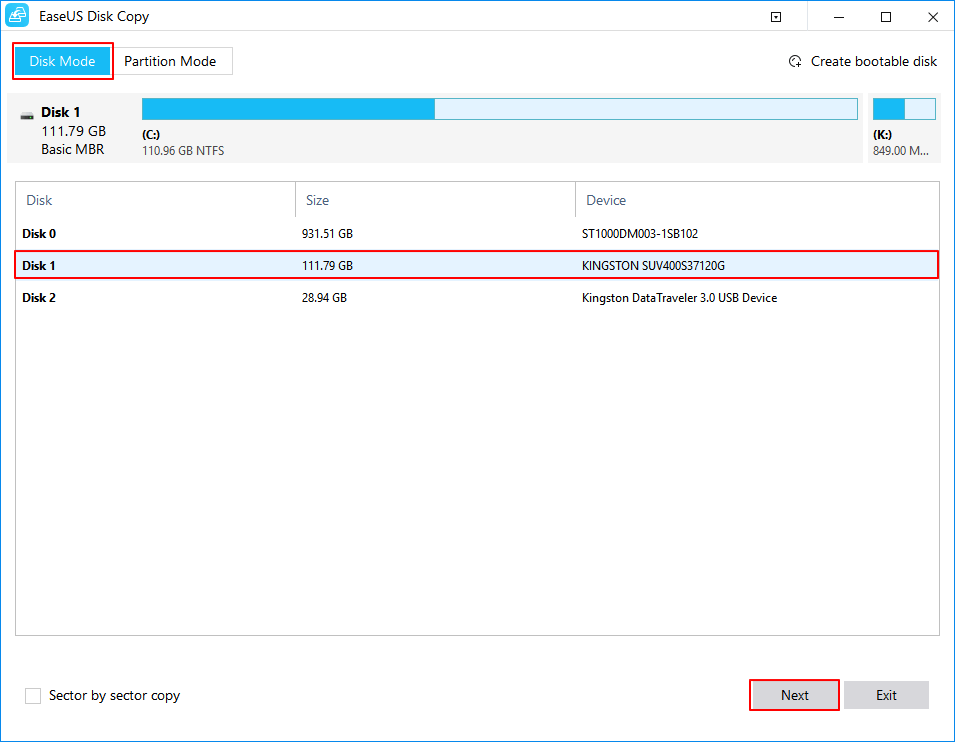
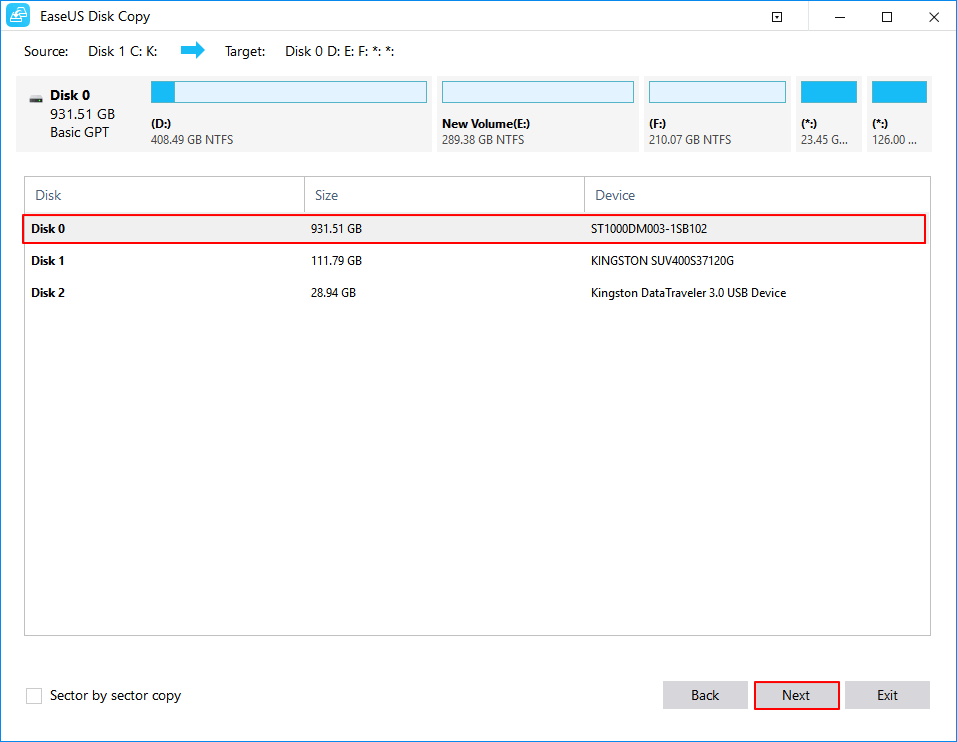
Step 1. Download, install and run EaseUS Disk Copy on your PC.
Click "Disk Mode" and select the hard drive that you want to copy or clone. Click "Next" to continue.
Step 2. Select the destination disk.
Note: The destination disk should be at least the same big or even larger than the source disk if you want to copy or clone the source hard disk.
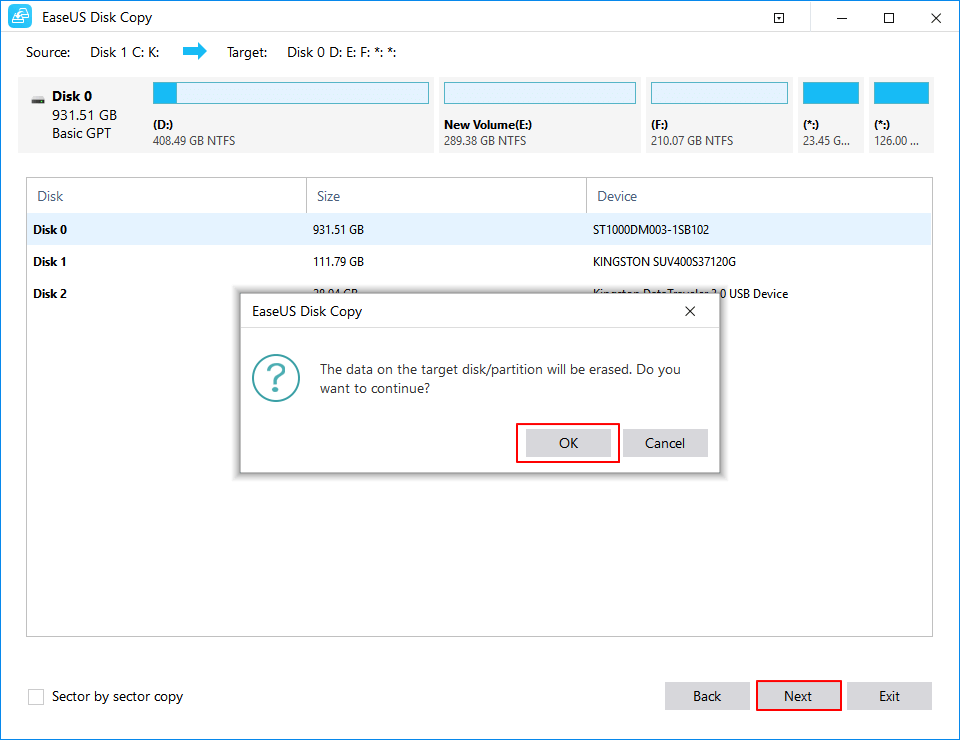
Step 3. Click "OK" to confirm if the program asks to erase data on the destination disk.
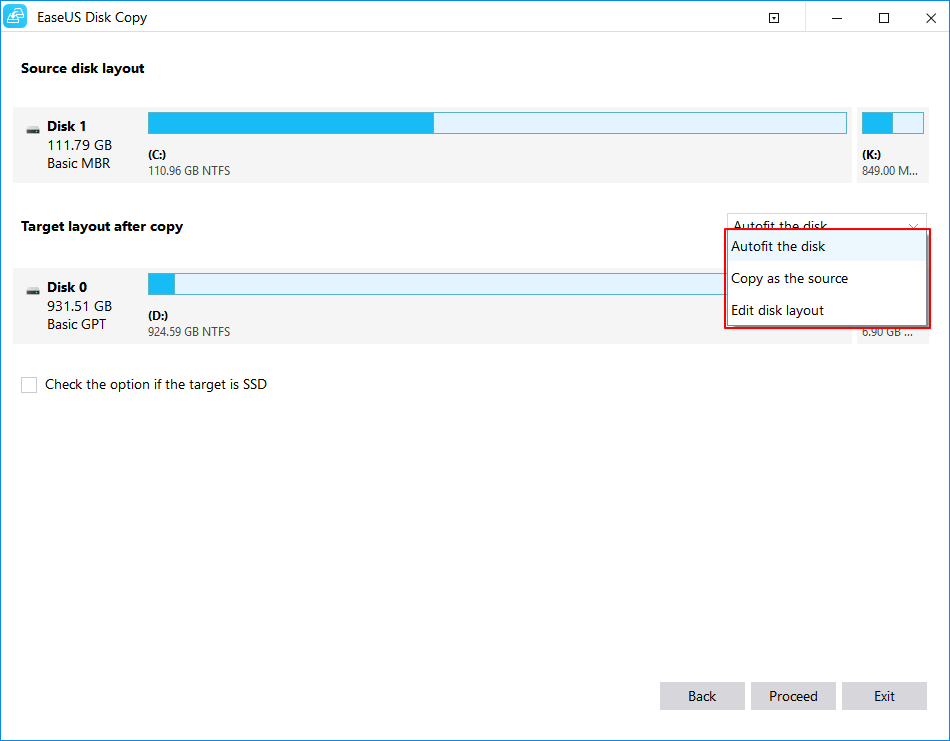
Step 4. Check and edit the disk layout.
If your destination disk is an SSD drive, do remember to Check the option if the target is SSD.
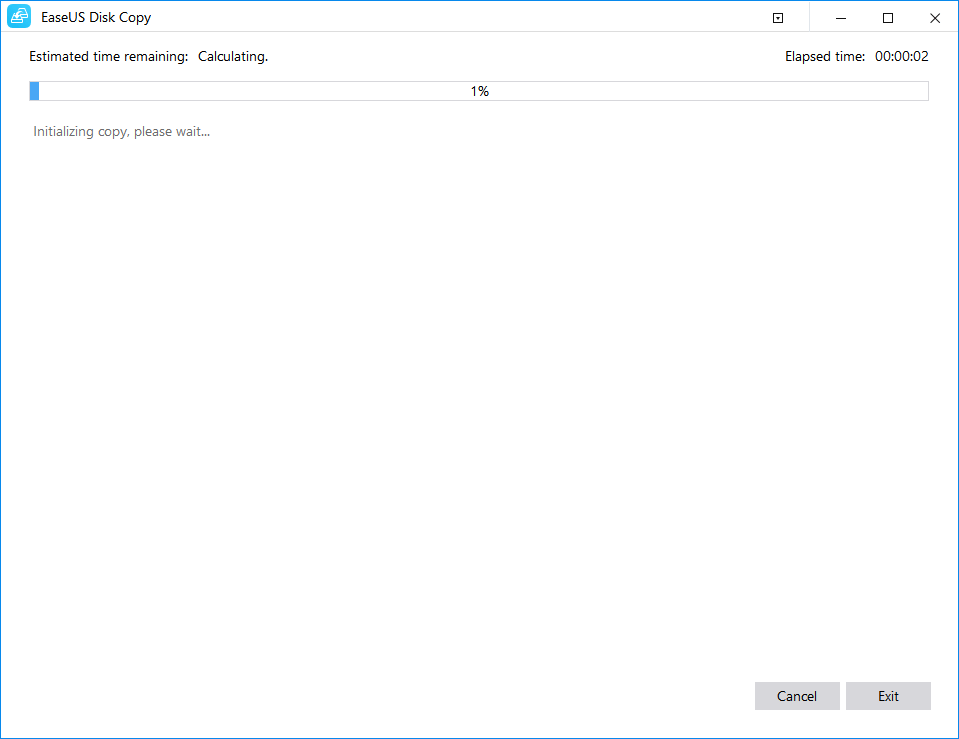
Step 5. Click "Proceed" to start the hard drive cloning process.
Conclusion
SSDs out-performs HDDs in many recognized aspects such as speed, reliability, and durability. Here’s why cloning your existing HDD to SSD is an excellent step to enjoying a sleek experience on your Windows devices. With the guidelines enumerated on this page and utilizing the recommended software, we are hopeful that you’ll have a great time cloning your HDD to SSD.