We have access to the sophisticated technology that simplifies our lives through its ease of use in the present era of digital communication. Our handheld units, smart wristbands, current computing systems, and other technologies fall within this category.
However, having the correct tools and utilities on our systems can make our daily activities more manageable and less scary. A screenshot application for our operating systems can be a helpful tool for saving time and providing additional capabilities that allow us to cut corners and be more productive.
While we can snap screenshots with a few keys or by pressing buttons on our handhelds, the ones detailed here have advantages that set them apart from the competition in various ways.
Without further ado, let's examine the top Linux tools for taking and editing screenshots and assess each one's advantages.
Best 6 Snipping Tools on Linux
1. FlameShot
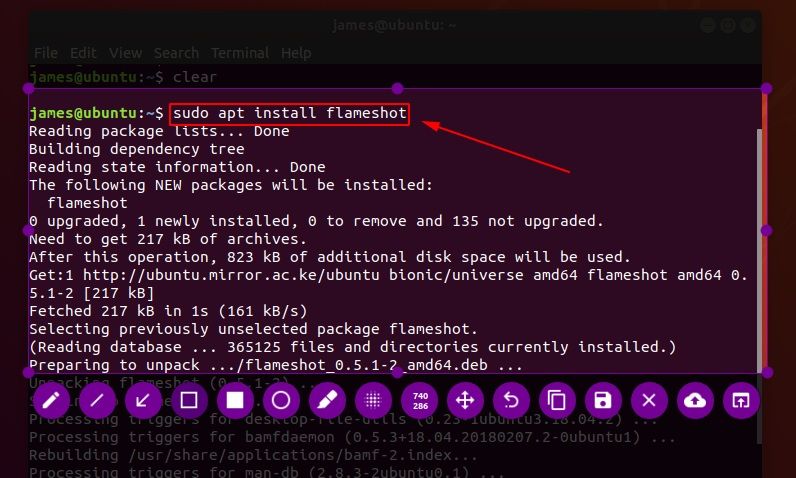
Flameshot is a robust, versatile, and user-friendly screen capture tool that lets you capture screenshots using either the GUI application or CLI commands on the terminal. Aside from taking screenshots, you may edit them by adding arrow marks, a rectangular border, blurring a segment of the image, adding notes, and much more.
Pros:
- Practical editing options
- PDF redaction
- Elegant design
Cons:
- No screen recording
- No method to add text
2. ScreenRec
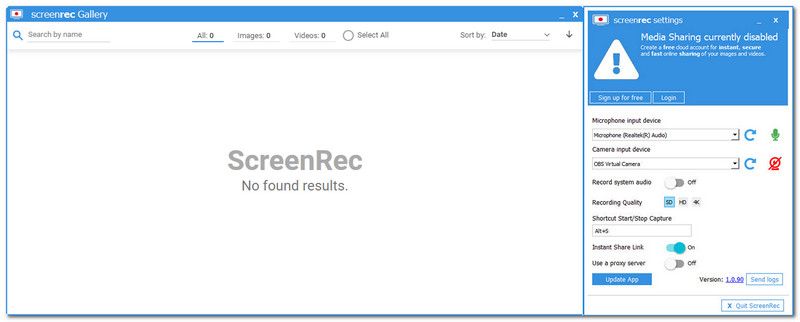
ScreenRec allows you to annotate high-quality images with multiple annotations. Every photo you save gets a private, shareable link created and copied to your clipboard, taking sharing to the next level.
You may now send your photographs to anyone and post them everywhere. You may even record your screen to add narration to otherwise dull screen captures. Your files are also stored and automatically transferred to your private cloud storage if you need to view them from another computer. Bottom line: the usability, editing capabilities, and sharing options are unparalleled.
Pros:
- Editing possibilities
- Simple private sharing
- Unlimited private cloud storage
- It also functions as a screen recorder.
Cons:
- Not open source
3. ImageMagick
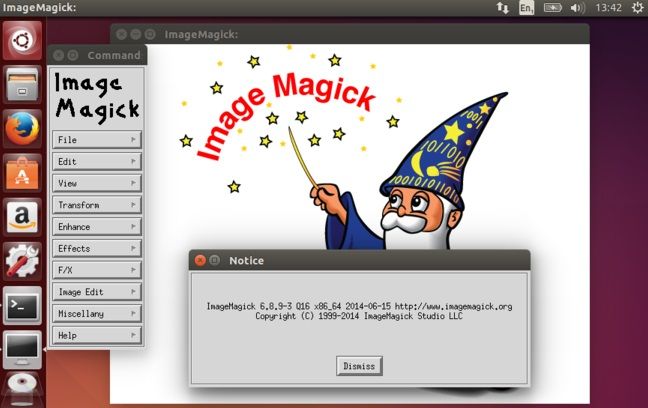
ImageMagick is a free, open-source tool that displays, transforms, and manipulates vector picture files in over 200 different formats. It also can take screenshots on Linux using a comprehensive set of commands. You can use ImageMagick to capture a screenshot of the entire screen, the currently active window, or a specific screen part.
Pros:
- Numerous editing options
- Simple to use
- Capture any window or an entire page
Cons:
- There is no option to share automatically.
- No screen recording
4. Spectacle
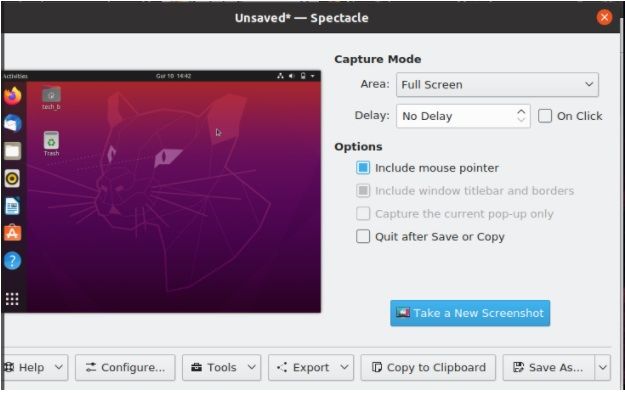
Spectacle is a simple tool for collecting desktop screenshots in Linux that is native to the KDE desktop. It can take screenshots of the entire desktop, the currently active window, the window beneath the mouse, or a rectangle section of the screen. The photographs that have been collected can then be stored, printed, or transferred to other programs for editing. The GPL open source license allows Spectacle to be freely distributed.
Pros:
- Extremely easy to use
- Mouse tracker
- Captures any part of your screen
Cons:
- No editing possibilities
- No automatic sharing is available
5. Shutter
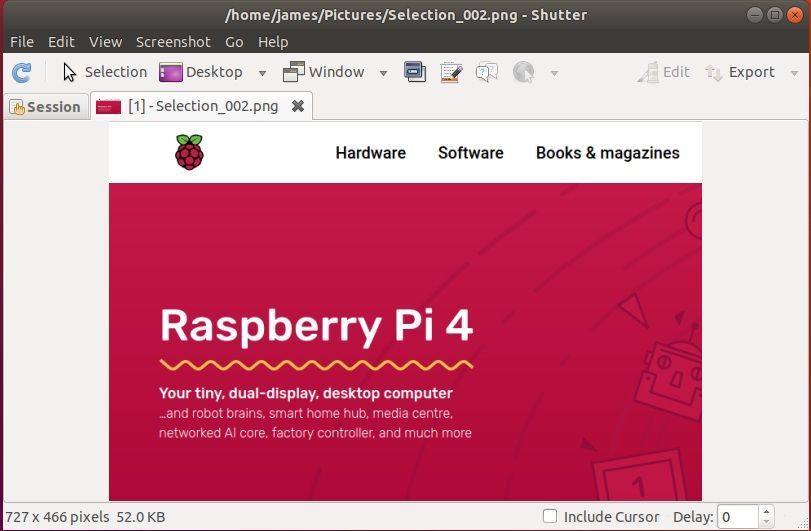
Shutter is a free and open-source screen capture utility for Linux-based systems. You can snap a screenshot of a specific area, window, or your entire screen and apply effects such as drawing highlight points to it. Within the same window, you can upload to an image hosting website.
Pros:
- Immediately share via email or instant chat
- Automatically copy an image to the clipboard
Cons:
- No screen capture
- A cluttered and out-of-date UI
6. FireShot
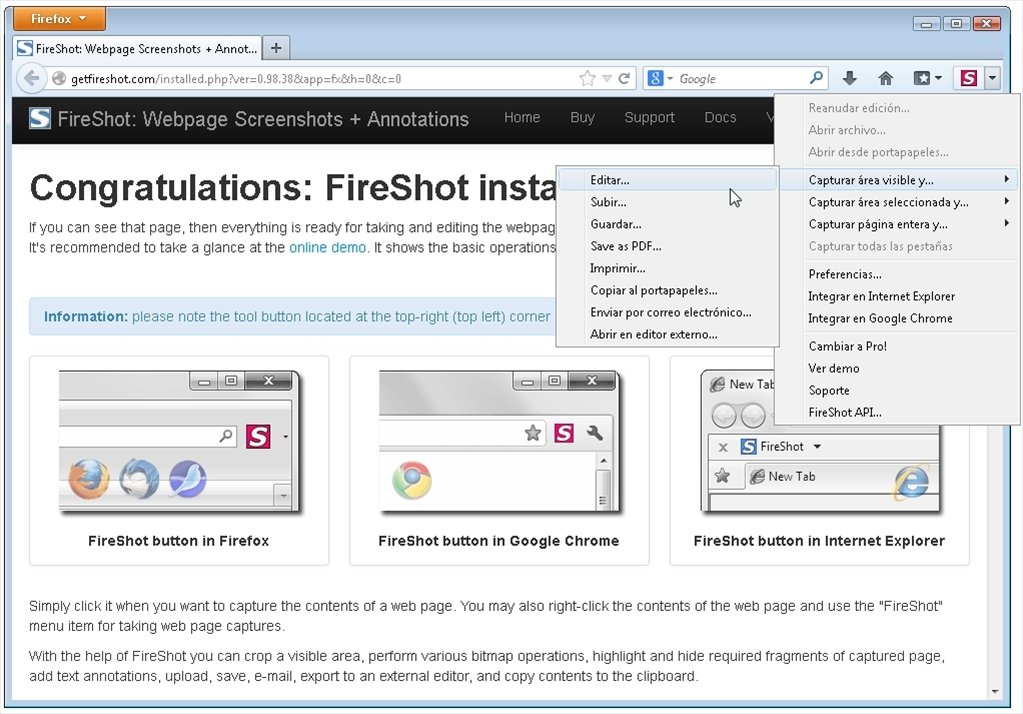
Another full-page Linux screen capture tool is FireShot. This software lets you capture page elements, scrolling zones, and floating elements in the active window. FireShot, designed for professionals, also includes extensive editing tools such as personalized watermarking, easy resizing, and optimal rendering.
You can also post straight to various sharing services, save as a PDF, or save as a JPEG, PNG, GIF, or BMP. Unfortunately, these functions are only available in FireShot Pro, so FireShot Lite (the free version) is severely constrained.
Pros:
- Professional-looking full-page capture
- Reasonable editing suite
- Simple uploading to sharing sites
Cons:
- Only useful with the premium version ($39.95 for a one-year license)
- No screen recording
Bonus Tip: The Best Tool to Recover Your Important Screenshots on Linux
EaseUS Data Recovery Wizard is highly recommended. To restore your data, it can effortlessly unformat files or perform partition recovery. All of your deleted and lost files are easily recoverable. EaseUS Data Recovery Wizard software can recover data from any logical data loss circumstance.
If you like the Linux interface, you might like the EaseUS Data Recovery Wizard. The program is compact and simple to use, and it can recover erased data in as little as three steps.
Over 5 million users worldwide rely on the application, which has over 17 years of data recovery experience. The EaseUS tool lets you create a full backup copy of your system and also allows you to backup the operating system, user settings, and applications.
Features:
- All-in-One Data Recovery Software
- A novel scanning algorithm.
- Scan Sessions Export/Import
- On Search, choose Filters.
- Premium customers receive free remote support.
Price: It starts $69.95/Monthly.
Compatibility: Windows and Mac
How to use:
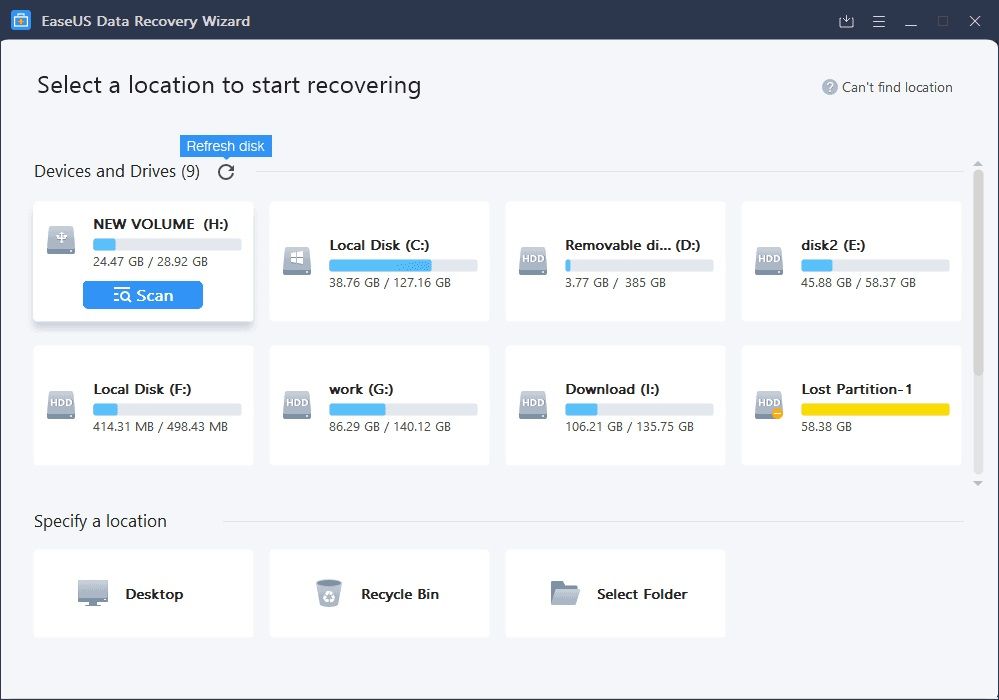
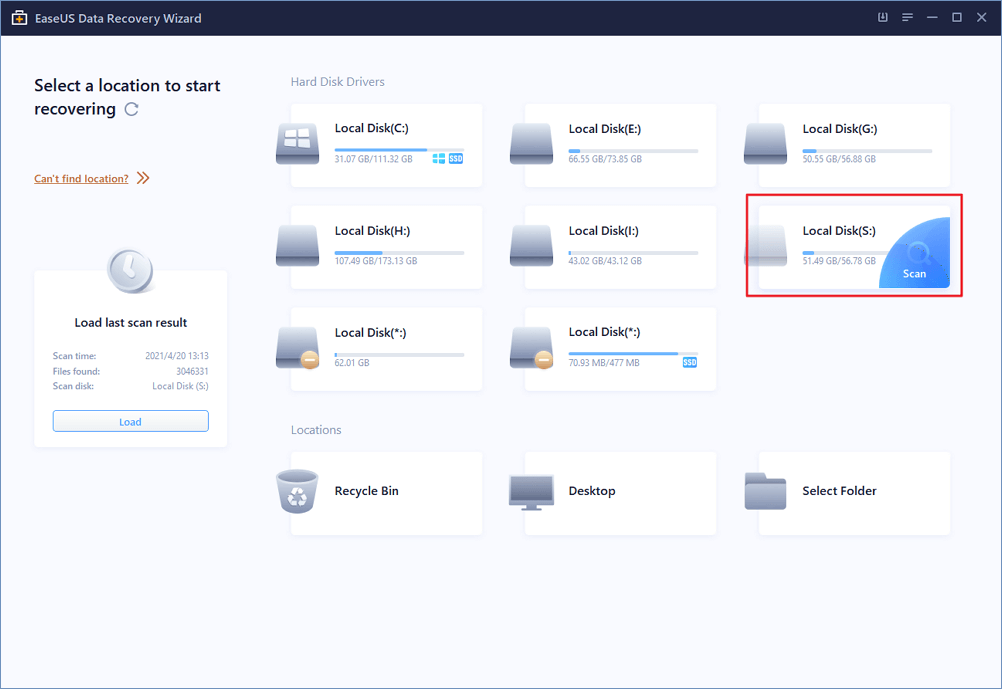
Step 1. Select a location and start scanning
Launch EaseUS Data Recovery Wizard, hover on the location where you lost data, then click "Scan".
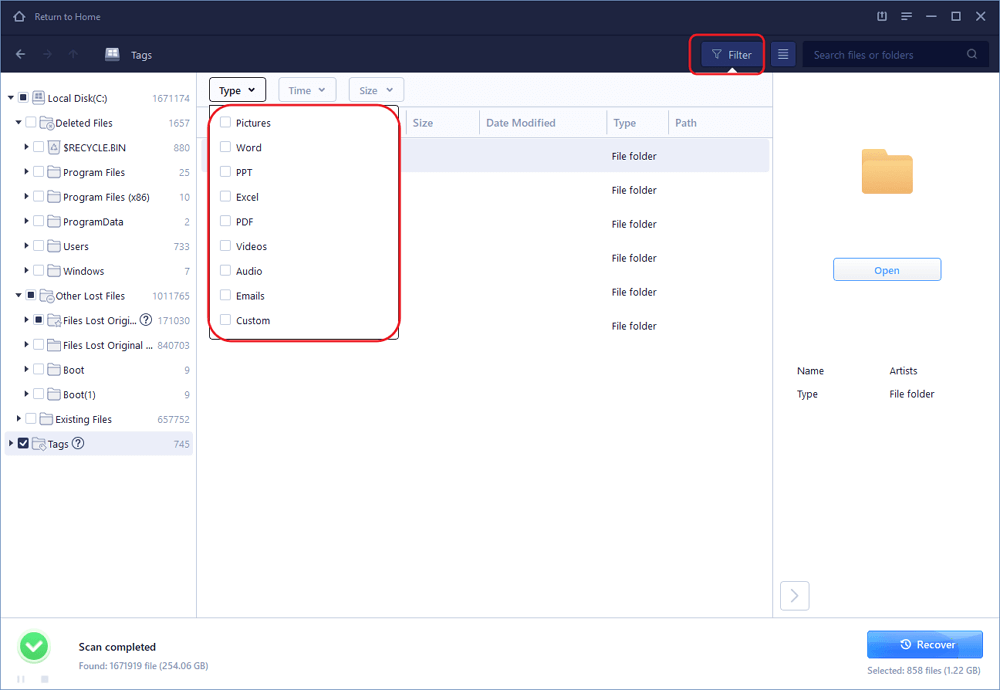
Step 2. Preview and select the files
Wait until the scanning completes. You can use Filter or search bar to find lost files.
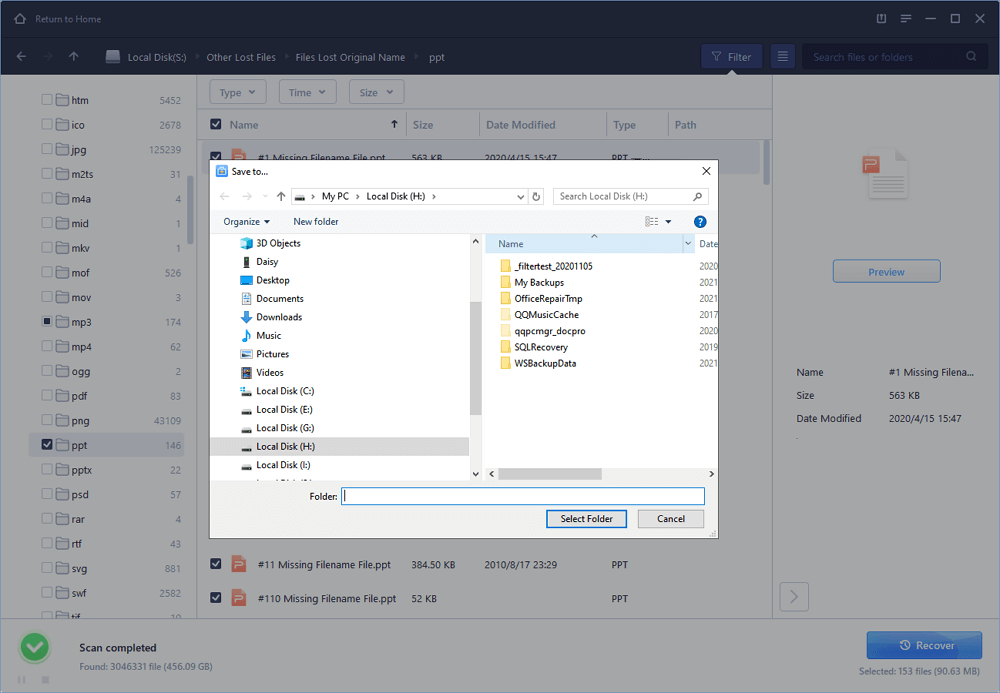
Step 3. Recover lost data
Then choose a location to save the recovered data, and click "OK". You should store the data in another place instead of the original one.
Conclusion
We have some snipping tools for Linux that include private sharing, private cloud storage, quick snapshotting and screen recording, and basic editing; it doesn't get any better than that. Which one, though, is the greatest of the best? We propose you test each one to find which works best for you.
You can select the desired snipping program based on your preferences. If you are looking for the Best Application to Recover Your Important Screenshots on Linux, EaseUS Data Recovery Wizard is the tool you should not overlook.