You will often come across occasions when you find the need to snip off parts of your videos to make them suitable for posting. You may have videos on your hand that require a bit of trimming at the beginning with inconsistent sound or at the end where there is a weird camera shake or an entire section at any point of your footage that you want to be removed for myriad reasons.
While you may have at your disposal some of the most sophisticated video editors that can help you do the cutting, it is sometimes quite convenient and easy to do it in the very player where it is playing. VLC Media Player is one of the finest choices and among the best-known programs for viewing videos. The plus thing is that with the help of its in-built cropping and trimming tools, VLC trim videos are not a distant possibility whether you are using Windows or Mac.
How to Use VLC Media Player to Trim Video on Windows
You can follow a few simple guidelines and functions of the VLC Media player to trim videos on Windows.
Here's a step-by-step process to do it.
Step 1: Firstly, download, install, and launch the VLC media software on your device. Visit Site.
Step 2: Open the video file you need to trim after checking whether it is compatible with the software. You can open the file on VLC in three different ways:
- You can either directly drag and drop the file into the VLC media player window.
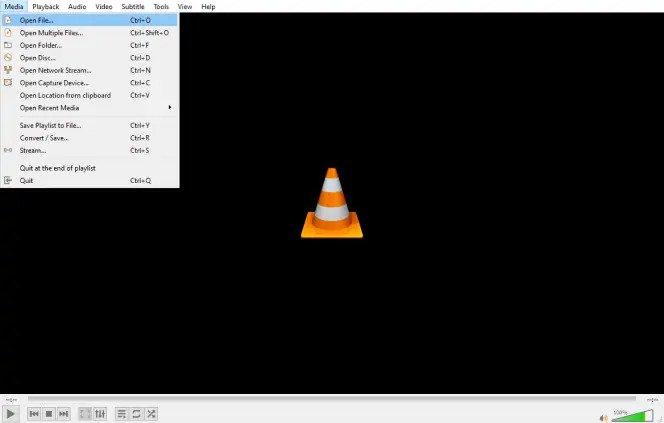
- Go to the top left of your screen and tap on Media. Then go to Open File, look for your file that needs trimming, and Open it.
- You can also press Ctrl + O on your keyboard, search the file, and Open it.
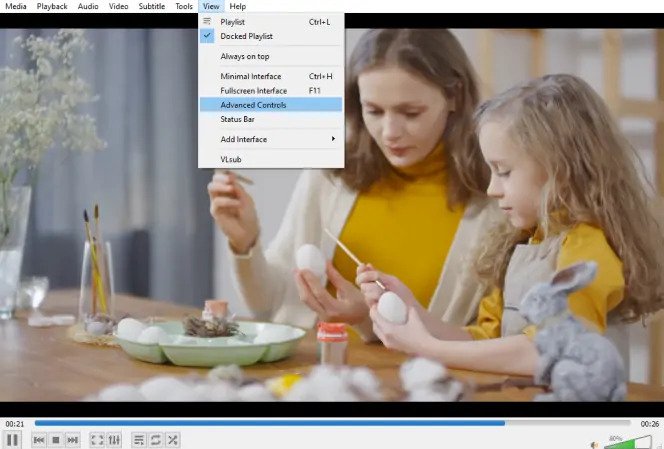
Step 3: Shift the software’s playback controls over to its editing controls to use VLC trim video features. Find the View menu located near the top of the media player and click on it. Once you get the drop-down menu, select the option Advanced Controls. You will immediately find that the editing controls and functions start featuring right below the media viewer.
Step 4: Before you start the trimming process, find the point on the video where you wish to begin trimming by using the Play button and playing the video up to that particular point. Do this by using the space bar or your mouse and the scroll bar right under the media window and finding the exact spot where you want the video to start.
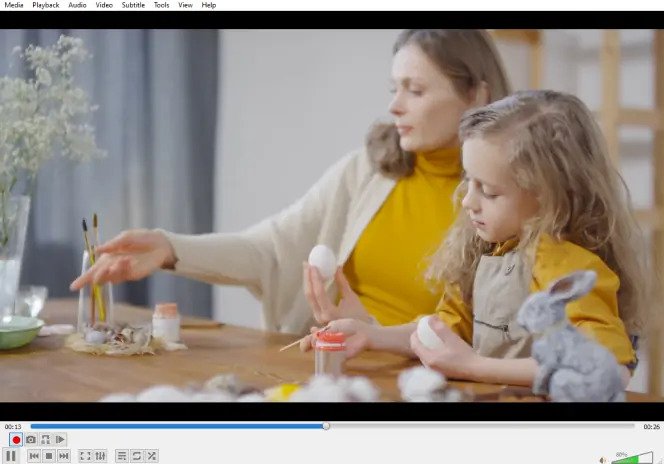
Step 5: Start the actual trimming process by clicking the Record button. You will find this circular red button inside the editing controls you opened earlier. You will know when you are recording with the button changing its color.
Alternatively, you can go to the top of the media player and click Playback; once the drop-down window appears, click on Record.
If you want to use shortcut keys, just press shift + R
Step 6: Play your video using the space bar or the play button until you enjoy the video to stop, and hit on the Pause button or the space bar once again.
This can also be done by going to your editing tools and using the Frame by Frame button (the button is indicated by a red arrow pointing downwards with a film strip), especially if you are looking for precision and accuracy in the clip.
Once you reach the endpoint of the clip, stop recording by clicking the Record button again. This can be done either from the Playback dropdown menu or simply by pressing the buttons Shift + R
Step 7: Finding the trimmed video is a little tricky as it will neither appear automatically nor will there be any indication by the media player. The VLC trim video is automatically placed in your Videos folder using Windows 10 unless you have altered the settings.
Locate the file either at C:\Users\Username\Video or in your default videos folder with a filename that starts with ‘vlc-record’ followed by the date. Once here, you can rename your file.
How to Use VLC Media Player to Trim Video on Mac
Trimming videos on VLC if you are using a Mac is equally easy. Follow this step-by-step guide for the VLC trim video for Mac.
Step 1: Download the software from the appropriate website. Ensure you click on the down arrow that you will find next to the link, and from the subsequent dropdown list, click on Mac. Install and open. Visit Site.
Step 2: You need to open the file to be trimmed. You can use the drag and drop option to get the file into your VLC playlist. The video will start playing automatically, or you can double-click it to start playing.
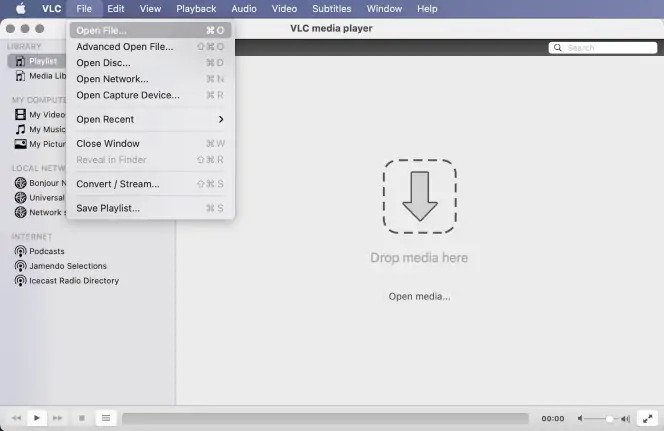
There are other ways to open the file, like going to the File dropdown menu > Open File or simply pressing Command + O
Step 3: Before you begin trimming, mark the initial point of your video where you want the process to start with the help of your mouse and scroll bar below the media window. You can also use the space bar and Play button to play the video till this point.
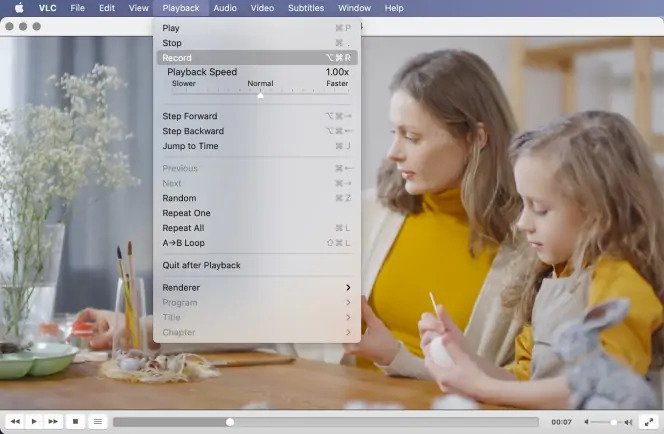
Step 4: Next, go to the top of your screen and click Playback > Record when you get the dropdown menu. You can also simply press the keys Option + Command + R. on your keyboard, then press the Play button to start playing the video until you want to stop and hit pause. Stop recording by repeating the Playback step.
Step 5: Find your trimmed video by looking at files that start with vlc-record in your Movies folder as long as you have not altered the settings.
Bonus: How to Edit Video with Video Editor
Alternately, you can simply go for an easy and intelligent video editing technique by using one of the fastest video editing software, EaseUS Video Editor. Now share moments from your most cherished experiences with the help of this tool and its numerous features. Get some of the best video editing results with a host of visual and transition effects that make your video stand out as well as other professional tools that help you cut, split, trim, rotate, mix, merge, and much more. The tool supports all files and lets you export the edited movie for sharing/playing in any format.
Price: It starts $17.97/Monthly.
Compatibility: Windows 7/8/10/11
Step by step guide:
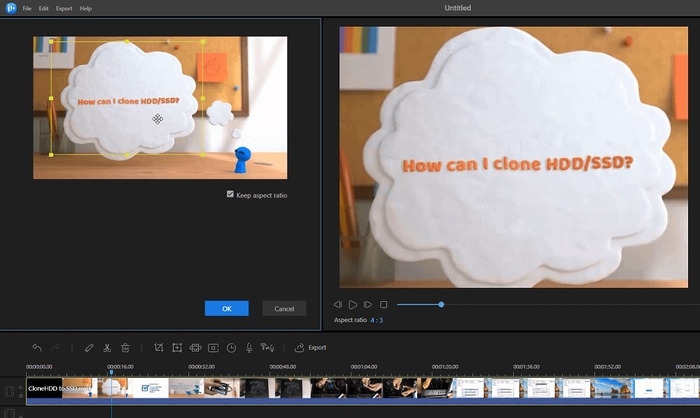
Step 1: Get the software, open it, and import the source file by either using drag and drop or clicking on Import. Add the video to the timeline by right-clicking the source.
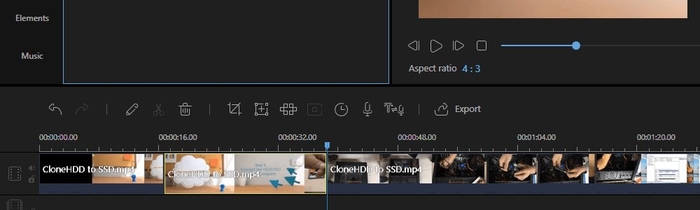
Step 2: On the timeline, select the playhead and bring it to the point where you want the video to start. Then split and drag to the mouse's position where you want to cut, and split again to confirm the clip.
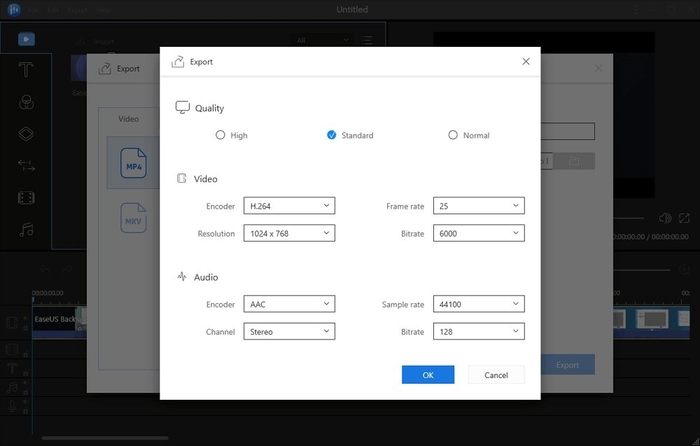
Step 3: Once ready, export the video or upload it where you want after configuring the quality and resolution of the video
Conclusion
The popular media player VLC comes with a plethora of menus and options and can act as a convenient tool if you wish to use VLC trim videos for your video editing requirements. However, it is feasible only if you are adequately familiar with these features and functions. You can count the guidelines discussed above to trim your videos and make them post-worthy, or simply use the online video editing tool EaseUS Video Editor for all your trimming, editing, splitting, mixing, and cutting needs with just a few clicks.
Price: It starts $17.97/Monthly.
Compatibility: Windows 7/8/10/11