Sharing pictures and videos has become more commonplace and one of the ways we communicate every day. While scanning exciting photos or videos online, we may want to share them with friends and family. But not all of them can be saved to your devices directly. It is time when we need to take a screenshot or record screens to achieve that. This may explain why most product producers build screenshots and screen recorders in their devices.
However, the fact is that different systems have different methods to take screenshots or record screens. Some versions of phones or computers aren't equipped with these two features. It seems to be troublesome to remember and try every method in detail.
The good news is that the software EaseUS RecExperts combines these two functions into one, which can be used to take screenshots and record screens. This passage will introduce a powerful tool, EaseUS RecExperts, to you guys and demonstrate specific steps to take a screenshot and record screens on a Windows computer.
Table of Contents:
2 in 1 Awesome Software - EaseUS RecExperts
Use EaseUS RecExperts to Take Screenshot on Windows
Use EaseUS RecExperts to Record Screen on Windows
2 in 1 Awesome Software - EaseUS RecExperts
EaseUS RecExperts shows its main functions clearly on the page with a simple and user-friendly interface. You can operate according to your needs to capture or record full screen or only part of the screen. In addition, you can extract only audio from videos and capture your face via camera while recording screens.

Besides these above functions, EaseUS RecExperts allows recording sound while recording. Through the "Setting" button, you can adjust your videos or photos' quality, formats, and other features.
As for videos, it supports MOV, MP4, and other formats, and it supports PNG, GIF formats for pictures.
Can't wait to use it? Download it to your computer and read the following steps.
Price: It starts $19.95/Monthly.
Compatibility: Windows and Mac
Use EaseUS RecExperts to Take Screenshot on Windows
You can choose to take a full screen or only part of the screen. Here are the specific steps:
Step 1: Launch EaseUS RecExperts software on your computer.
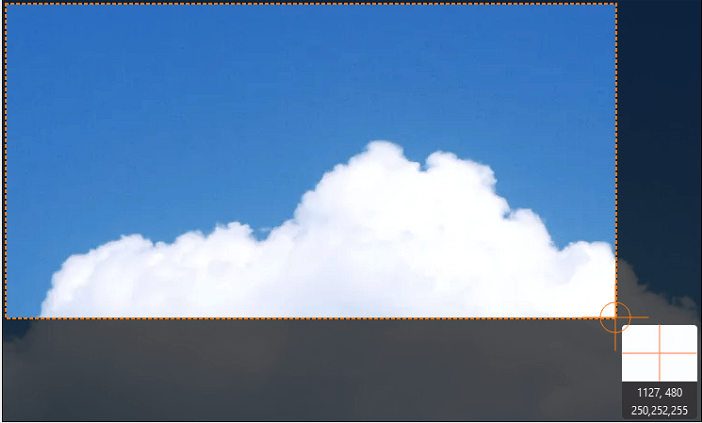
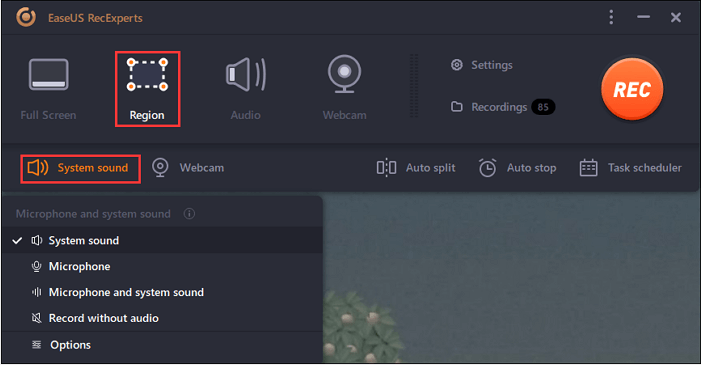
Step 2: Click the "Full Screen" or the "Region" button according to your need. If you are going to capture part of the screen, you need to move the mouse to select the area you want to capture, and the selected region will get bright and stay within the dotted line.
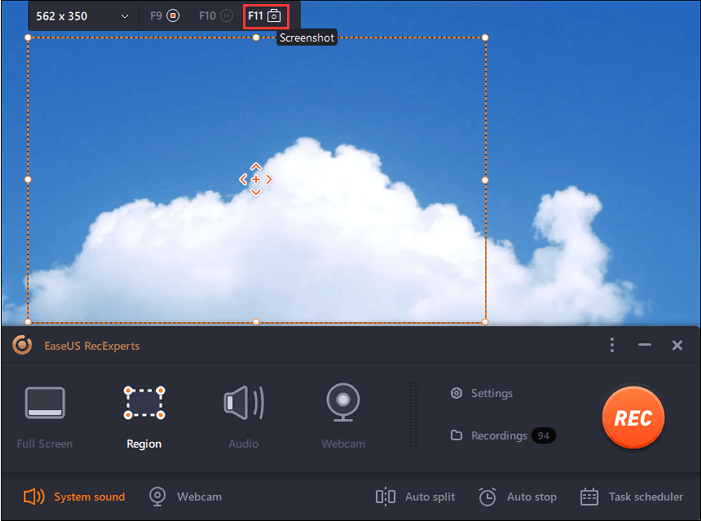
Step 3: Tap the camera icon on the area's top-left corner to take a screenshot. Or, you can press the "F11" key on the keyboard.
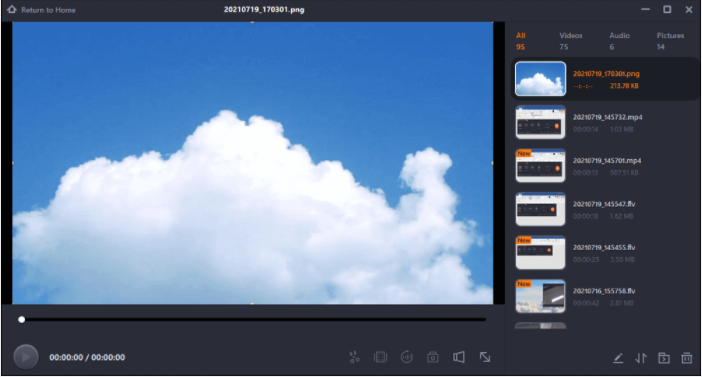
Step 4: Click the "Recordings" button to find the screenshots. Here you can choose to rename or edit the screenshots.
Use EaseUS RecExperts to Record Screen on Windows
Step 1. Run EaseUS RecExperts on your Windows. If you want to capture everything on your screen, click the "Full Screen" option. This is a perfect choice when playing the streaming video in full-screen mode.

Step 2. Alternatively, you can opt for "Region" to record the specific area if you want to play the streaming video in a window.
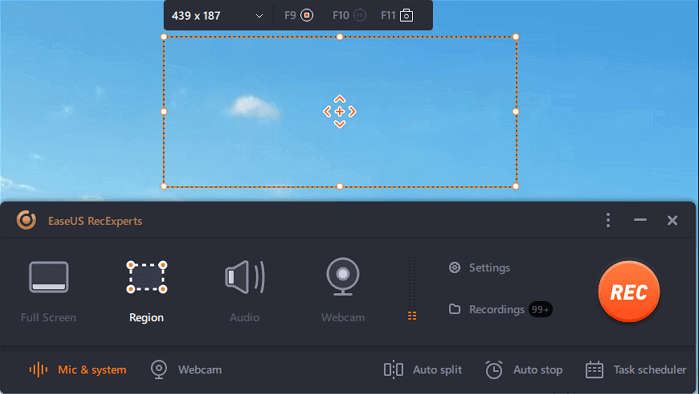
Step 3. Now, you can hit the "System sound" button to choose the sound source you prefer and adjust the volume. Upon that, click "REC" to start recording.
Step 4. When the recording is ongoing, you'll see a toolbar floating on the screen, which you can avail yourself of to pause or stop the recording process.
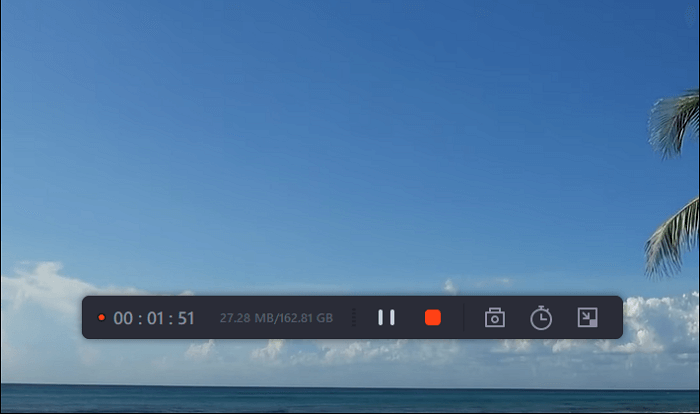
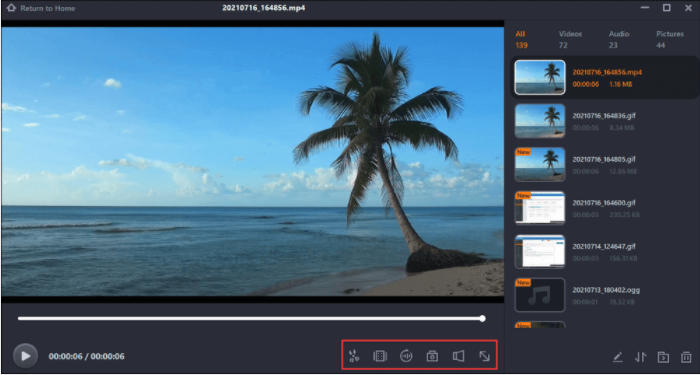
Step 5. Once you are done with the recording, click on the red stop button and then your captured video will be automatically saved on your device. You are also allowed to view the recording and utilize tools for trimming it, extracting audio from it, or adding an opening and ending section as the built-in media player appears.
Conclusion
This post has shown the steps to take a screenshot and record screens on Windows computer. I'm sure you've got a good grasp of this part. Using EaseUS RecExperts makes it easier to capture photos and videos. These two functions in one software are such an easy-to-use tool that can save you a lot of time. You can choose to capture the whole or only part of the screen.
Price: It starts $19.95/Monthly.
Compatibility: Windows and Mac
You can also read: 3 Simple Ways to Record Screen with Sound on Mac
