When in the dominant digital world, streaming videos have become a compulsive requirement of everyday life, you must be in search of a means to capture these videos for later use. From taking backups of any video tutorials to getting inspiration for creating your videos, whatever the reason, recording streaming videos is the best solution to make the most of any of your favorite videos.
When you record a video with a high-end streaming video recorder, you can use it in various ways in your personal or professional life. So, in this article, you will get the most advanced and valuable four different streaming video recorders for Windows/Mac/Android/iPhone.
Streaming Video Recorder for Windows
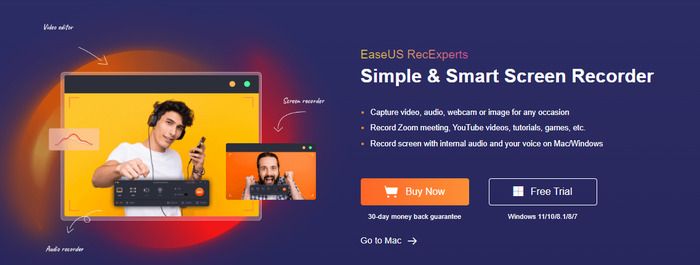
EaseUS RecExperts is the most user-friendly streaming video recorder for Windows & Mac OS. This tool records the entire video screen with a particular screen recording option, from capturing audio-video content to recording your voice. From schedule-recording, auto-stop, and auto-split features to screenshot & edit recording options, this software gives you ultimate flexibility in your customizable video recording experience on your Mac computer or PC.
Price: It starts $19.95/Monthly.
Compatibility: Windows and Mac
Step-by-step Guide:
Step 1. Run EaseUS RecExperts on your Windows. If you want to capture everything on your screen, click the "Full Screen" option. This is a perfect choice when playing the streaming video in full-screen mode.
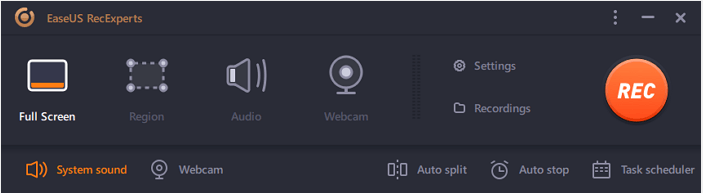
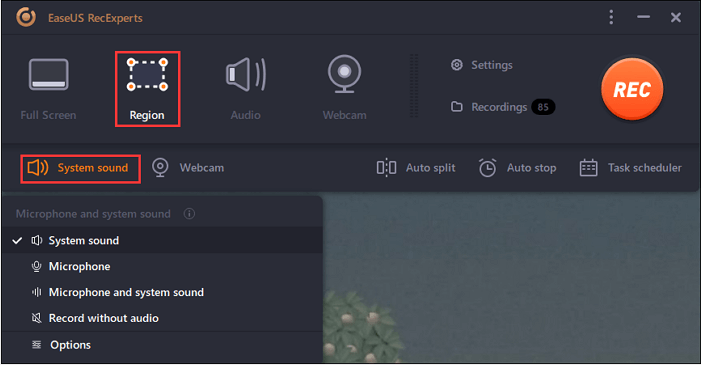
Step 2. Alternatively, you can opt for "Region" to record the specific area if you want to play the streaming video in a window.

Step 3. Now, you can hit the "System sound" button to choose the sound source you prefer and adjust the volume. Upon that, click "REC" to start recording.
Step 4. When the recording is ongoing, you'll see a toolbar floating on the screen, which you can avail yourself of to pause or stop the recording process.
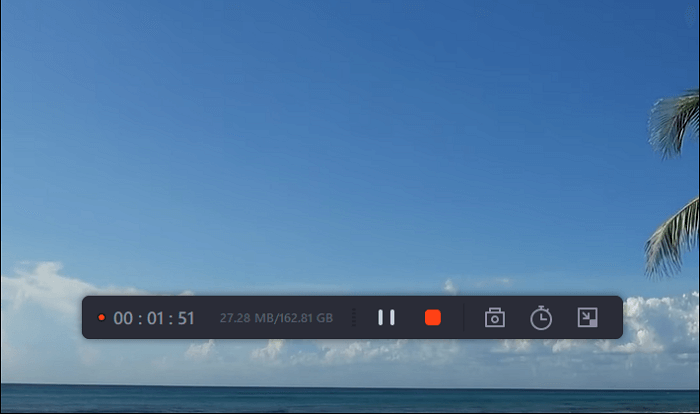
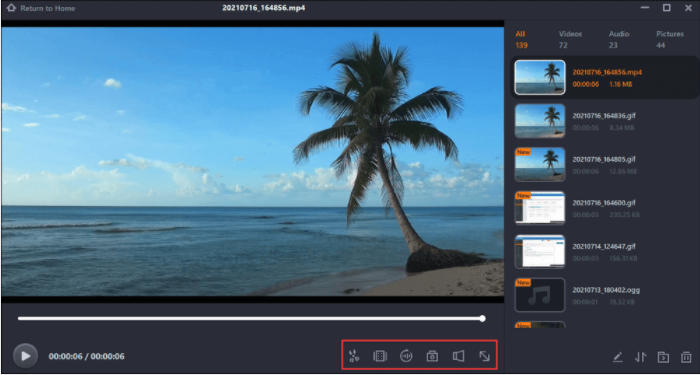
Step 5. Once you are done with the recording, click on the red stop button and then your captured video will be automatically saved on your device. You are also allowed to view the recording and utilize tools for trimming it, extracting audio from it, or adding an opening and ending section as the built-in media player appears.
Streaming Video Recorder for Mac
QuickTime Player is one of the best built-in applications on Mac OS that allows you to record any videos on your Mac computer. This streaming video recorder has an extensive option of video editing tools with cutting, cropping, pasting, rotating, merging separate video tracks, etc. This tool also allows you to save & export your favorite videos directly from the web to an HDD. So, with this in-built application, video recording on Mac is just a few clicks away.
Step-by-step Guide:
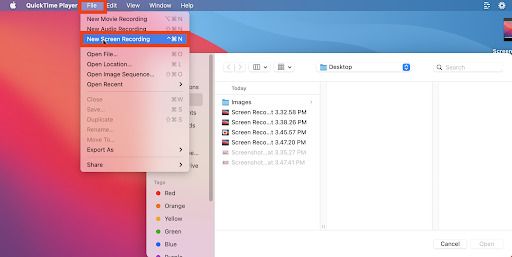
Step 1: Go to the QuickTime Player via the application folder. Select "File" & go to the menu bar to select "New Screen Recording." You would see the "Onscreen Controls" described above or the "Screen Recording Window" given below.
Step 2: Before initiating your recording process, you need to tap on the arrow option next to the record button to change the setting option of your recording.
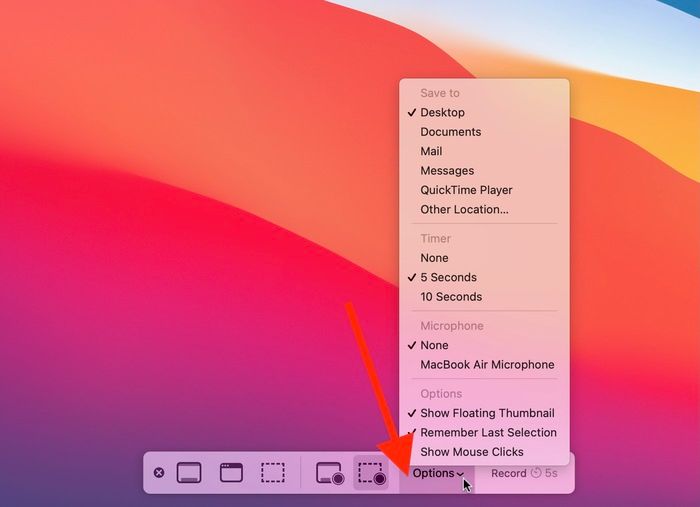
Step 3: You need to select a microphone to record audio or your voice while screen recording. You can make volume slide bar adjustments to monitor audio recording. You can also use a microphone or lower the volume if you would get any audio feedback. You must also select the "Show Mouse Clicks in Recording" option when a black circle appears around the pointer.
Step 4: To start the screen recording, you need to click on the red button. Next, click on any part of your screen, or click on your selected area for partial recording to begin the recording process.

Step 5: You can stop your recordings anytime while clicking on the "Stop" option on the menu bar. Otherwise, you can press "Command-Control-Esc" to Escape.
Step 6: Once you stop the recording, the QuickTime Player will instantly & automatically open up the recording for playing, editing, or sharing.
Streaming Video Recorder for Android
AZ Recorder is a simple but intelligent streaming video recorder perfect for Android. It allows you to record anything running on your screen, from live videos, gameplay, and movies to high-quality video calling. Adding an internal video recording option with facecam footage makes your screen recording experience flexible and customizable. With this tool, you can record unlimited videos with drawing feature support. This recorder gives you a watermarking-free recording option.

Step-by-step Guide:
Step 1: Install the app on your device via your convenient app drawer. Go to the "Four buttons" sign that appears on the screen. Next, select the "Settings" options to initiate your video recording process with resolution, frame rate & bit rate selection options. Once you are done with your selection process, get back to the "Home screen" by clicking on the "Back" button.
Step 2: Locate the screen you want to record after opening the app. Click on the "Red" colored recording button to start the process. During a recording session, you can continue your regular activity on your android device & pause or stop the recording whenever you want.
Step 3: Once the recording gets complete, you need to hit on the "Image" icon to view the recording & go to the "Magic Wand" icon to edit the video with trimming, cutting, cropping, replacing audio, or converting to GIF options.
Streaming Video Recorder for iPhone
With the built-in recording option, you can easily record on your iPhone. However, you don't have to install or depend on any separate software to record the screen on your iPhone. So, having a built-in recording option has always made things easy, simple, and hassle-free. Since it is a built-in option, there is no chance anything goes wrong while recording videos on iPhone.
Step-by-step Guide:
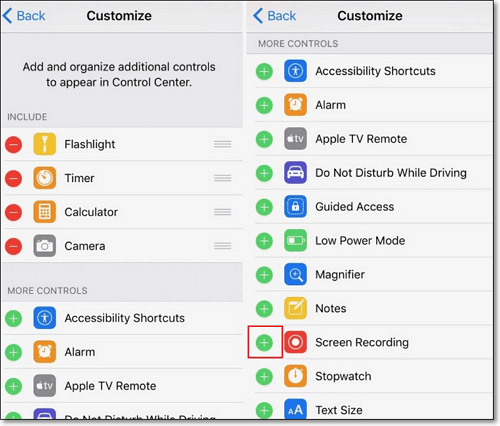
Step 1: In your iOS 14 or later version, go to the "Settings" option & move to the "Control Center" > "Add button" given next to the "Screen Recording" option.
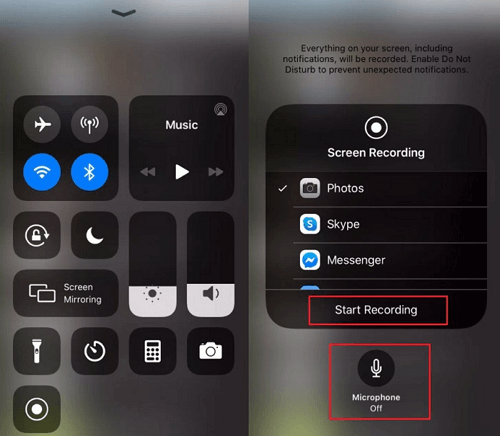
Step 2: Open the "Control Center" option on your device. Click & hold the "Gray color recording" button & hit the "Microphone" option. Hit "Start Recording" & wait for three seconds.
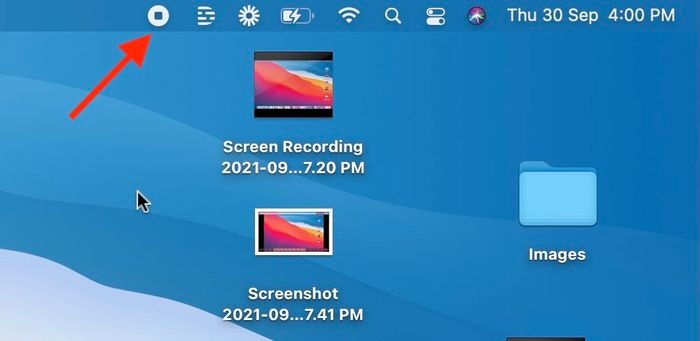
Step 3: Go to the "Control Center" to stop the recording by clicking the "Red" button. Or you can click on the red status bar at the top of the screen & hit the "Stop" button. Then, you can choose the screen recording while going to the "Photos" app.
Conclusion
While selecting any streaming video recorder, you first need to consider the tool's compatibility with your device. Since these recorders work differently for all the devices, you must select them accordingly. However, since screen recording quality depends on the multiple customizable editing options, in that case, EaseUs RecExperts would live up to your expectations. It would also allow you to access its entire video recording facility on both the Windows & Mac OS.
Price: It starts $19.95/Monthly.
Compatibility: Windows and Mac