Whether you are a working professional who loves spending hours on your PC or a creative person who needs technological advancements, sometimes taking screenshots becomes essential. It can be done in situations when vital information shows up on the screen, and you do not have a better option than to take a screenshot of the same as it assists in capturing the exact information.
You must know how to take a screenshot on mobiles, but do you want to know how to screenshot in laptop? We provide various ways to take screenshots on PC and Mac using different methods.
5 Simple Ways to Screenshot in Laptop
Method 1: Use EaseUS RecExperts to Screenshot on Windows and Mac Laptop

EaseUS RecExperts is an easy-to-handle software that you can utilize if you have no clue how to screenshot in laptop. Various tools help capture a part of the screen or full screen or use a webcam. You can use the screenshots from practical formats like PNG or GIF in excellent quality.
You can efficiently utilize this software to capture screenshots in comfortable formats and faster speed. For example, you can use its mesmerizing user interface to capture multiple screens.
Price: It starts $19.95/Monthly.
Compatibility: Windows and Mac
![]() Pros
Pros
- It has a snipping tool that can be used as a built-in feature
- You can capture either a part of the screen or the whole screen
- There is an auto-stop function along with an auto-split facility
![]() Cons
Cons
- Some advanced features need to be paid
Step-By-Step Guide
Step 1: Launch EaseUS RecExperts software on your computer.
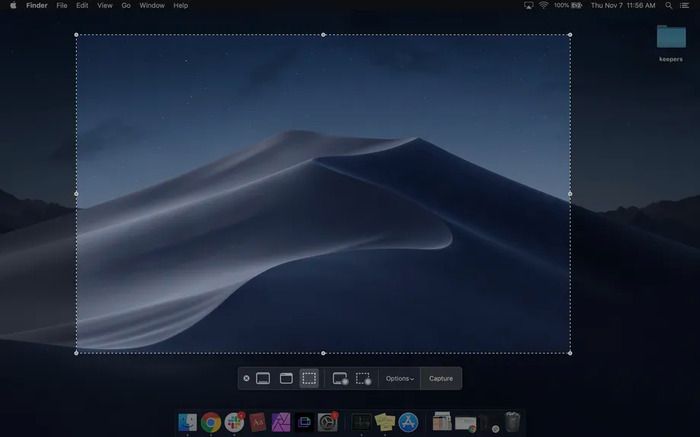
Step 2: Click the "Full Screen" or the "Region" button according to your need. If you are going to capture part of the screen, you need to move the mouse to select the area you want to capture, and the selected region will get bright and stay within the dotted line.
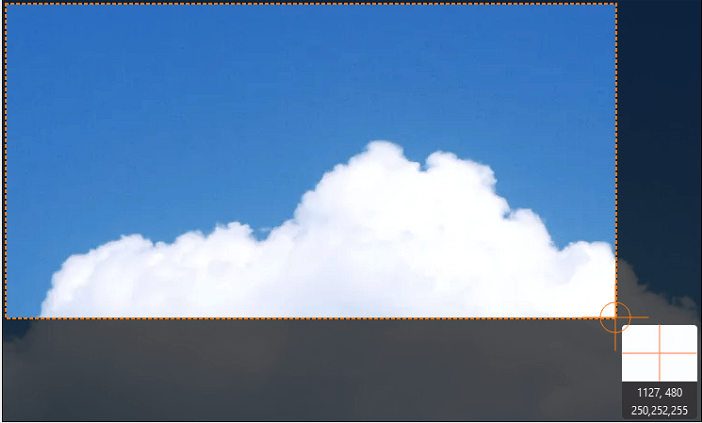
Step 3: Tap the camera icon on the area's top-left corner to take a screenshot. Or, you can press the "F11" key on the keyboard.
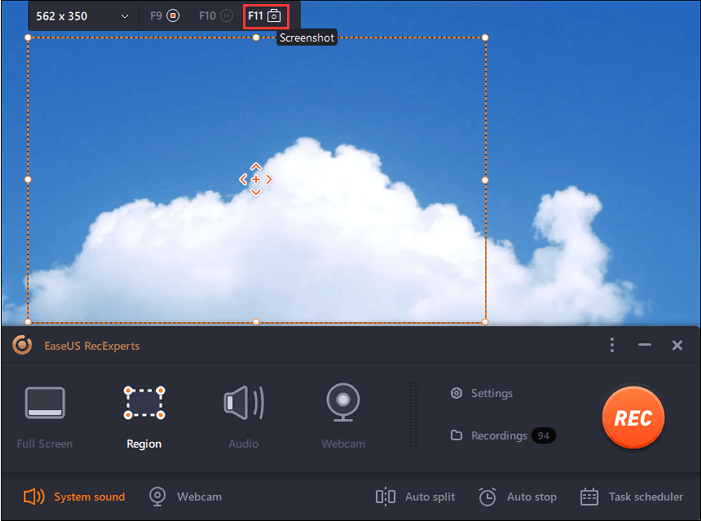
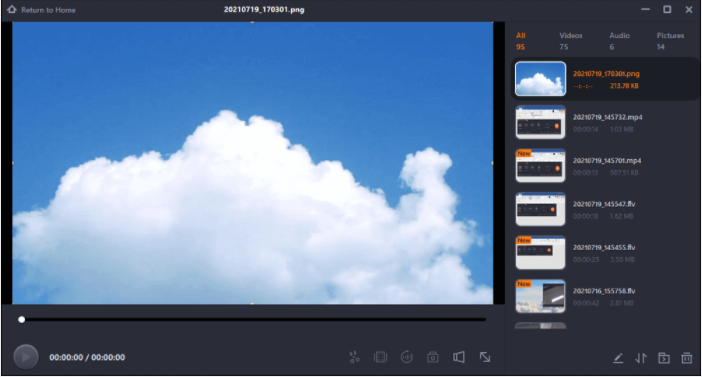
Step 4: Click the "Recordings" button to find the screenshots. Here you can choose to rename or edit the screenshots.
Method 2: Use Snipping Tool to Screenshot on Windows Laptop
The snipping tool can be an excellent and flexible tool that works efficiently to provide you with suitable screenshots of your PC screen. You can save these screenshots to a desirable location and use them wherever and whenever required.
It is an apt tool for those who use Windows as it helps them save screenshots in any form and keeps them without the extra step of pasting them. However, it is not available for Mac users.
![]() Pros
Pros
- It is pretty easy to use
- It gives the option of editing
- It assists in taking screenshots in various forms
![]() Cons
Cons
- It is not available on Mac
Step-By-Step Guide
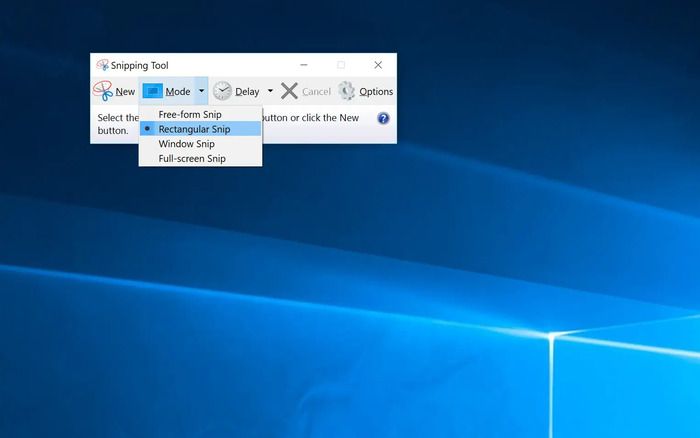
Step 1: From the search bar, locate the Snipping tool and open it.
Step 2: Now, from the drop-down, make a selection for the snip type you require from Rectangle, Windows, Full Screen, or Free form.
Step 3: Once you decide on the screenshot type, click on the New option. Or you can also press Win + Shift + S. As the PC goes dim, make use of the cursor and do your job.
Step 4: Then edit, annotate, and save the screenshot.
Step 5: Now save it in the location of your choice.
Method 3: Use Alt+PrtScn to Screenshot on Windows Laptop
It can be the most convenient way if you are thinking about how to screenshot in laptop. For example, using the PrtScn or Print Screen button can help capture the whole screen with a simple tap from your keypad. It is an easy method if you use Windows and require taking screenshots several times a day. You can use it to share information with people in external business or colleagues.
![]() Pros
Pros
- It is very straightforward for beginners
- It helps in capturing the entire screen at once
![]() Cons
Cons
- If you want to make a selection of a particular part of the screen, it does not allow you to do the same.
Step-By-Step Guide
Step 1: Open the required window or screen you need to get the screenshot.
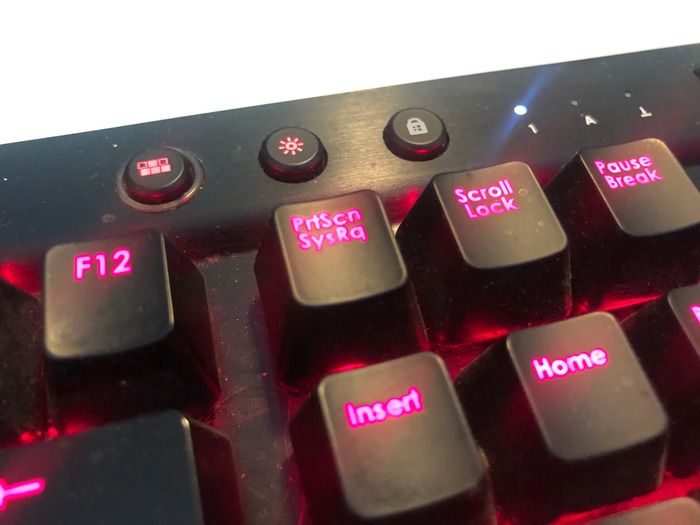
Step 2: Now press Alt + PrtScn.
Step 3: Windows 10 will allow you to copy the information to the clipboard and paste it into the required location, which can be another program or anything else.
Step 4: For Windows 11, the screenshot of the screen is copied and saved right away into the folder for screenshots.
Method 4: Use Command + Shift + 3 to Screenshot on Mac Laptop
If you are looking how to screenshot a laptop, especially for Mac, this shortcut can help you quickly. With this, you can permanently save your favorite picture or utilize it to create records for your bills. Whatever the case, it enables you to create proofs that can be shared conveniently anywhere as and when required.
It helps in saving screenshots of your bank transactions or other essential transactions and documents in a single step. However, it may dishearten you if you want to capture a particular portion, not the entire screen.
![]() Pros
Pros
- It lets you capture the entire Mac screen
- It takes clear screenshots of your documents
![]() Cons
Cons
- It takes screenshots of the entire screen and does not focus on a particular portion of the screen
Step-By-Step Guide
Step 1: Go ahead by pressing Command + Shift + 3 from your Mac keyboard.
Step 2: Whatever are visible on-screen gets captured. You can see the saved screenshot from the toolbar in the top portion.
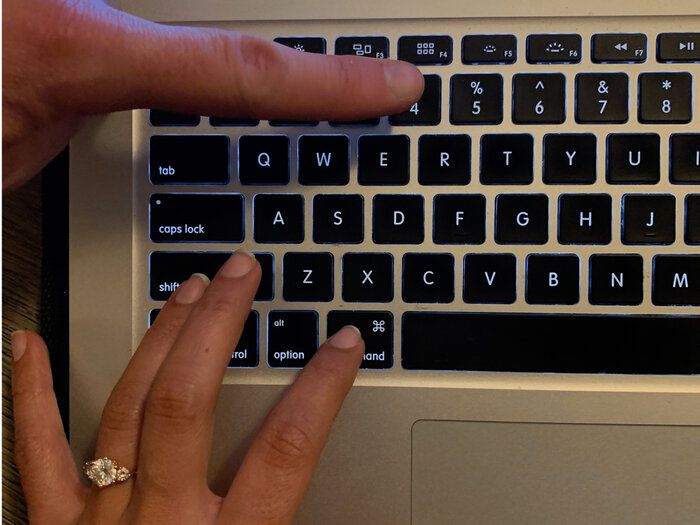
Method 5: Use Command + Shift + 4 to Screenshot on Mac Laptop
Using your Mac for taking screenshots is a great idea to create proof of your monthly expenditure to monitor them. With this shortcut now, you can do this pretty quickly and easily. It is seamless to use even if you are a beginner, as it is just pressing Command + ↑Shift + 4, and you are good to go.
Unlike other shortcuts, Command + Shift + 4 allows you to take a screenshot of a required window and not focus on the screen as a whole. However, Windows users cannot use it.
![]() Pros
Pros
- It is effortless to use
- It assists you in capturing a screenshot of a particular window
![]() Cons
Cons
- It is unavailable for Windows
- It does not allow the capture of the entire screen
Step-By-Step Guide
Step 1: Start by pressing the keys altogether: Command + Shift + 4 from the keyboard.
Step 2: Go ahead by pressing the spacebar as soon as the target icon appears, and it will transform the target icon into a camera icon.

Step 3: Take a screenshot by dragging the camera icon on the window of your choice. Alternatively, you can use your dock for the task too.

Step 4: Your screenshot saves automatically on the desktop.
Final Words
We suggest two methods for using Windows: the Snipping Tool and the Print screen option to take screenshots. Both come with their limitations but work well for beginners and professionals. If you use Mac, we suggest two ways in the form of shortcuts like Command+Shift+3 and Command + Shift + 4 that assists with taking screenshots quickly.
However, if you are looking for an answer to how to screenshot in laptop that works on both Windows and Mac OS, you can use EaseUs RecExperts software. In addition, it assists with various additional tools that make the work seamless for both beginners and professionals.
Price: It starts $19.95/Monthly.
Compatibility: Windows and Mac