If it's your first time using an iOS device, you might have a hard time recording screens or taking screenshots on iPhone and MAC.
Like Android, iOS devices also have keyboard shortcuts to help you in this regard. However, there can be instances where you would need a third-party screenshot or screen recording tool to do the job for you.
Be it for work, personal use, game streaming, or any other reason, it's best to know the basics of capturing screenshots and screens on a PC without banging your head in front of the screen for hours.
With that said, let us walk you through this step-by-step guide to taking screenshots and recording screens on iPhone and MAC.
How to Take Screenshots on iPhone
Step1: Enter the password to unlock your phone. Go to the home screen, gently press the off button with the volume up button on the side, and release.

Step 2: The second option is to press the home screen button slightly with the sleep/wake button on the side.

Step 3: Your device will automatically capture the screenshot and save it in your phone's gallery in the screenshots folder.
Step 4: Lastly, check if the screenshot has been saved to the screenshot album on your phone's gallery after turning the settings > photos.
How to Record Screen on iPhone
To record the screen on an iPhone, follow the steps mentioned below.
Step 1: Unlock your iPhone and go to settings.

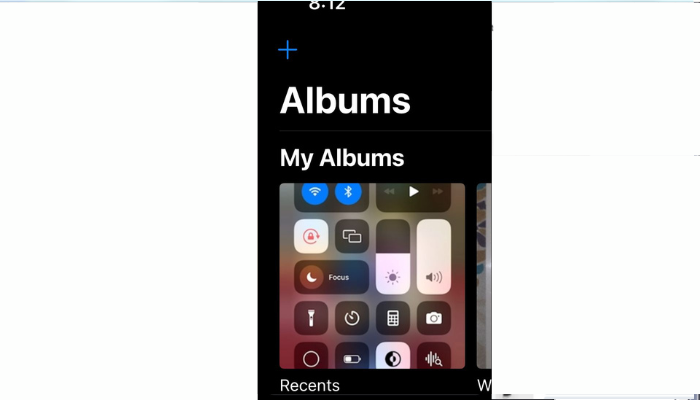
Step 2: Select the ''control center'' and then click on the ''+'' icon present next to the option ''screen recording.''

Step 3: In the control center, choose the ''screen recording icon,'' and the recording will start on the countdown of 3.
![]()
Step 4: Once you're done recording the screen, open the control center and tap on the ''round red button'' at the top of the screen to stop the screen recording.
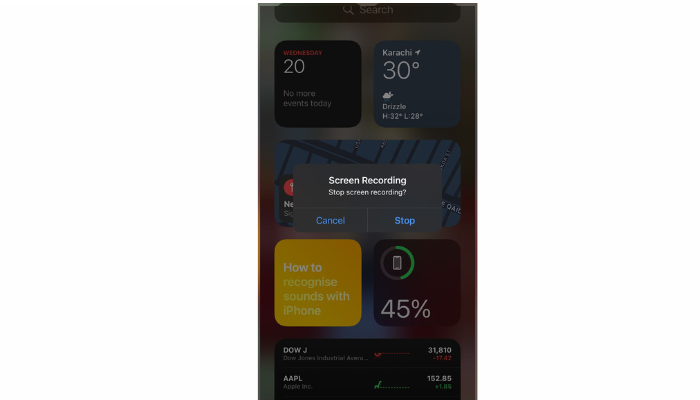
Step 5: This will automatically save the recording to your gallery; you can check it there too.
How to Take Screenshot & Record Screen on Mac
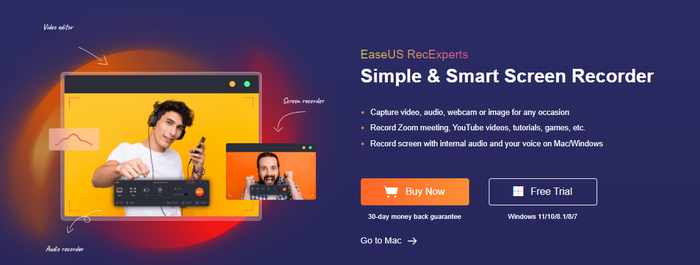
If you're looking for a smart screen recorder that makes capturing screen recording a breeze, Ease US Rec Experts is an ideal option.
Whether you've got to record cool DIY tutorials for your YouTube video or live stream games online, this all-in-one tool makes screen capturing and recording a piece of cake.
Whether it's Mac or Windows, Ease US Rec Experts is compatible with nearly all versions of Windows and comes with a full-fledged set of features.
Whether you have to record a small portion of your screen or record audio for hours, it works great in capturing, recording, and saving all the media safely to your phone gallery.
Want to hear more? EaseUS also leaves no room to entertain users by capturing videos and images in GIF form.
With flexible output settings, advanced scheduling options, and an auto-stop & auto-split feature, the tool is handy for recording screens for meetings, streaming, tutorials, and much more.
Price: It starts $19.95/Monthly.
Compatibility: Windows and Mac
Step-by-step Guide to Take Screenshots
Step 1: Launch EaseUS RecExperts software on your computer.
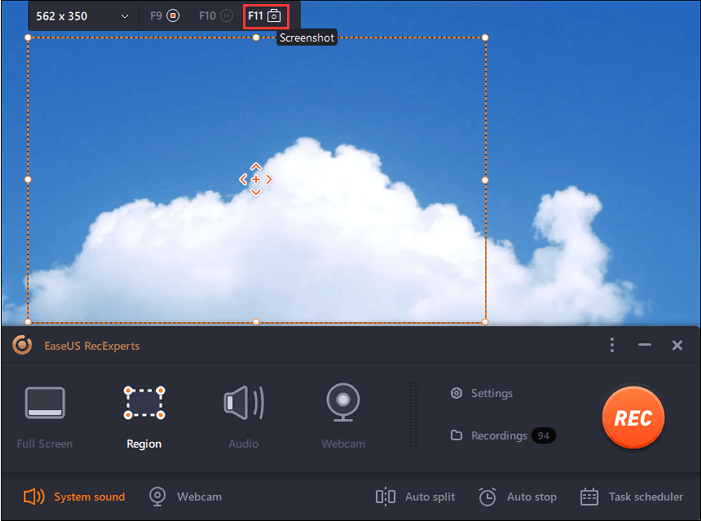
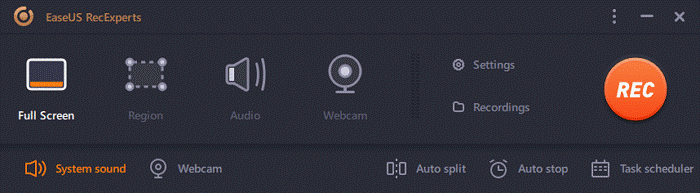
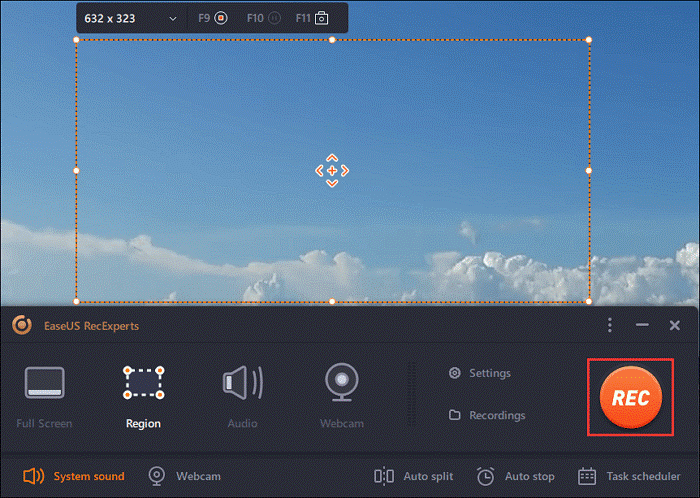
Step 2: Click the "Full Screen" or the "Region" button according to your need. If you are going to capture part of the screen, you need to move the mouse to select the area you want to capture, and the selected region will get bright and stay within the dotted line.

Step 3: Tap the camera icon on the area's top-left corner to take a screenshot. Or, you can press the "F11" key on the keyboard.
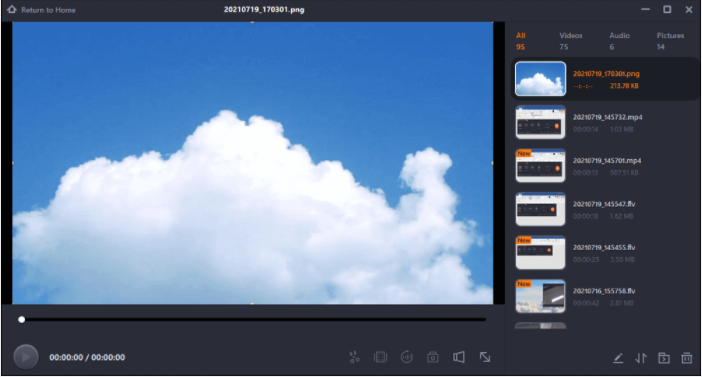
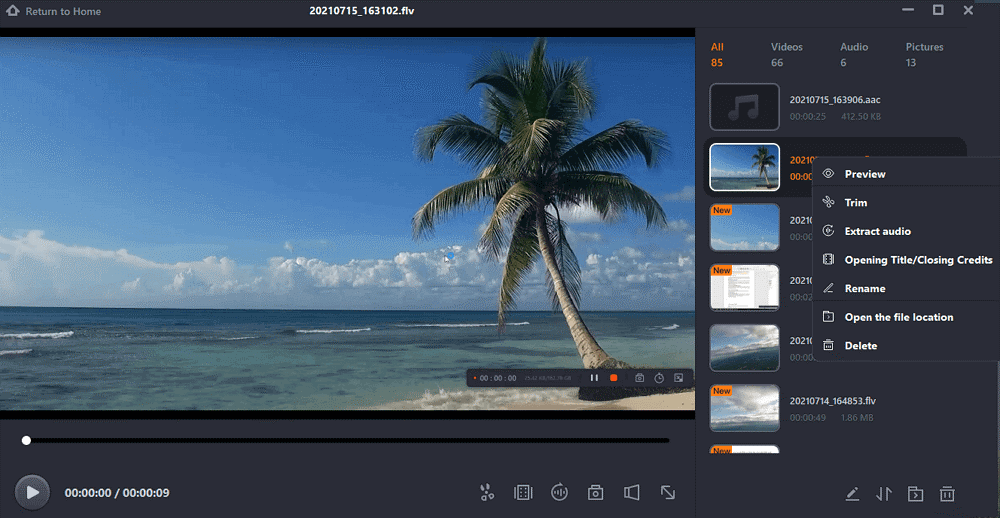
Step 4: Click the "Recordings" button to find the screenshots. Here you can choose to rename or edit the screenshots.
Step-by-step Guide to Record Screen
Step 1: Launch the EaseUS RecExperts software on your computer.
Step 2: You can either click the "Full Screen" option (for recording the whole screen) or select "Region" (for customizing the recording area). Upon that, choose the recording area with your mouse. If you want to record video with audio, you need to click the "Sound" icon on the bottom-left corner.
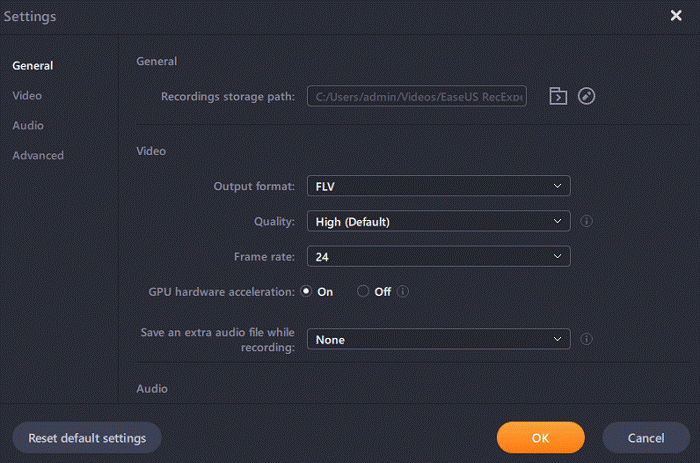
Step 3: Click the "Settings" button to apply more options and select the corresponding specification based on your needs. When finished, click "OK".
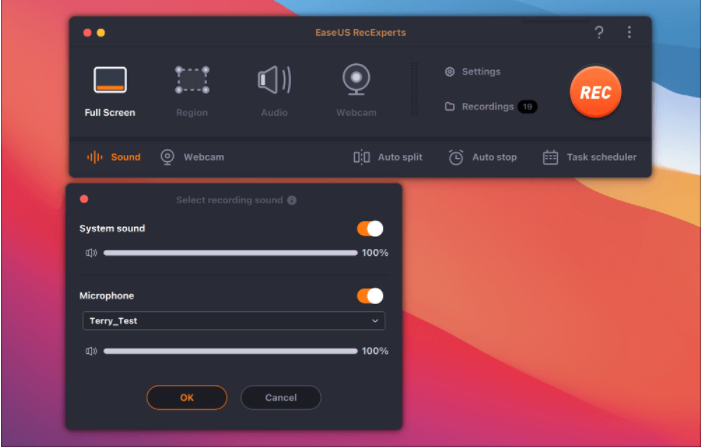
Step 4: Hit the "Sound" button on the bottom-left corner and open the system or microphone sound if you prefer to record audio and screen simultaneously. With that, select "OK" to ensure the audio options.
Step 5: Click the "REC" button to start recording. And click the red button on the timing bar to stop recording when it finishes.
You can find the recording videos in the "Recordings" which is located in the main interface. Select the video and edit it as you want.
Wrapping Up
Screen recording and capturing were never as easy as it is today. From in-built apps to keyboard shortcuts, there are multiple ways you can record your screen and save it to your device.
If you don't trust these traditional methods or want more handy screen capturing features, Easeus RecExperts is the perfect option for you to try and enjoy without the hustle-bustle.
Out of all, the best part about this handy screen recording option is that it offers a 7-day free trial with a 30-day money-back guarantee, so download this tool today for free and enjoy.
Price: It starts $19.95/Monthly.
Compatibility: Windows and Mac