While busy performing multiple tasks on your Mac or PC daily, you may feel the need to share them with others for expert advice or otherwise. At that moment, you may not find where to record video on laptop. Herein the built-in tools offered in Windows and macOS enable you with this functionality of recording screen, video, or webcam as per your utility.
You can use the tool for screencasting and recording videos from a webcam, and it also lets you do gameplay recording if you are fond of playing online games. This recording helps you improve your game by watching good moves. If you are in the teaching profession, you can use it for recording tutorials, or if you are a businessman, use it for presentations.
Herein we will help you find beneficial ways to record videos on Windows laptops or Mac devices. Check them out.
How to Screenshot & Record Video on Laptop With Webcam
1. Use EaseUS RecExperts to Screenshot and Record Videos on Windows & Mac
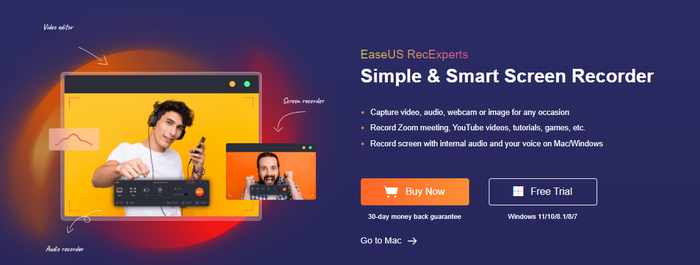
EaseUS RecExperts is a fantastic software for seamlessly recording video and taking screenshots on your laptop. You can capture webcam, audio, video, and images about any occasion. You can also make recordings for YouTube videos, games, Zoom meetings, or even tutorials for teaching and business purposes.
The software assists you in recording any audio, whether it is from your microphone or laptop. You can also do recording of a full screen, or even a part of it, along with the facility of recording multiple screens. It also helps in capturing desktop, software, website, or video and transforms by saving them into cute GIFs. Moreover, you can also schedule recording in an automatic mode for multiple tasks of your choice.
Price: It starts $19.95/Monthly.
Compatibility: Windows and Mac
step-by-step Guide:
Step 1: Launch the EaseUS RecExperts software on your computer.
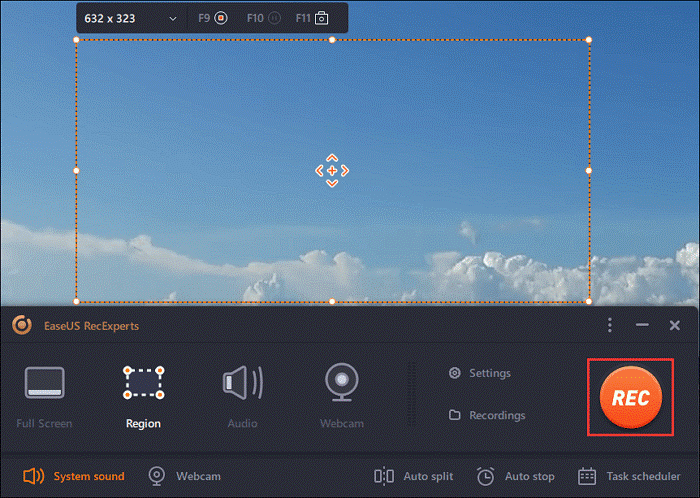
Step 2: You can either click the "Full Screen" option (for recording the whole screen) or select "Region" (for customizing the recording area). Upon that, choose the recording area with your mouse. If you want to record video with audio, you need to click the "Sound" icon on the bottom-left corner.
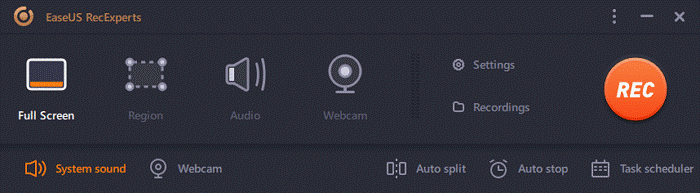
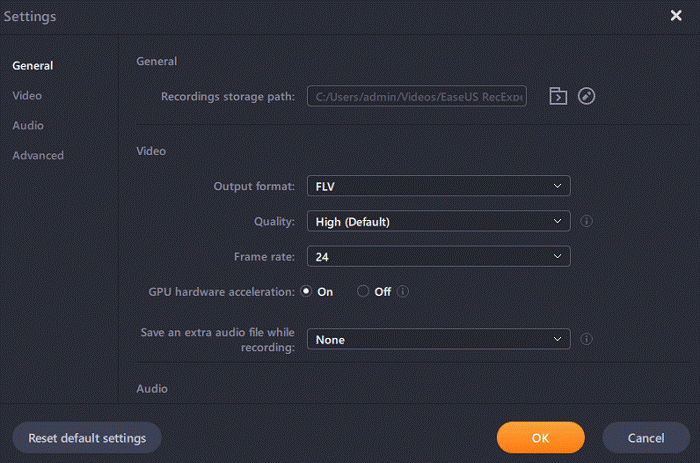
Step 3: Click the "Settings" button to apply more options and select the corresponding specification based on your needs. When finished, click "OK".
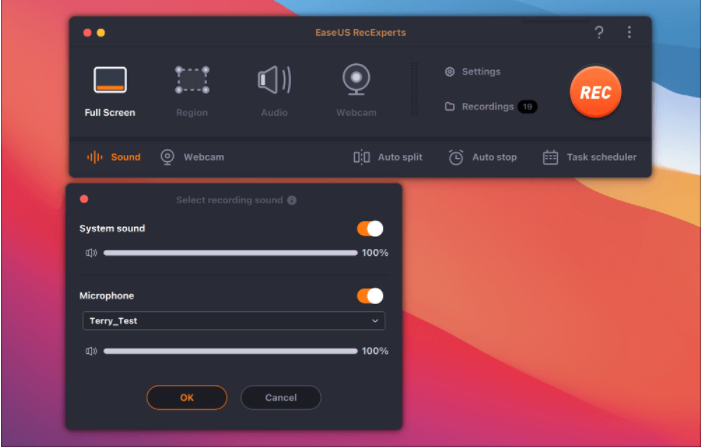
Step 4: Hit the "Sound" button on the bottom-left corner and open the system or microphone sound if you prefer to record audio and screen simultaneously. With that, select "OK" to ensure the audio options.
Step 5: Click the "REC" button to start recording. And click the red button on the timing bar to stop recording when it finishes.
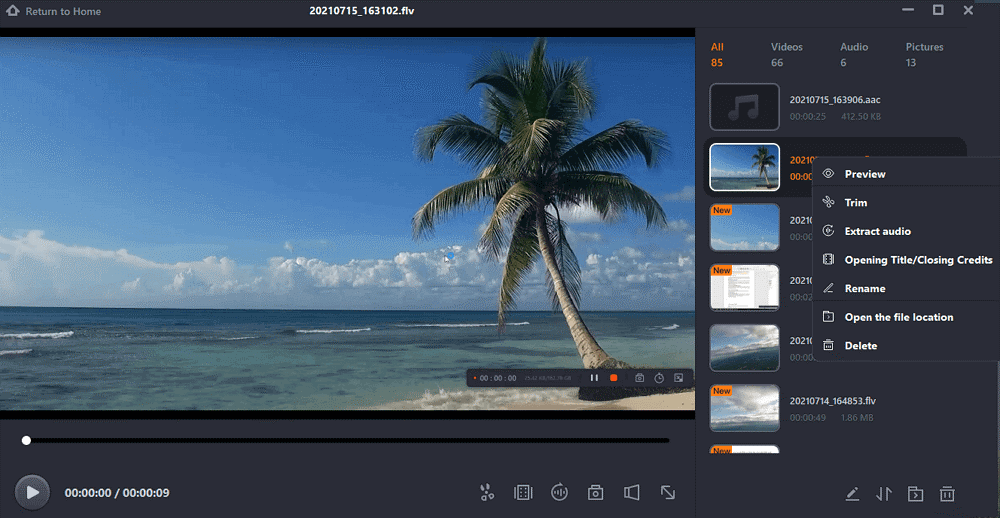
You can find the recording videos in the "Recordings" which is located in the main interface. Select the video and edit it as you want.
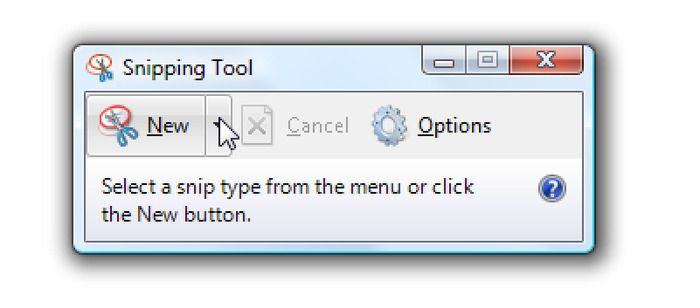
2. Use Snipping Tool to Screenshot on Windows
If you are a Windows 7 to Windows 10 user, you will find a helpful Snipping tool in your device; however, Snip & Sketch has superseded it in upgraded appliances. The snipping tool helps you capture the screenshot in a free-form or rectangular shape as you look for your work. You can also use the entire screen or window option for a wider angle or detailed screenshot.
If you are looking for time delaying a screenshot, you get one to five seconds for carrying it well via the snipping tool. Using a pen or a highlighter, you can also make a marking on the screenshot. Once you have taken the screenshot, you can find it copied on your clipboard and use various sharing options.
step-by-step Guide:
Step 1: Press the Shift key + S + Windows Key. You will notice your system screen has turned dark. Now select the area you wish to take as a screenshot.
Step 2: As a default setting, you can see Rectangular mode already selected, but you can change it to free form or any other available method in the toolbar.
Step 3: Once you have used the shortcut keys, you will notice the screenshot copied in the clipboard as an automatic function. You will get a notification and a few editing options when you take the screenshot.
3. Use QuickTime Player to Record Video on Mac
If you are looking for a video cum audio player as a built-in tool on Mac, then a QuickTime player can be of much help. It has a sophisticated yet straightforward UI and can handle multiple audio, video, image, and panoramic media. Not only this, but this fantastic tool also provides the facility of live streaming along with some editing tools of essential nature.
So, if you're searching for advanced editing, this tool may disappoint you with its limited features. Additionally, the device does not support all sorts of formats for your files and may sometimes require codecs from third parties. QuickTime Player provides you with watching and creating a facility for media and sharing them via social platforms, including YouTube, Facebook, and other popular mediums.
step-by-step Guide:
Step 1: First, you must open the QuickTime player by digging in the Applications folder. Afterward, you must select the options for File and the New screen recording using the menu bar. You can see either control on the screen or in the window for screen recording.
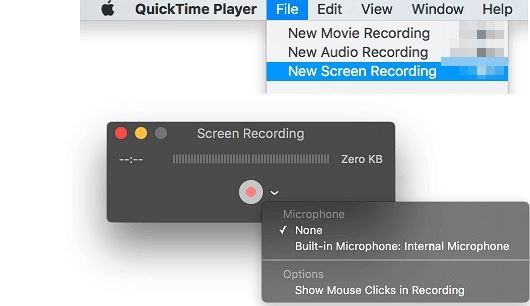
Step 2: Then find and click the arrow present next to the button for recording.
You can also use a microphone for recording any audio or your voice. Using the slider, you can make changes to the volume to adjust it as per your requirement.
Step 3: You can complete the screen recording by pressing the Record button on your Mac.
- If you intend to record the entire screen, go ahead by tapping on any part of the screen.
- Select the location by dragging the required portion if you wish to register a particular screen area.
Step 4: Now, from the menu bar, press the Stop button to stop the recording. Alternatively, you can go ahead by pressing the Control+Esc+Command keys.
Step 5: As soon as the recording stops, you will see that the QuickTime player opens it automatically. Now you have the freedom of editing, playing, or sharing the recorded clipping.
Final Words
Sometimes while giving tutorials or making presentations, you may need to record your screen or webcam, but you may not know where to record video on laptop. For this, we have suggested practical ways above, and you can use any of them per your choice and situation.
Being a Windows user, you can use the Snipping Tool to create screenshots and screen recordings. But it comes with a drawback of limited editing functions. Being a Mac user, you can use QuickTime player, but it may sometimes require you to use codecs from a third party. But in case you are looking for fully functional software that can run on both Windows and Mac devices, then EaseUS RecExperts can help you out. It supports all sorts of file formats, multiple functions of auto-stop and auto-split, and flexibility in output settings.
Price: It starts $19.95/Monthly.
Compatibility: Windows and Mac