Screen recording is a decent way to save intriguing videos clips and demonstrate how to do something on your device to friends or colleagues. However, things may get kind of tricky when it comes to screen recording on Mac with audio because of its exclusive OS and compatibility.
Today's how-to guide will walk you through how to screen record on Mac with audio with ease. Also, we covered the detailed instructions to help you record audio without any background noise on your Mac computer. Read on and learn how to do these.
Table of contents:
How to Screen Record on Mac with Audio
How to Screen Record on Mac with no Background Noise
How to Screen Record on Mac with Audio
Option 1: Screen Record on Mac with audio via EaseUS RecExperts
EaseUS RecExperts is a lightweight yet all-in-one screen recorder capable of capturing video, streaming audio, webcam, or image and screen recording with internal audio and your own voice on Mac. You are allowed to record Zoom meetings, YouTube videos, tutorials, games, and so much more.
Better yet, you can select to record either your desired part of the screen or full-screen based on your needs. Also, you are able to trim the length of the recording or alter its volume and add a custom intro.
Exclusive Features:
- Record Anywhere. Record part of the screen or a full screen based on your needs. You can even record multiple screens simultaneously.
- Schedule Recording. You are able to set a time to start or stop a recording automatically. You are also allowed to schedule a bunch of tasks as you want.
- Record Any Audio. You can record sound from your computer and smartphone and extract them from the recorded video file or during recording.
- High quality. The maximum resolution for the output videos can reach up to 1080P/4K
Price: It starts $19.95/Monthly.
Compatibility: Windows and Mac
Here's how to use this tool:
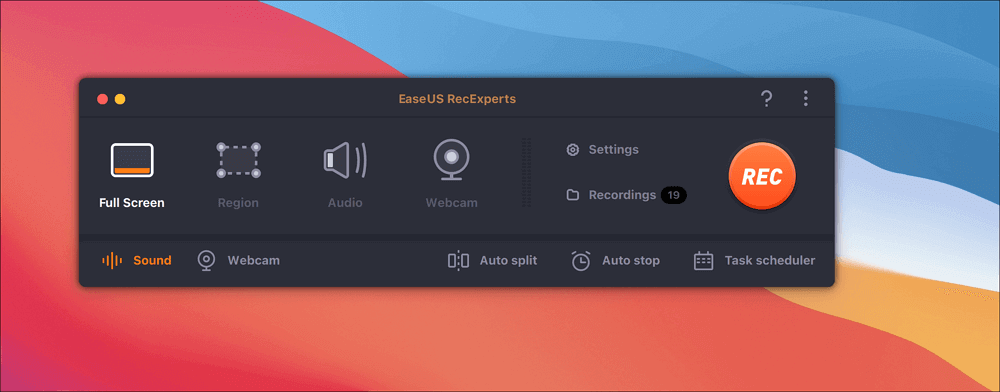
Step 1. You can either click the "Full Screen" option (for recording the whole screen) or select "Region" (for customizing the recording area). Upon that, choose the recording area with your mouse.
Note: You need to click the Sound icon on the bottom left to capture the screen with audio.
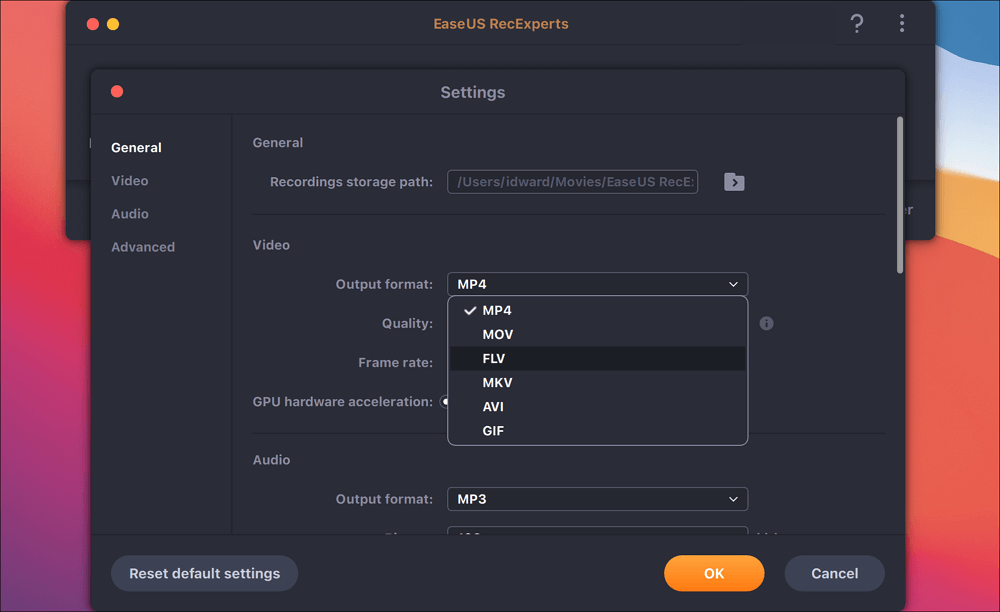
Step 2. Hit "Settings" to apply more options and select the corresponding specification based on your needs.
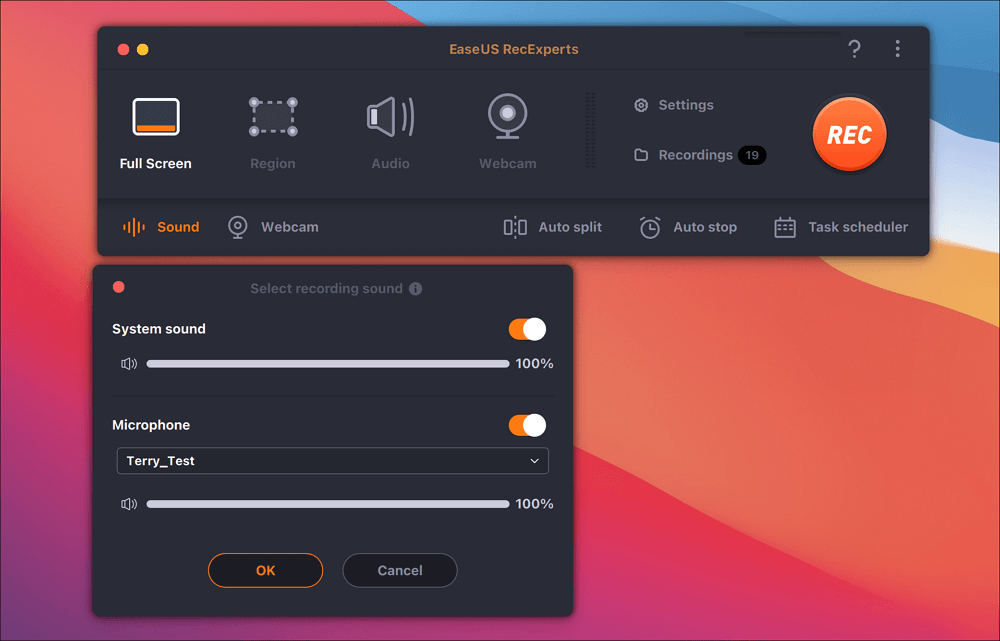
Step 3. Once done, head back to the main screen, hit "Sound," and open the system or microphone sound if you prefer to record audio and screen simultaneously. With that, select "OK" to ensure the audio options and then click "REC" to start recording.
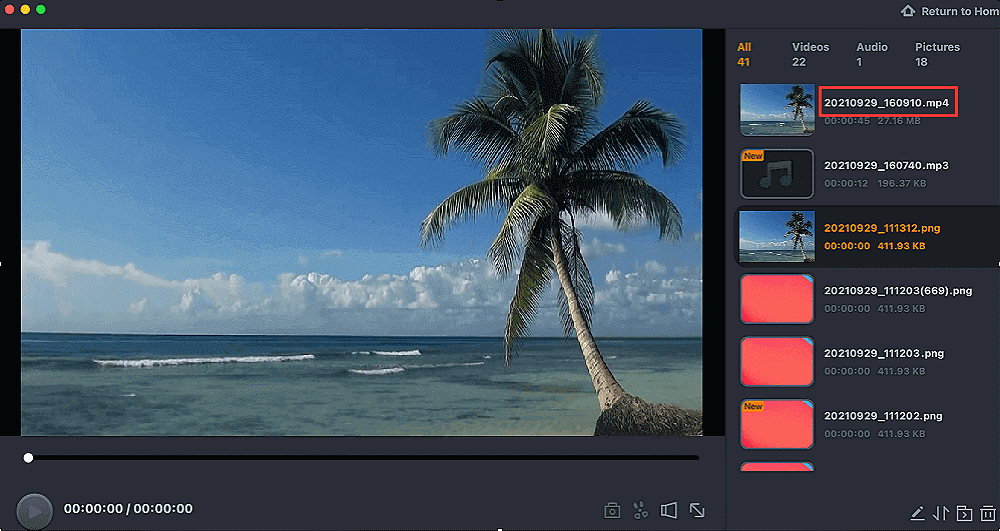
Step 4. If you want to stop recording a task, click the Stop icon whenever you want. Upon that, go to watch the recorded video in "Recordings," which is located in the main interface. If you want to review the target savings, check the lists.
Option 2: Screen Record on Mac with audio via QuickTime
QuickTime is a powerful screen record tool that comes with an intuitive interface, perfectly compatible with Mac. Here are detailed steps on how to use it to screen record on Mac with audio.
1. Download and Install the free app Soundflower:
Step 1. Download from Soundflower from here. Once done, open the .dmg file.
Step 2. Double click on the Soundflower. pkg and follow prompts to install.
You'll have to adjust your security settings if you receive an error during installation. Here's how to do that:
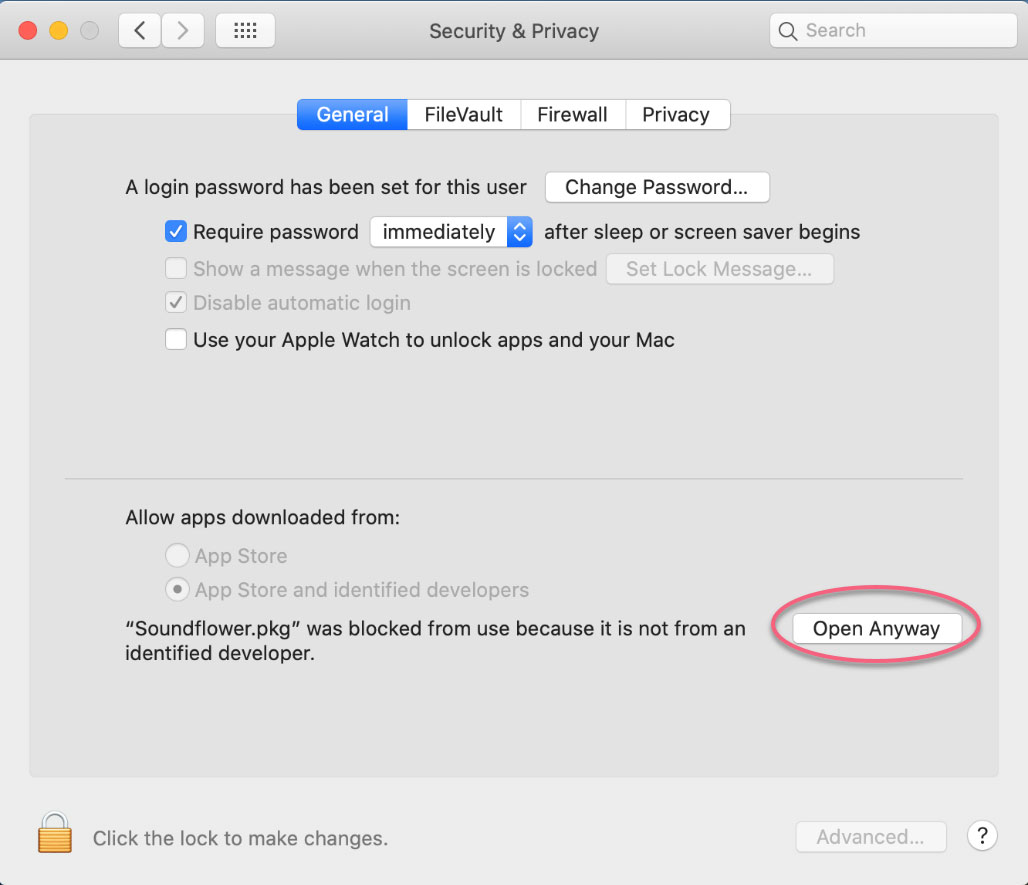
Step 1. Open System Preferences and select Security and Privacy. If you see "Soundflower. pkg was blocked..." near the bottom, click Open Anyway and unlock the computer with a system password or fingerprint.
Step 2. Return to the Soundflower installation steps to retry the installation.
Step 3. Once installation is done, reboot your device.
2. Set up Audio Output
Step 1. Run the Audio MIDI Setup, whose app logo is a piano keyboard.
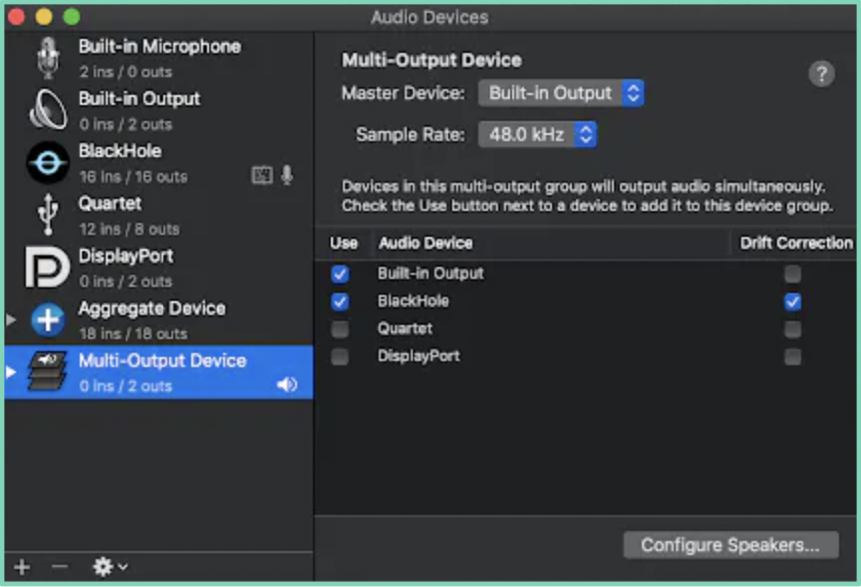
Step 2. Click the + button and select Create Multi-Output Device.
Step 3. Click the box in the use column for both Built-in Output and Soundflower (2ch) to update settings for Multi-output Device.
Note: You should only check the box for built-in output in the Drift Correction column. You'll have to check the box for the headphones in the Use column if you want to use headphones.
3. Open QuickTime Player
Step 1. Install QuickTime and launch it on your Mac.
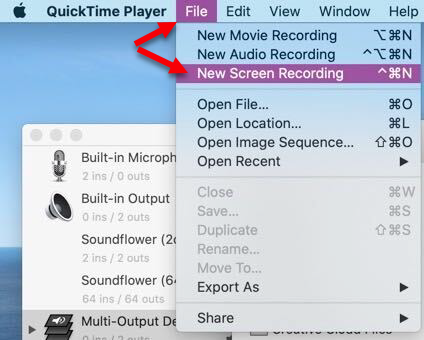
Step 2. When ready to record, click on File at the top, and select New Screen Recording.
Step 3. Now, an opaque window with a menu will appear, with which you can choose what part of the screen to record. In the options tab, you can select the location to save the file. All other options can be left alone.
Step 4. Click the record button in the menu to start recording.
Step 5. If you want to stop the recording, hit the stop button in the menu bar at the top of the Mac.
![]()
How to Screen Record on Mac Without Background Noise
Option 1. Screen record on Mac without background noise via Mac's screen recording
Apple has been adding loads of software to their devices for years, yet the screen recording function remains what it was. Screen recordings can be captured with ease on a Mac by using their two recording choices. The first one is QuickTime Media Player, which we have covered already. So here, we mainly focus on the second option —— the screen capturing command. Here's how to use it:
Step 1. Press Command + Shift + 5 simultaneously to open up the screen recordings toolbar, which will offer you the options of recording the entire screen, your desired part, and specific apps. You can also select different windows and choose to have a delay before you begin recording.
Step 2. Ensure to head to "Options" in the toolbar and choose "Built-in Microphone" before you start the recording, as none of the sounds will be contained on your screen recording if you don't.
Option 2. Recordit
Recordit is gratis screencast software that enables you to smoothly create audio presentations and gifs. You can record screen audio for 5 minutes. Plus, you are allowed to add commentaries to your recordings to make them more engaging!

Pros:
- Lightweight
- Intuitive interface
Cons:
- You need to subscribe to acquire premium features
- You can only record for five minutes
How to use:
Step 1. Download install Recordit on your Mac.
Step 2. Go to System Preferences>Sound and click the "Input tab" to select "Internal Microphone." You'll need to hit the 'Output' tab and choose 'Aggregate Device' to enable the output source.
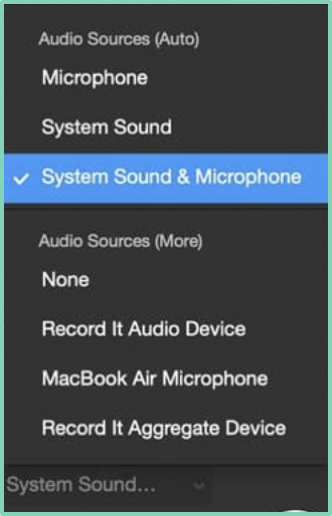
Step 3. Now, run Recordit and select 'Aggregate Device' as your audio source. It will also let you customize your preferences and offer three basic choices to select as your Audio Source. You are allowed to choose to record only external audio or only internal audio, or both of them at the same time.
Step 4. Now, you can easily record your internal and external audio by clicking on 'Record.'
Step 5. If you want to end the recording, hit the 'Stop' button.
Conclusion
So much for today's how-to guide. We believe that you understand how to screen record on Mac with audio easily. Among various screen record tools, we highly recommend EaseUS RecExperts, which is powerful and easy to use.
Price: It starts $19.95/Monthly.
Compatibility: Windows and Mac