Minecraft is a popular game globally where players are constantly looking for new resources and trying to escape creepers. At times you may find yourself wishing you could share your special moments and achievements in this sandbox videogame with your friends. Fortunately, you can now screen record Minecraft gameplay on your PC and share it on various social media platforms. This article will guide you with the five easiest methods to do this.
How to Screen Record Minecraft [5 Methods]
Method 1. EaseUS RecExperts (The Easiest Solution)
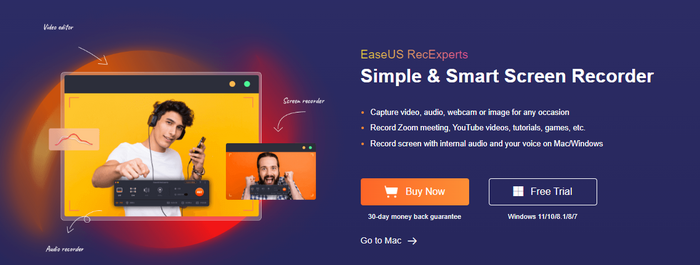
You can now share your best gameplay moments with friends and on YouTube by learning how to screen record Minecraft. The quickest way to do this is using EaseUS RecExperts, a state-of-the-art Minecraft recording software. With this, you can capture everything on your screen, including video and audio, with just a few simple clicks. By downloading EaseUsRecExperts, you can also record the whole or part of it based on whether you are playing the game in full-screen mode or window mode, according to your requirement.
Key Features:
- Easy-to-use screen recorder that can capture the whole screen as well as a partial screen
- Records sound from computer and microphone
- Can schedule recording by setting the start and stop time
- Features auto-stop and auto-split options
- Lets you take screenshots while recording
- Allows you to trim and edit your recorded clip
Price: It starts $19.95/Monthly.
Compatibility: Windows and Mac
Step-by-step guide
Step 1: Launch the EaseUS RecExperts software on your computer.
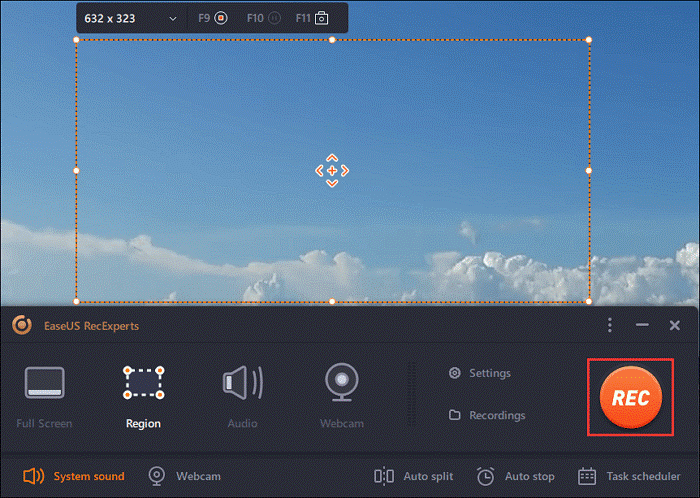
Step 2: You can either click the "Full Screen" option (for recording the whole screen) or select "Region" (for customizing the recording area). Upon that, choose the recording area with your mouse. If you want to record video with audio, you need to click the "Sound" icon on the bottom-left corner.

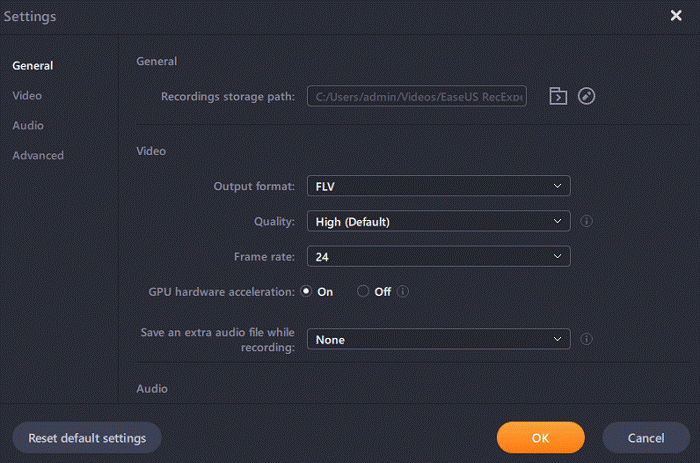
Step 3: Click the "Settings" button to apply more options and select the corresponding specification based on your needs. When finished, click "OK".
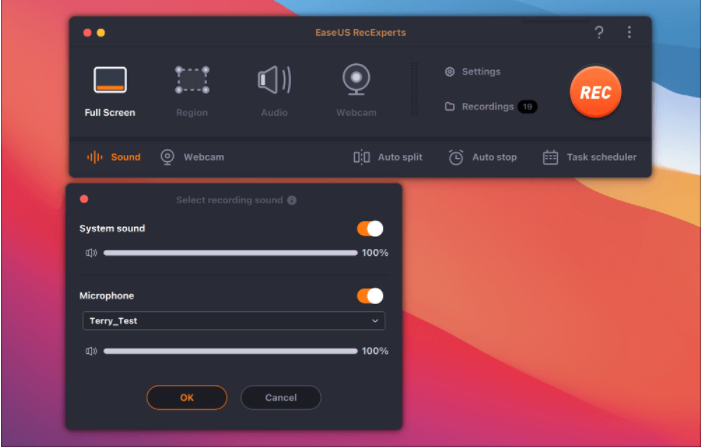
Step 4: Hit the "Sound" button on the bottom-left corner and open the system or microphone sound if you prefer to record audio and screen simultaneously. With that, select "OK" to ensure the audio options.
Step 5: Click the "REC" button to start recording. And click the red button on the timing bar to stop recording when it finishes.
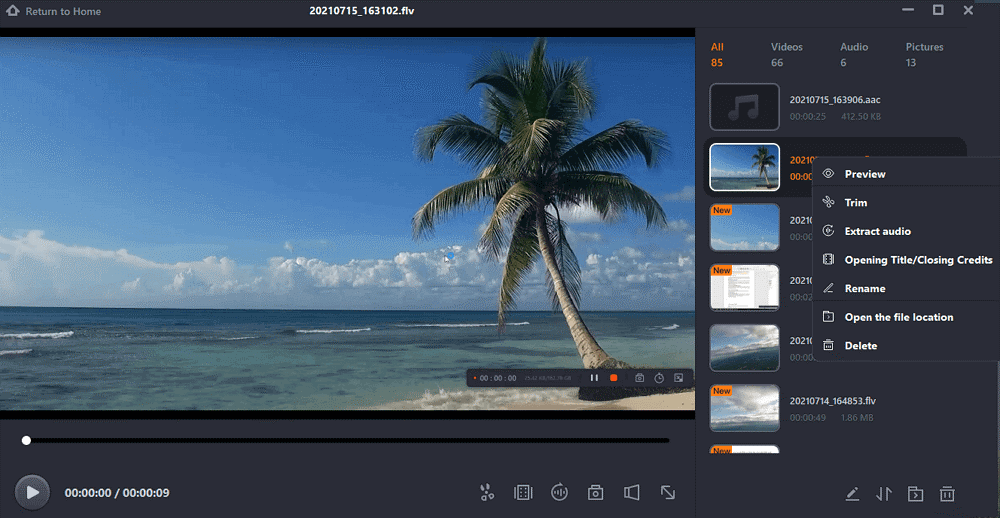
You can find the recording videos in the "Recordings" which is located in the main interface. Select the video and edit it as you want.
Method 2. Xbox Game Bar
Verdict: It is an in-built Windows recorder for your Minecraft gameplay that is easy to use and gives a hassle-free experience.
Step-by-step guide
Step 1: Open Game Bar while playing a game by pressing Win + G. You will find it appears over the game you're playing.
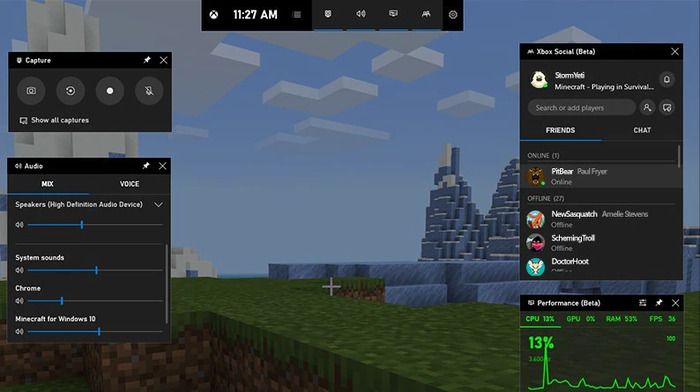
Step 2: Start recording your screen by tapping on the red recording button. Then, when the recording is underway, you will see a clock featured in the upper right corner of the screen.
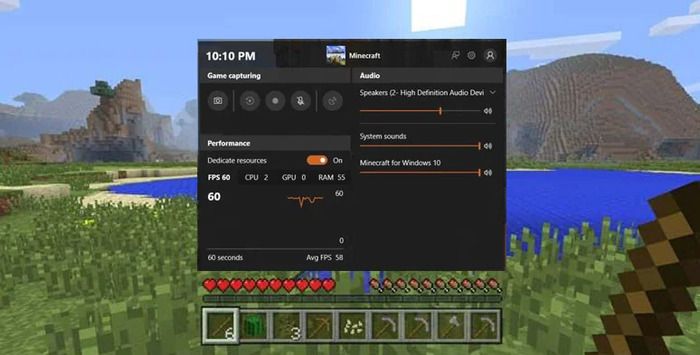
Step 3: When you want to stop recording, raise the Game Bar and hit the red Stop button. You can also use the hotkeys Windows Key + Alt + R to start and quit recording. All the recorded clips save on your PC as MP4 documents, each labeled with the game's name and the time they were captured.
Method 3. Icecream Screen Recorder
Verdict: A powerful PC screen recorder that helps accurately capture videos of different formats, including fast-paced 3D games, with just the click of a button.
Step-by-step guide
Step 1: Download and install the software on your computer from the official website.
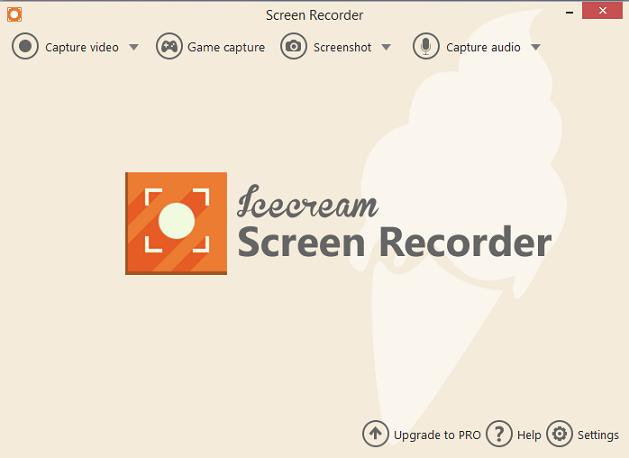
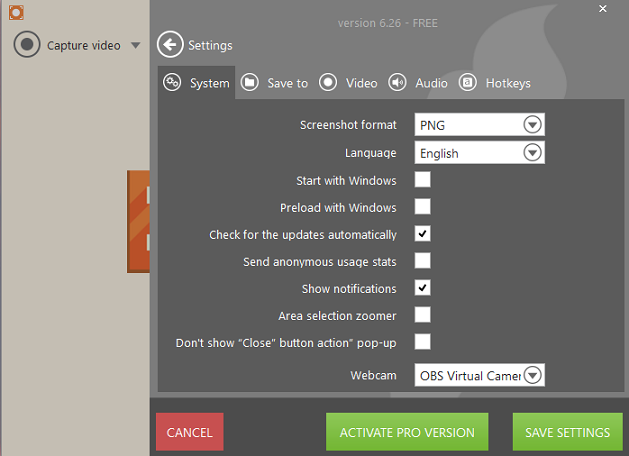
Step 2: You can change the recording setting if you wish or directly start recording. To change settings, go to Settings at the bottom right corner of the screen. You will find five options: System, Save to, Video, Audio, and Hotkeys. You can use each of these to customize according to your needs.
Step 3: Start recording by clicking on the Capture Video button and selecting the recording area, full-screen, specific area, or custom area.
Step 4: Tap on Rec and click on Draw if you wish to draw on the video while the recording is underway.
Step 5: To pause and resume the recording, press F7, and to stop recording, press F8.
Step 6: Save the recordings by giving the clip a name and hitting OK.
Step 7: If you want to capture audio, tap on the option that says Capture Audio and choose either High bitrate, Medium bitrate, or Low bitrate and then tap on Rec to start recording audio.
Method 4. Bandicam
Verdict: A robust interactivity recorder allows users to record video arrangements when playing the game.
Step-by-step guide
Step 1: Customize your recording by selecting the Game Recording mode and tuning to excellent video. Start Minecraft on your device and use the FPS tab for outline rating on your gadget screen.
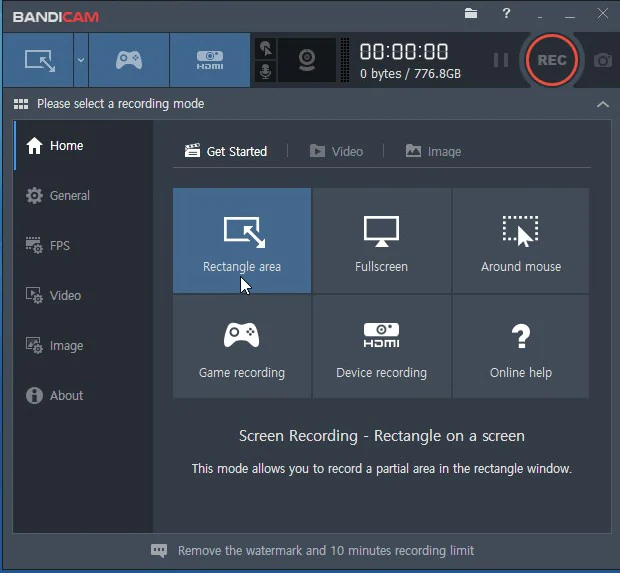
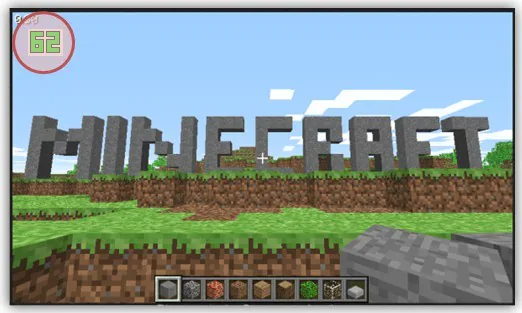
Step 2: Commence the recording process by tapping on the Record button or pressing F12 on your console. When recording is underway, you will find the numbers on the screen that are usually shown in green turning red.
Step 3: Either press the Record button once again to stop recording or hit F12 on your console.
Method 5. VSDC Screen Recorder
Verdict: It is a free screen recorder preferred by hardcore gamers that allows you to live stream without a watermark or time limit.
Step-by-step guide
Step 1: Set up the software settings of the VSDC Screen recorder by clicking the gear button. It will open the Settings option and give you a drop-down option featuring Common (to change the output folder and the language), Mixer (to select recording devices), and Export settings (to help the video quality and hotkeys)
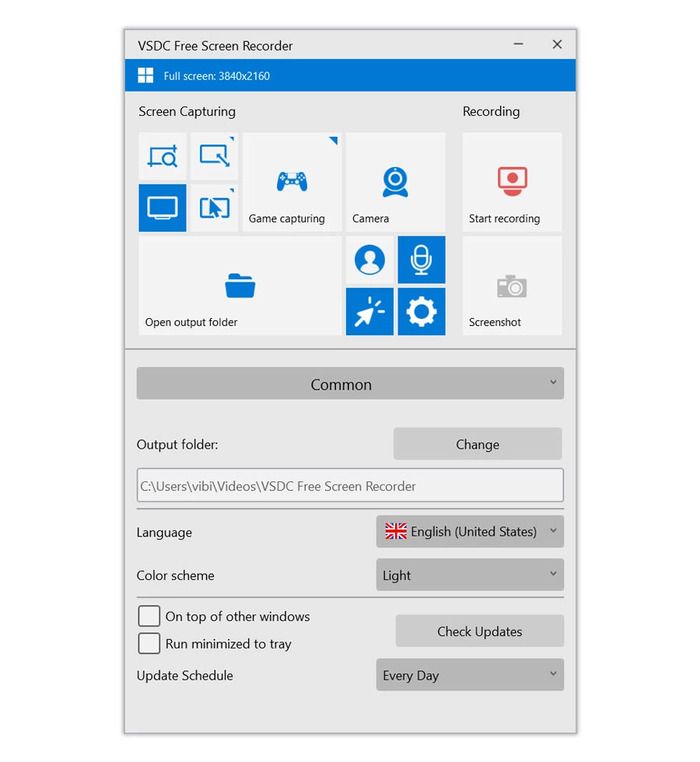
Step 2: Once configured, prepare for recording by first pressing the Enable camera and Enable sound buttons.
Step 3: Start recording by selecting the 'Capture full screen' option or using the 'Select area manually' or 'Capture area from presets' modes. Once ready, tap on 'Start Recording' or press Ctrl + F5, and to quit recording, hit Stop Recording or press Ctrl + F8. Then, go to the 'Open output folder' for your recorded clip.
Conclusion
With the help of these five methods, you can screen record Minecraft without any hassle and share your gameplay high moments, strategies, and techniques with your friends. For example, you can use the Xbox Game Bar if you do not wish to go for third-party software and make the most of your device's built-in feature for screen recording. You can also use other elegant and popular screen recorders like Bandicam, VSDC, or Icecream to capture live streaming on whole or partial screens per your needs.
However, if you want to use the most powerful yet simple and intelligent recording tool, go for EaseUS RecExperts, which has features to record and edit without inconvenience or limits.
Price: It starts $19.95/Monthly.
Compatibility: Windows and Mac
