With the FaceTime feature on Mac and iPhones, you have an excellent way to stay connected with your loved ones without installing a third-party tool. It is free for use and a hassle-free method of keeping in touch with everyone. However, there may have been times when you used FaceTime to connect with your near ones and wished you could save some of those precious moments for later viewing. The good news is that some easy methods can help you learn how to screen record FaceTime with sound in no time.
How to Record FaceTime with Sound on Mac
Method 1. EaseUS RecExperts (The Easiest Way)
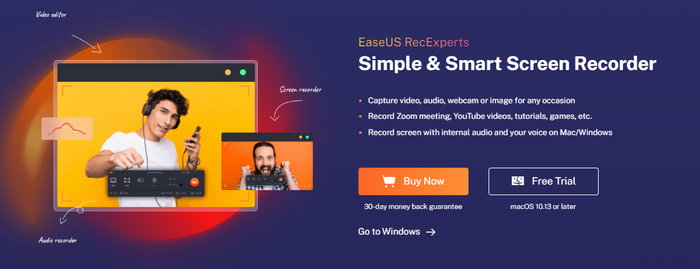
You can now use FaceTime to stay in touch with your near and dear ones and to capture those priceless moments you spend with those living far away. Know how to screen record FaceTime with sound with a few simple clicks by using EaseUS RecExperts. The easy-to-use screen recorder can help you capture anything on your Mac, including a video call, live streaming shows, online tutorials, and much more. The versatile writer lets you freely adjust the output video's resolution in 4K, 720p, 1080p, etc.
Key Features:
- Features a sophisticated internal audio recorder
- Allows recording video calls as well as gameplay videos and audio with ease
- You can also record a Skype call
- Lets you choose the quality of output video according to your needs
Price: It starts $19.95/Monthly.
Compatibility: Windows and Mac
Step-by-step guide
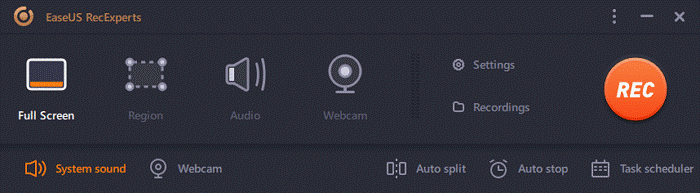
Step 1: Launch the EaseUS RecExperts software on your computer.
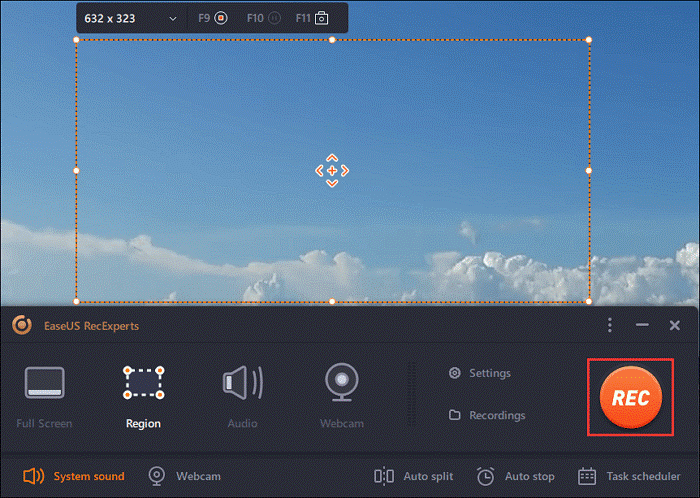
Step 2: You can either click the "Full Screen" option (for recording the whole screen) or select "Region" (for customizing the recording area). Upon that, choose the recording area with your mouse. If you want to record video with audio, you need to click the "Sound" icon on the bottom-left corner.
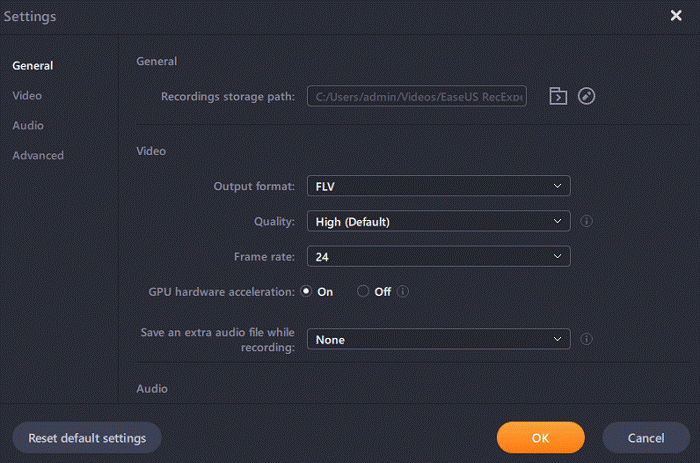
Step 3: Click the "Settings" button to apply more options and select the corresponding specification based on your needs. When finished, click "OK".
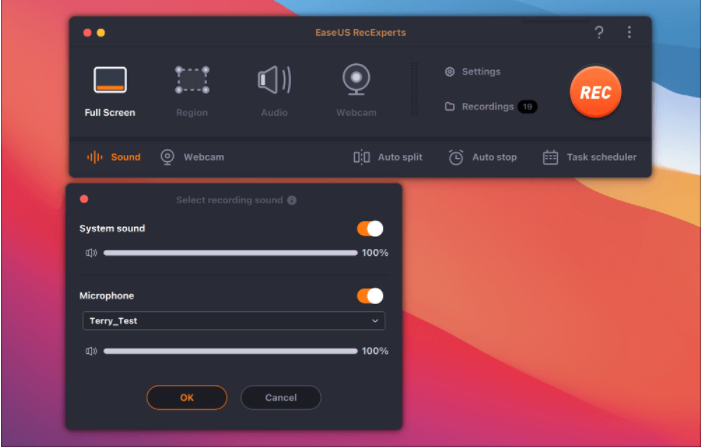
Step 4: Hit the "Sound" button on the bottom-left corner and open the system or microphone sound if you prefer to record audio and screen simultaneously. With that, select "OK" to ensure the audio options.
Step 5: Click the "REC" button to start recording. And click the red button on the timing bar to stop recording when it finishes.
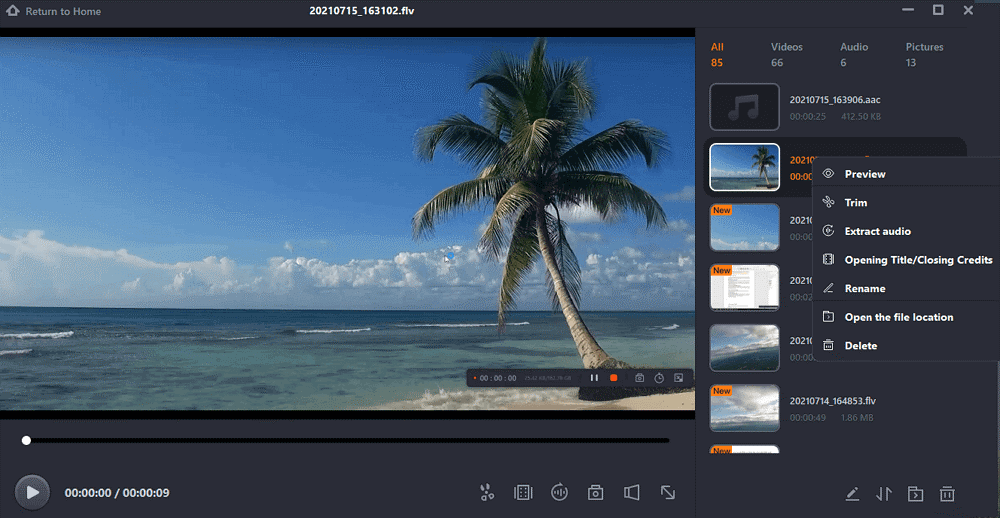
You can find the recording videos in the "Recordings" which is located in the main interface. Select the video and edit it as you want.
Method 2. QuickTime
QuickTime player is one of the most popular methods to screen record FaceTime with sound. Apart from being a media player, the software also bears the hidden ability of free video recording your screen in a size of your choice. It is pre-installed on your Mac and can also be used to edit, play, and share audio and video on various platforms. Here's how to screen record FaceTime with sound using a QuickTime player.
Step-by-step guide
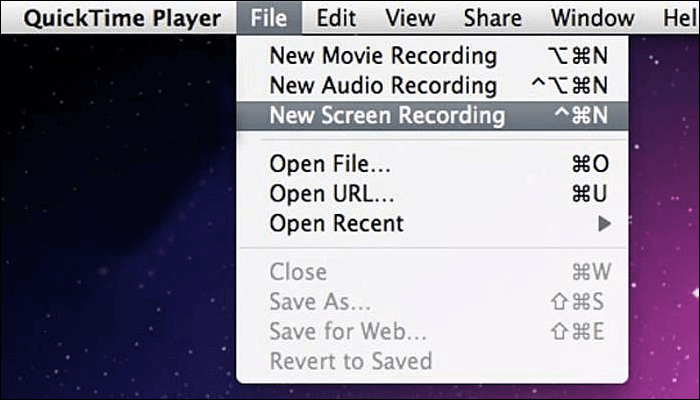
Step 1: Open the Quick Time Player on your Mac. Now navigate to the menu bar at the top of the screen and select "File." Then go to "New Screen Recording," which will open a new window for you. Next, select the "Microphone" by clicking the arrow.
Step 2: Start FaceTime and initiate a call on your Mac. Next, go to the QuickTime player and start capturing your video by clicking on the red button. Then, click on the "Stop" button to cease recording.
Step 3: The recorded video clip gets automatically saved to your Mac.
How to Record FaceTime with Sound on iPhone
You can also screen record FaceTime with sound on your iPhone without limitation and with just a few easy clicks. Unlike Android devices, where third-party apps and installations are required to capture the screen, iPhone requires no additional downloads. In addition, the built-in screen recorder in iPhone is powerful enough to capture the screen of your FaceTime call. Here's how to screen record FaceTime with sound on your iPhone.
Step-by-step guide
Step 1: On your iPhone, launch the "Settings app.
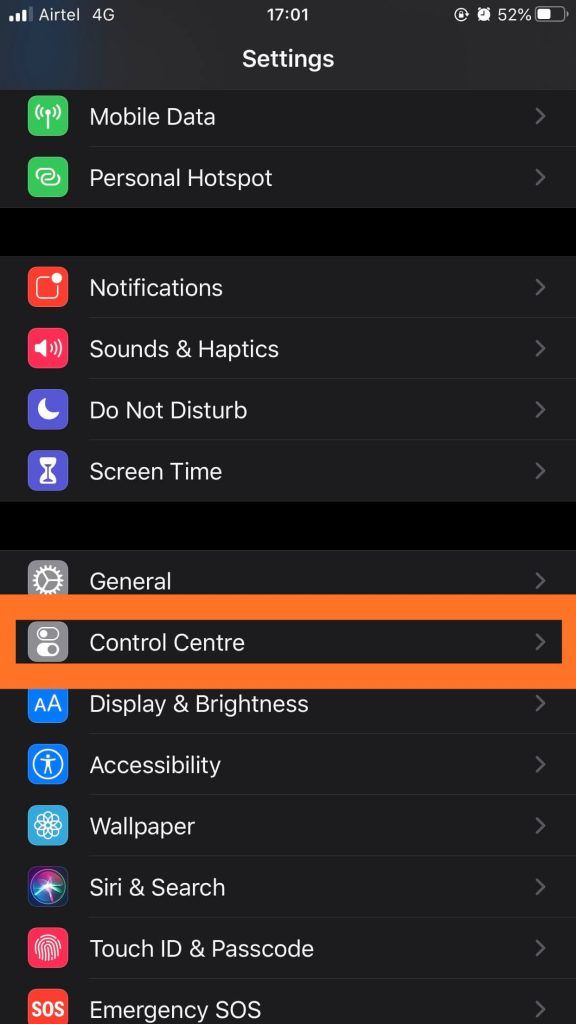
Step 2: Scroll down until you go to "Control Centre" and click on it.
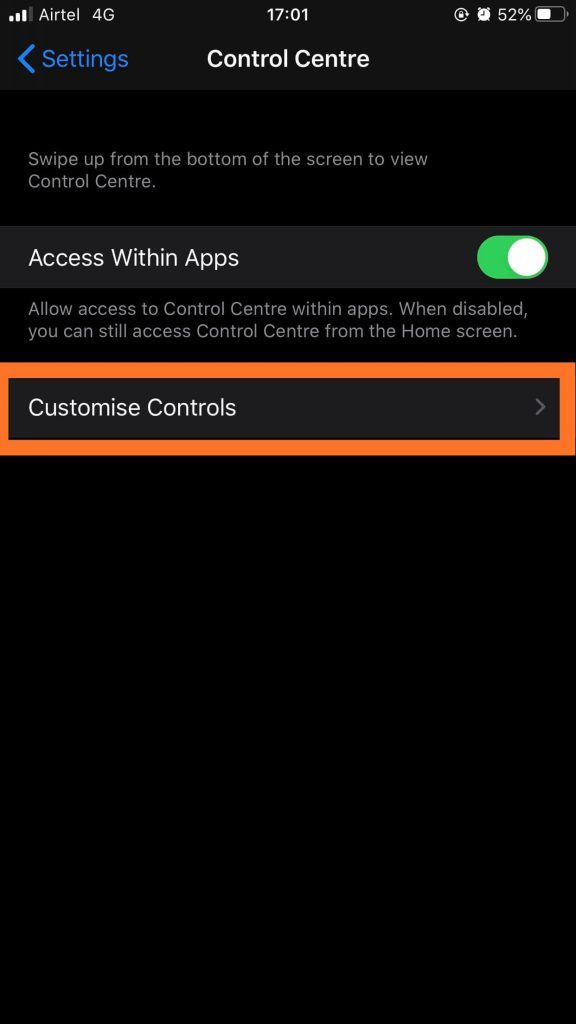
Step 3: Next, turn the toggle switch for "Access Within Apps" and select Customize Controls.
Step 4: A series of apps appearing in the "Control Centre" will pop up. To allow the recording app to feature in the list, you must add it by tapping on the plus sign in front of Screen Recording. Once it gets included in the list, it will feature as a separate icon for Screen Recorder in the Control Centre.
Step 5: Then launch the FaceTime app, pick a contact, and make your FaceTime call.
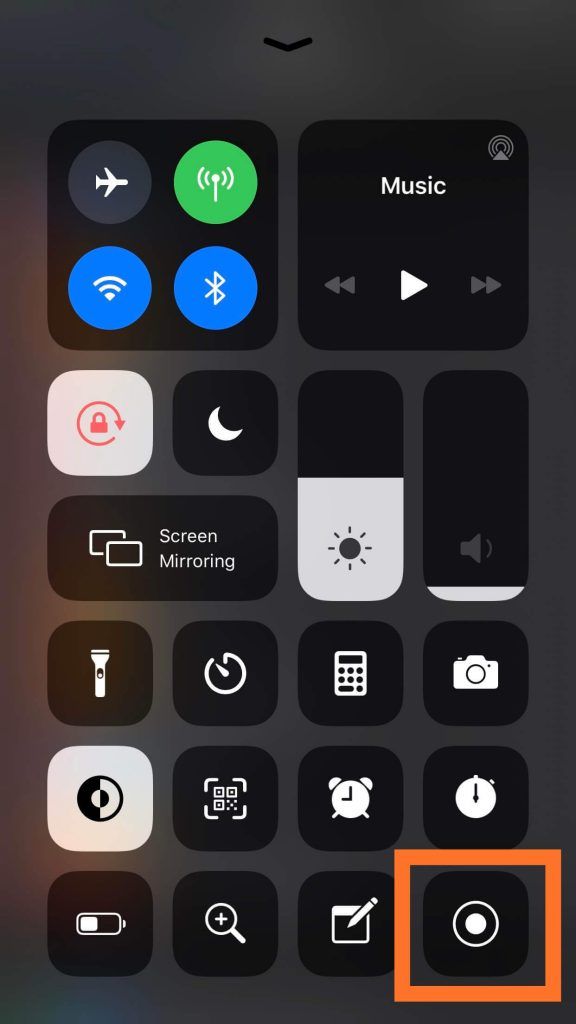
Step 6: When you hear the ringing, you have to open the "Control Centre." If you want to start your recording at this point, tap on the Screen Recorder. However, this will only record the screen without any sound.
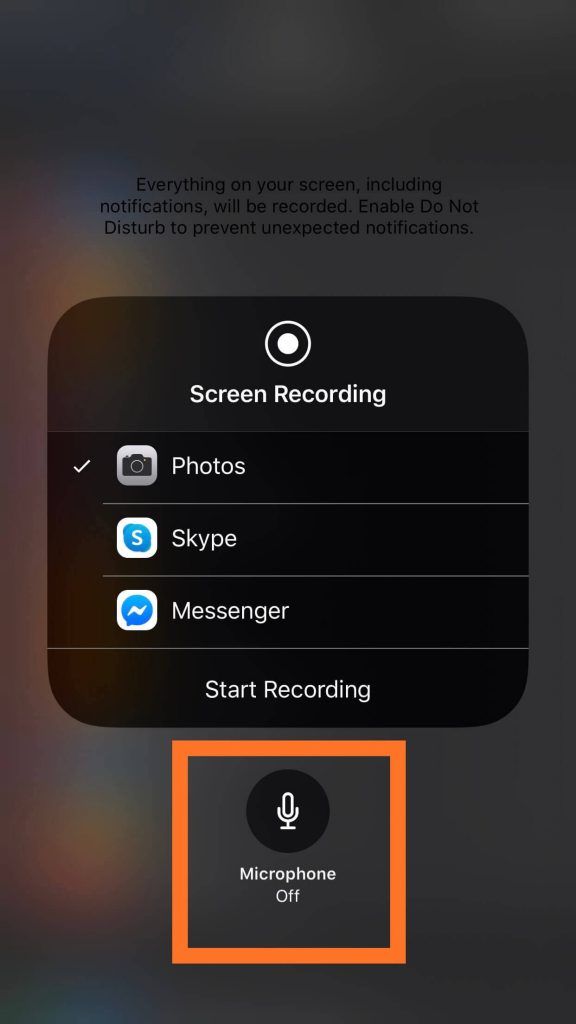
Step 7: If you want to screen record your FaceTime with the audio, you need to add one more step to the entire process. Long press on the "Screen Recorder" icon. You will see the available options while recording. One sign is that of a microphone that is greyed out and not active. It will say "Microphone Off."
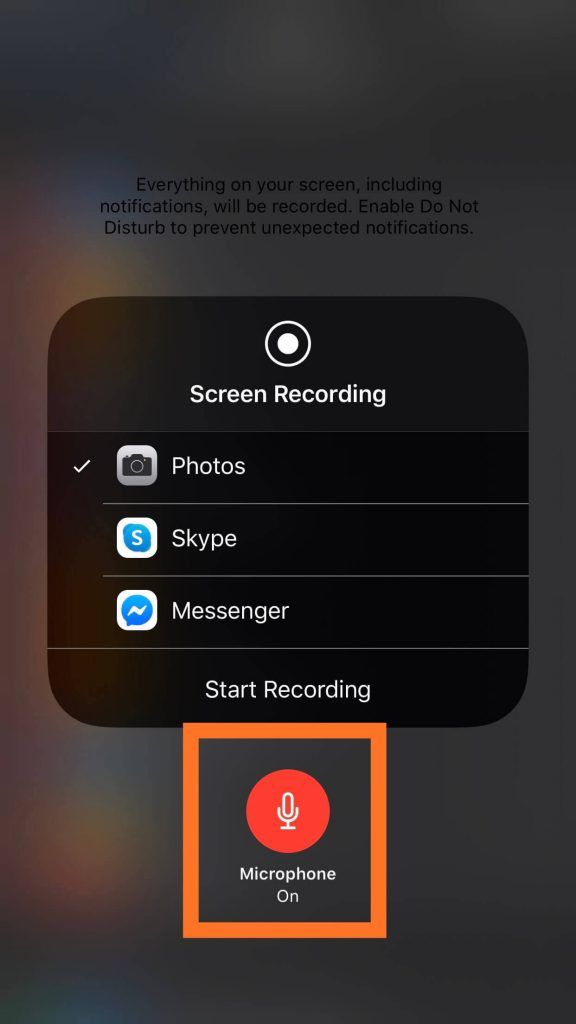
Step 8: Once you tap on the "Microphone" sign, you will see that the shade changes from grey to color, and the command below switches to "Microphone On."
Step 9: Commence the recording process by looking for the "Start Recording" button and clicking on it. You will immediately see a counter appear and can continue with your FaceTime call.
Note: Everything that appears on your iPhone screen is recorded along with the audio. So, suppose you want your FaceTime recording clip with sound on your iPhone to be without interruptions. In this case, you must remember to close any notifications or other sounds that are turned on for this purpose beforehand.
Step 10: Once your FaceTime call is complete, you can stop recording by tapping on the red bar at the top of the screen. Then, you will see a confirmation dialog box pop up. Then, tap on the "Stop" button from the mentioned options.
Conclusion
This article directs you through the simple steps and the different methods by which you can quickly learn how to screen record FaceTime with sound on your Mac or iPhone. So record your FaceTime calls now and save those unforgettable moments for eternity on your phone album or share them with your friends and family.
You can use the built-in features in your iPhone and the QuickTime media player on your Mac. However, for an effortless screen recording experience with multiple editing features, choose EaseUs RecExperts. This simple and intelligent recorder is easy to use and lets you capture your precious moments without glitches or limitations.
Price: It starts $19.95/Monthly.
Compatibility: Windows and Mac