Some documents already have a watermark on them, which makes the content hard to read. If you are looking to remove the watermark from your word document, this guide will provide you with a perfect step-by-step solution.
We will answer the question on how to remove the watermark in Word, by looking at the various methods to remove watermark from Word for both Windows and Mac. We will also suggest a third-party utility that will help you do the task quicker and easier. So, let's get into the details.
How to Remove Watermark in Word on Windows
Let's begin by looking at how to remove watermark in Word. Below are the two viable methods.
Method 1: Remove Watermark in Word on Window via the Watermark Menu
To remove watermark from a Word document. You will be using the same built-in menu to remove the watermark that is used to add the watermark to the document as well.
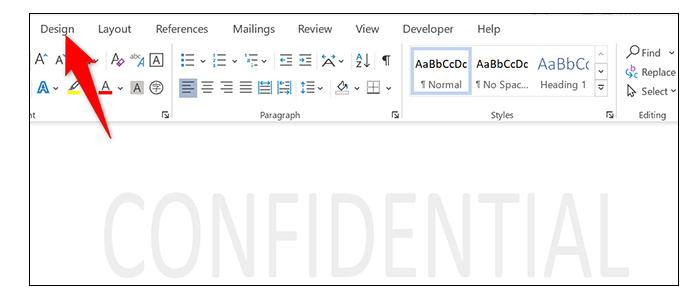
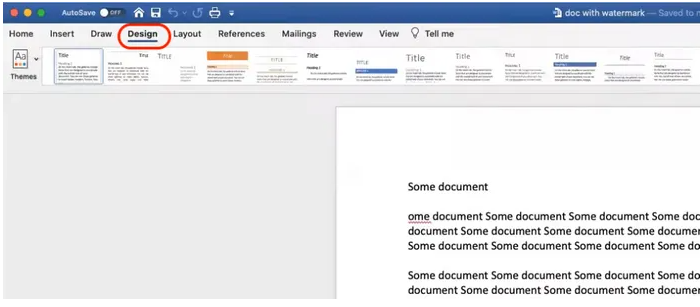
Step 1. Open the document with a watermark on Word. On the top ribbon of the word document. Click on the Design Tab.
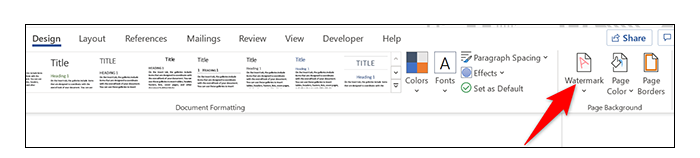
Step 2. Once you open the Design tab. On the right side of the ribbon, open the Page Background and select the watermark option
Step 3. Now, choose the Remove Watermark option
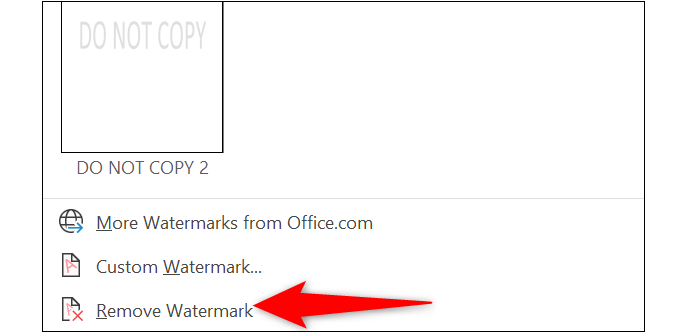
It will remove the watermark from your document.
Method 2. Remove Watermark in Word on Windows via the Footer Section
The second method to remove the watermark in Word is by the footer section. The steps are listed below:
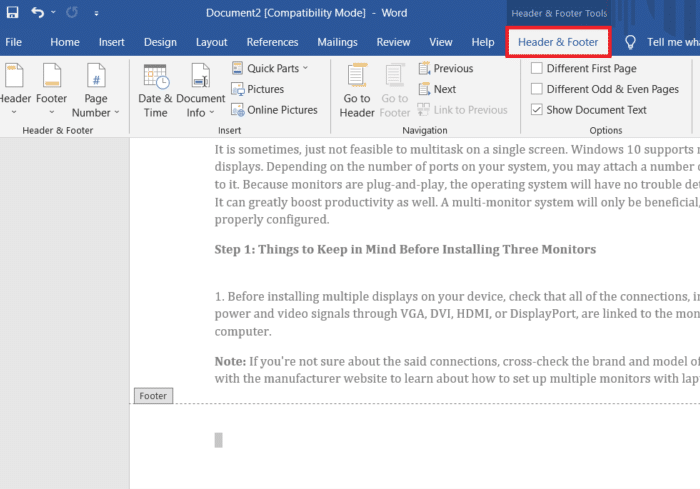
Step 1. Open the watermarked document in Microsoft Word. On the top ribbon, go to the Header & Footer section and click on it.
Step 2. A drop-down menu will appear. Select the "Remove Watermark" option

Step 3. Press Delete from your keyboard. It will remove the selected watermark from your document.
Method 3. Remove the Watermark in Word on Windows via Editing the Header
The third method to remove the watermark on Word is by editing the header, and it will make the watermark editable and removable. The steps are listed below.
Step 1. Open the document on Microsoft Word. On the top ribbon, click on the "Insert" tab.
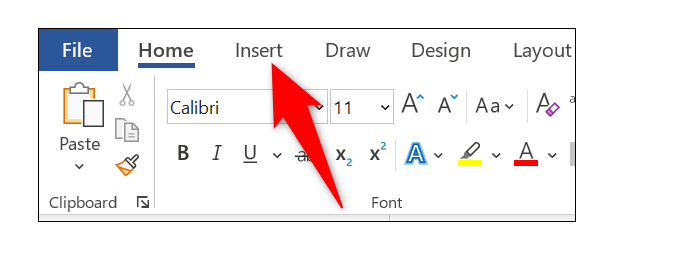
Step 2. Once you open the insert tab, go to the "Header & Footer" section.

Step 3. A drop-down menu will open up. Click on the "Edit Header" option.

Step 4. Now your document header is editable. Once you get access to the watermark, find and remove it in your document and click it.

Step 5. Once you have selected the watermark, press the delete key from your keyboard, and Word will remove the watermark.
Method 4. Remove Watermark in Word on Windows via XML format
Another method to remove the watermark is by using the XML (extensible Markup Language). This language is similar to HTML. In addition, You can save the document in an XML file it will convert into plain text. The steps are listed below:
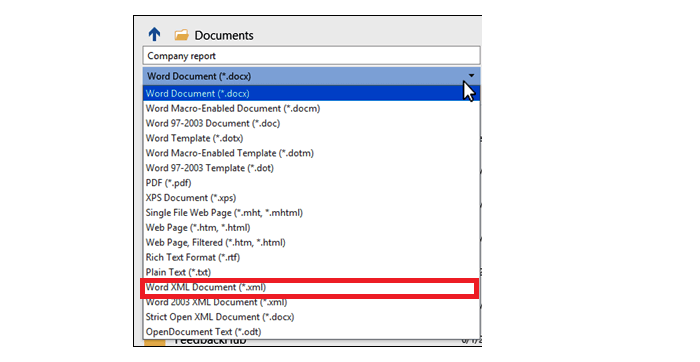
Step 1. Open the File with a watermark on it. From the File Menu, select 'Save As.'
Step 2. Click on Save as type, and from the drop-down menu, select word XML.
Step 3. Now click on save. Here, you will begin editing the document in Notepad.
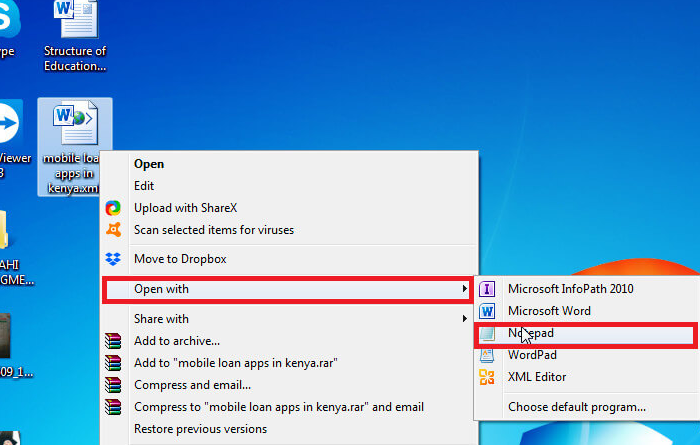
Step 4. Now go to the document that you have recently saved in XML format. Right-click and choose "Open With" and select "Notepad."
Step 5. Here, you will find the watermark Phrase by pressing CTRL+F simultaneously on the keyboard.
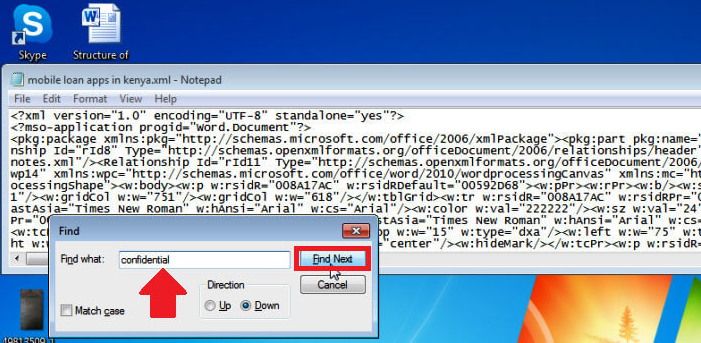
Step 6. Delete the Phrase without deleting the quotation mark. Search all the repeat occurrences of the same Word.
Step 7. Click on save to save the changes and reopen the document on Microsoft Word this time. And now save it as a word document.
How to Remove Watermark in Word on Mac
The steps to remove the watermark from Word are a bit similar to removing it on Windows. The steps are listed below:
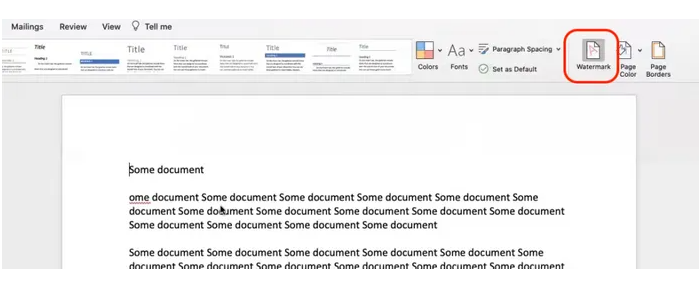
Step 1. Open the watermarked document on Word. From the top menu, select the Design tab.
Step 2. Select the Watermark option.
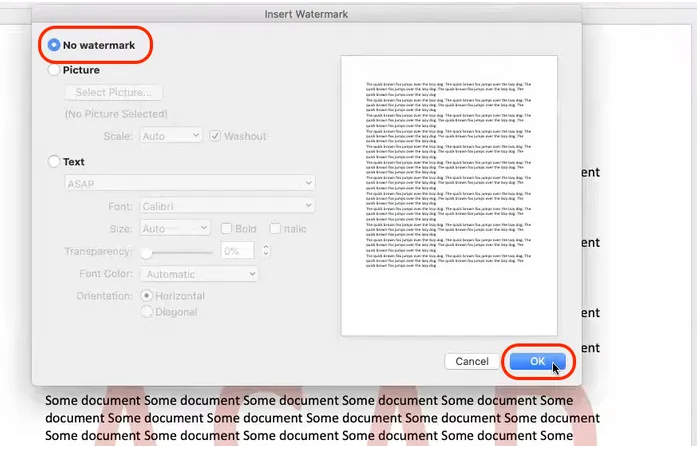
Step 3. Now, select the "No Watermark" option. And click on OK to save changes.
Bonus Tip: How to Remove Watermark from PDF
You can also use EaseUS PDF Editor, a third-party tool, to remove the watermark from Word. It can handle PDF documents with ease. It not only conveniently removes the watermark but also adds a personalized watermark.
You may easily add and remove images and text from a pdf document. It also works well with scanned PDFs.
Some salient features of EaseUS PDF Editor are listed below:
- It can delete and add the watermark and password to the PDF
- It is capable of managing PDF pages, including cropping, splitting, and merging.
- Converts PDF files into other files format
- Helps in signing pdf documents easily
- It can send the document via email
Price: It costs $29.95/Monthly, $49.95/Annual, $79.95/Lifetime.
Compatibility: Windows
The steps to remove the watermark using EaseUS PDF Editor are listed below:
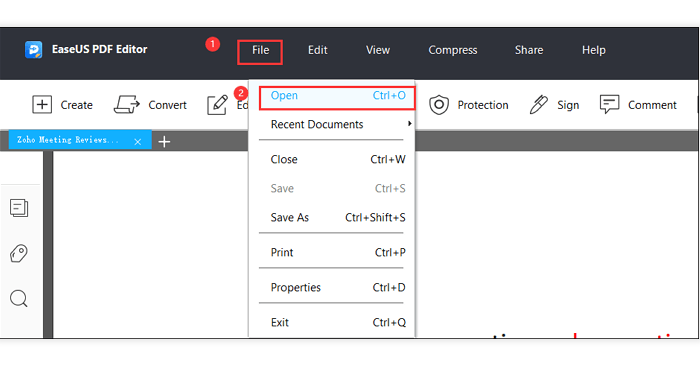
Step 1. Download and launch EaseUS PDF Editor in your system. On the lower-left corner, select "Open File" and import the PDF that contains a watermark.
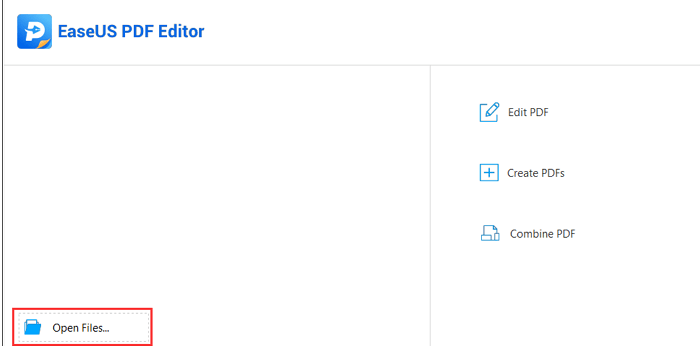
Step 2. You can also click on File and choose Open to select the PDF file with a watermark.
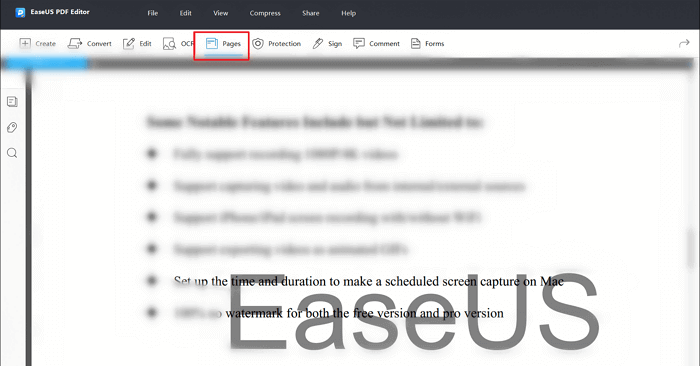
Step 3. After opening the document, select the "Pages" option.
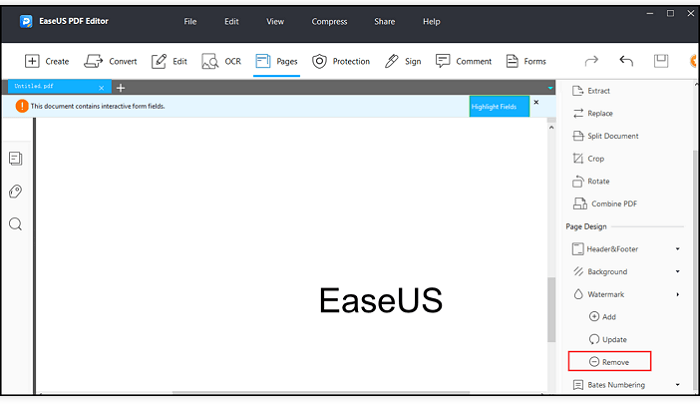
Step 4. In the page design, go to the "Navigate" button. A drop-down menu of three options will appear. Select the "Remove" watermark option.
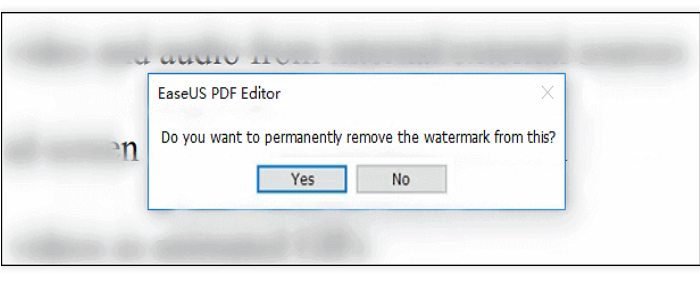
Step 4. A pop-up menu will appear. Click on Yes to remove the watermark. Now select the save option to save the edited File.
The watermark will now be removed by using EaseUS PDF Editor.
Wrapping up
To summarise the discussion, we now know how to remove the watermark in Word for both Windows and Mac. All of the above-mentioned methods are already in your system. You can select the methods that are most effective for you. However, we recommend that you use EaseUS PDF Editor. It's a handy tool that gets the job done quickly. Not only does EaseUS PDF Editor remove a watermark, but it also has a number of other essential PDF functions. Have a look at EaseUS PDF Editor for yourself.
Price: It costs $29.95/Monthly, $49.95/Annual, $79.95/Lifetime.
Compatibility: Windows