These days we heavily rely on USB drives as portable storage devices for our essential files and data. USB drives are incredibly compact, and manufacturers strive to make them even smaller with each development.
Yet, USB drives can pose security issues. As a result, you need a password-protected USB flash drive. To do this, encrypting your USB device with a password is the best option.
Hence, we demonstrate here with this article how to password protect a USB drive in four simple and effective ways.
4 Methods to Password Protect a USB Drive in Windows
If your information is not secure, anyone with access to it can misuse it. Losing a USB drive means misplacing your crucial data in seconds to make you a victim of data theft.
Using one of the following four methods, you can password-protect a USB drive in Windows. However, your choice depends on which one suits your needs and privacy requirements. Whichever method you choose, you can ensure that your most important documents and files will be protected.
Table of Content:
Method 1: Use VeraCrypt to Encrypt Your Entire Flash Drive
Method 2: Use EaseUS LockMyFile to Password Protect a USB Drive(Recommended)
Method 3: Save Individual Files With a Password
Method 4: Use WinRAR to Password Protect Your USB Drive
Method 1: Use VeraCrypt to Encrypt Your Entire Flash
VeraCrypt is a popular open-source encryption software program with many features to protect USB drives. It is possible to secure your USB drive using Veracrypt. Administrator rights are required to run VeraCrypt, though. The security system uses on-the-fly AES 256-bit encryption. 2GB is the maximum size of a drive in the free version.
The main characteristics of VeraCrypt are the complete encryption of storage devices (such as USB drives), automatic and real-time encryption, hardware acceleration, and plausible deniability. Protecting a USB drive can be a complicated process, but VeraCrypt makes it simple. Please follow the given instructions mentioned below:
1: Download VeryCrypt software and insert your USB into your computer/Laptop. Visit Site.
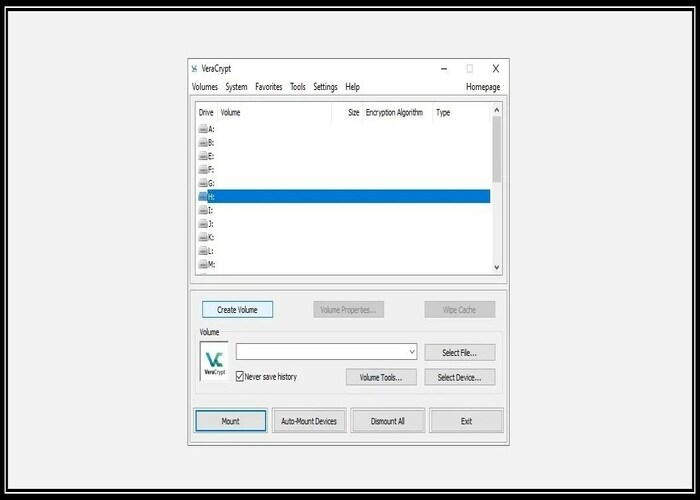
2: Now open the software. It will show you all the available drive letters. Select your USB Drive, and Click Create Volume option to begin.
3: The VeraCrypt Volume Creation Wizard will open. Select Encrypt a non-system partition/drive, and click Next to encrypt your entire USB flash drive.
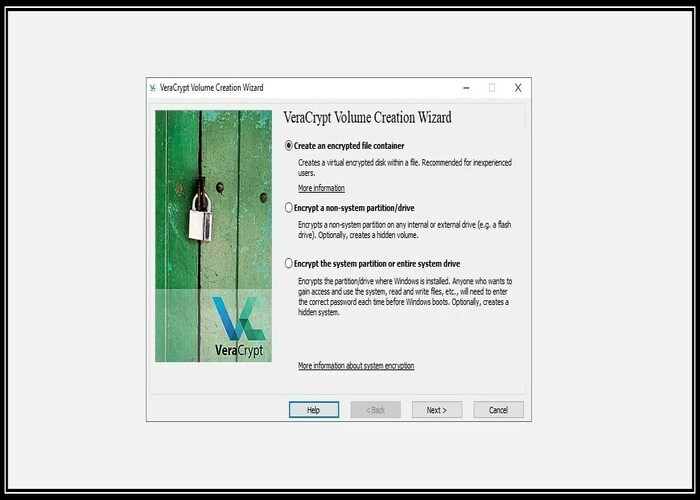
4: In the following step, select the Standard VeraCrypt volume.
Note: You can choose between the Standard and Hidden VeraCrypt volumes. We recommend you select the Standard VeraCrypt volume. When you use a hidden volume option, the risk of being forced to reveal your password is reduced. If you want to create a Hidden VeraCrypt volume, you'll need to format the entire USB drive.

5: Click Select Device, select your USB drive, confirm OK, and click the Next button.
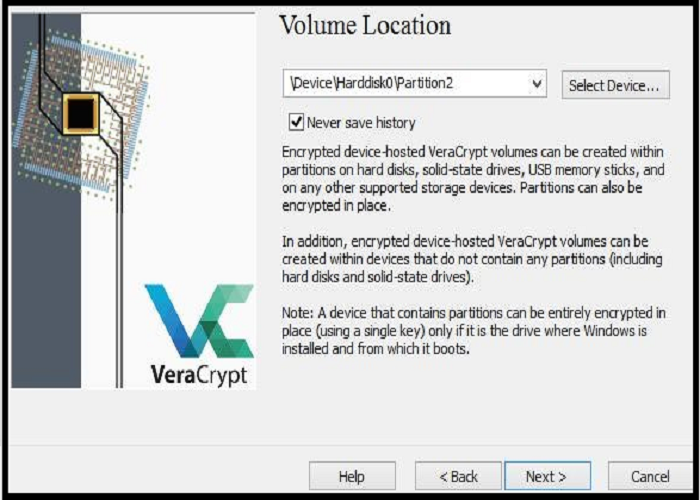
Note: VeryCrypt will pop a warning that shows you to make a backup of the data if something goes wrong during encryptions.
6: Select Encrypt partition in place, then click next.
7: Now select the Encryption Option, or also you can go with the default settings, which are given. Select Next.

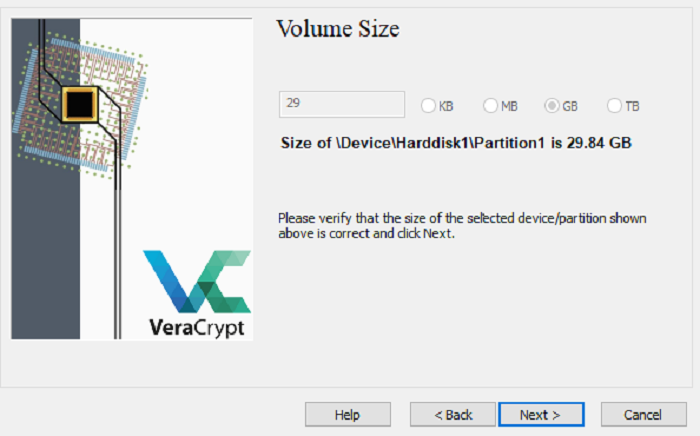
8: VeraCrypt will show you the volume size. Confirm the right size and click Next.
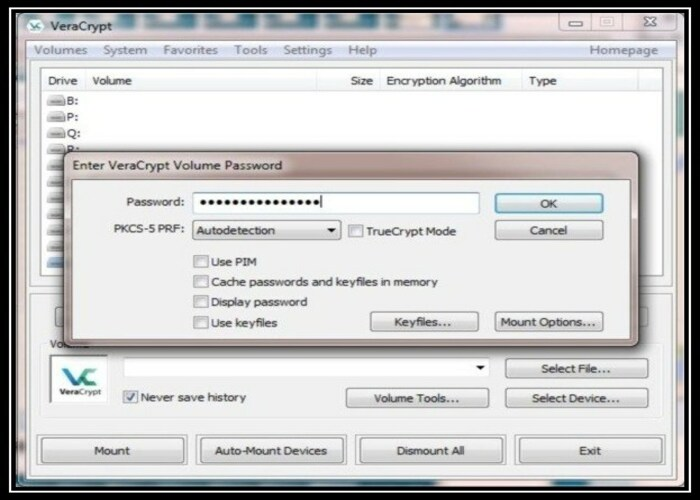
9: Create a secure password or key for the drive. Confirm the password and click next.
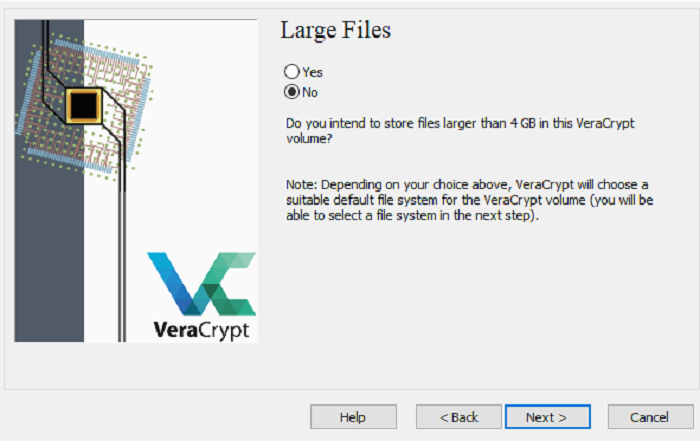
10: If you plan to store files over 4 GB, select Answer (Yes/No). Now click Next.
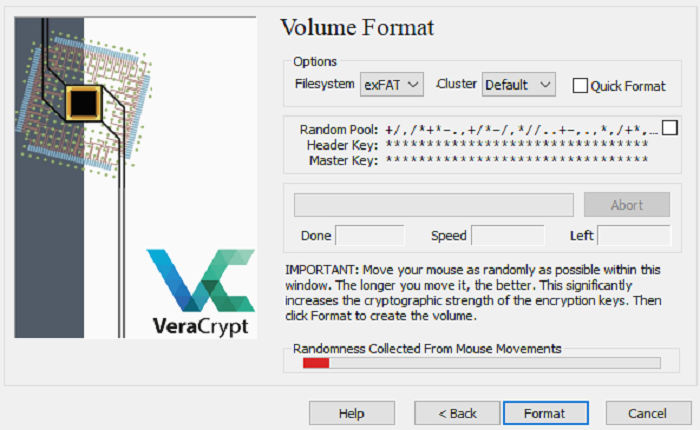
11: VeraCrypt will randomize the cryptography as you move the mouse randomly across the window. When the bar turns green, click Format.
Method 2: Use EaseUS LockMyFile to Password Protect a USB Drive (Recommended)
If you want to protect the files of your USB drive in Windows, you can use EaseUS LockMyFile. It is a safe and easy-to-use USB drive protection software. To keep your USB data safe, it can hide and lock files or folders using Advanced Encryption Standard (AES) 256-bit keys.
With EaseUS LockMyFile, you can easily password-protect your USB Files.
Price: It starts $29.95/Monthly.
Compatibility: Windows 2000/2003/XP/Vista/7/8/10/11
Follow these easy Five steps to know how to password protect a USB drive to use this advanced and robust file protection tool.
Step 1. Simply download and install this file lock and encryption tool.
Step 2. Sign up with a valid email address and a license code.
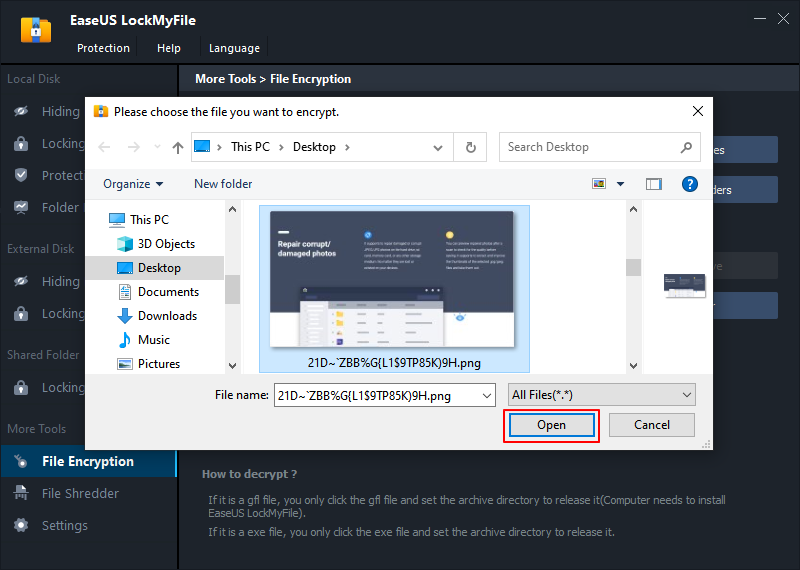
Step 3. Select File Encryption from the More Tools menu. Add Files or Add Folders will be displayed.
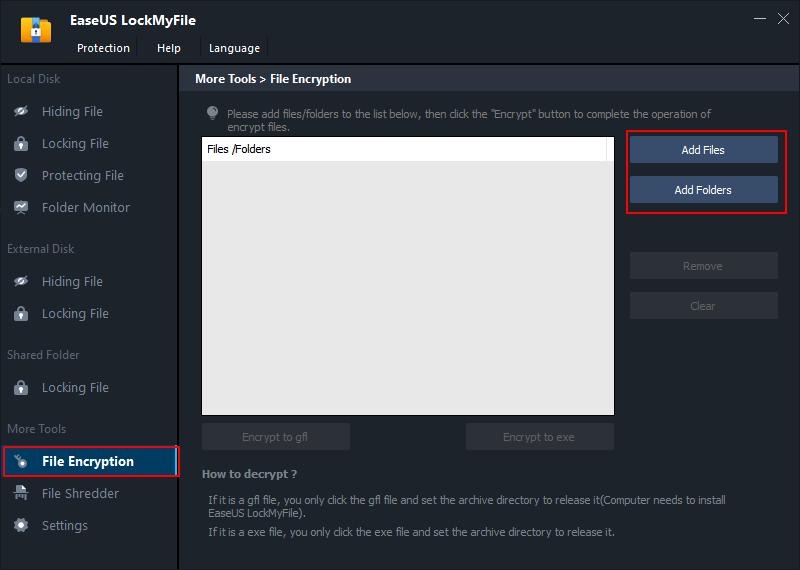
Step 4. Now select the files or folders from the USB you want to encrypt. Click on the open button.
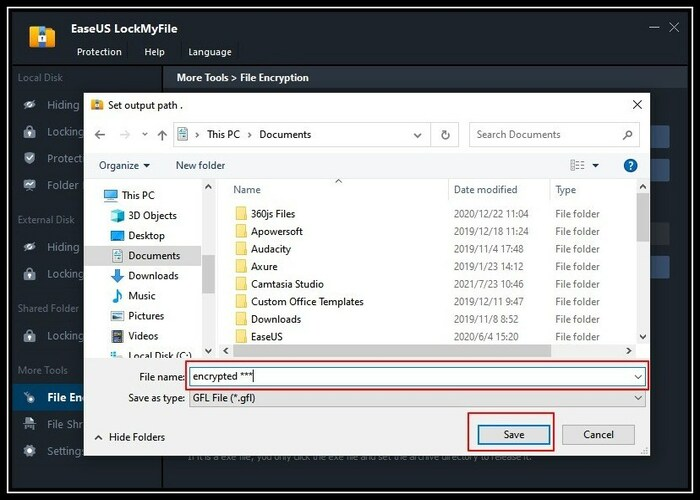
Step 5. Choose your desired encryption Mode: Encrypt to gfl or Encrypt to exe.

Step 6. Choose a location on your computer, rename the encrypted file or folder, and click Save the encrypted files/folders.
Method 3: Save Individual Files With a Password
If you want to encrypt a file or folder, follow these steps:
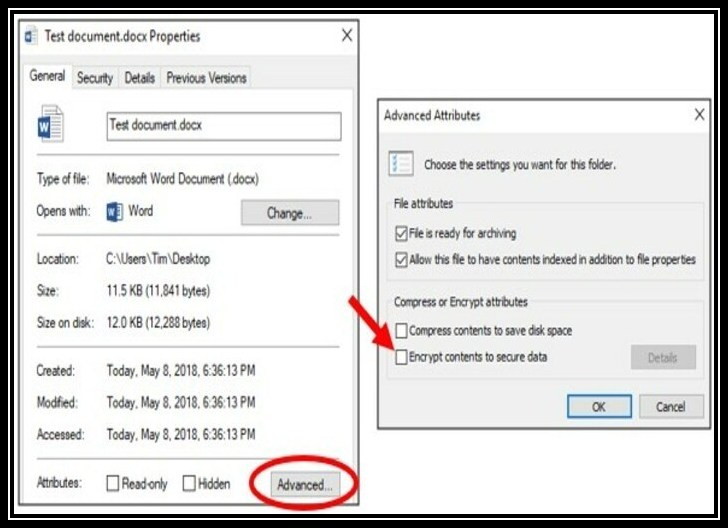
- First, select the file or folder you want to encrypt.
- Right-click the chosen item and select Properties.
- From the General tab of the pop-up box, click the Advanced button.
- On both windows, check the "Encrypt contents to secure data" checkbox. Click OK.
- Click OK once again, and then confirm the changes.
After you finish the process successfully, you will see a small yellow lock on the protected file.
Method 4: Use WinRAR to Password Protect Your USB Drive
WinRAR is a free software file archiver that works with the Windows operating system. It, like WinZip, comes in handy when compressing large amounts of data.
You can also use this to protect your data. This is especially true if you want to encrypt individual files or folders rather than an entire USB Drive.
Following are the steps you can take to protect USB using WinRAR.
Step 1: Download WinRAR on your computer. Visit Site.
Step 2: Connect your USB to your system and open your USB drive.
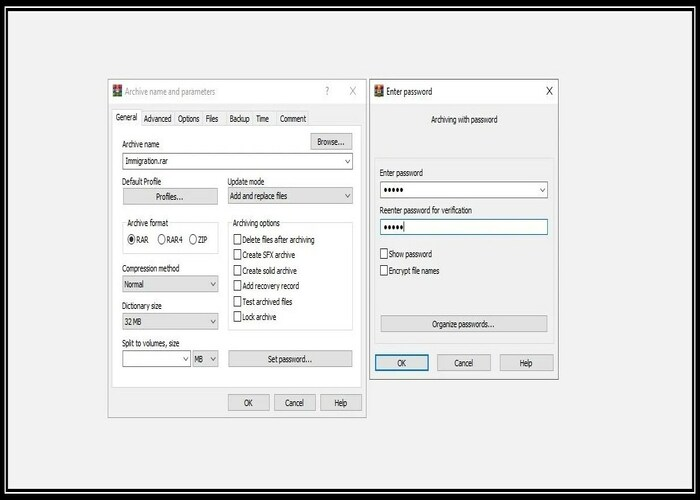
Step 3: Right-click on the file you want to protect in a USB. Now click on add to the archive.
Step 4: In the next window, Under General Tab. Now give a name to your file and save it on USB and click on the set password and encrypt your file.
Final Words
These are the easiest and most effective ways to learn how to password protect a USB drive in Windows. The entire USB drive can be encrypted or password-protected, depending on your preferences.
EaseUS LockMyFile data encryption tool is the best option for every individual need. It provides the effortless and most advanced encryption options to protect files. EaseUS LockMyFile hides and makes unsearchable all your folders and protects files, folders, and drives from being edited or deleted.
The market is full of encryption tools for encrypting large files, but EaseUs comes first on the list, and then WinRAR. You can use these tools to secure your USB drive and prevent data breaches and other security problems.
Price: It starts $29.95/Monthly.
Compatibility: Windows 2000/2003/XP/Vista/7/8/10/11