You would want to record your computer's internal sound for several reasons. You could wish to record the audio from a video, your online calls, and the background music from your games. Whatever the reason, there are some practical software solutions for recording internal audio on Windows PCs.
The following guide looks at one of the most popular recording apps, Audacity. This program allows you to capture sounds from your microphone and your PC. The guide also teaches you about the different audio recorders available for Windows 10.
How to Record Computer Audio with Audacity
Audacity, a multi-faceted media tool, allows you to record audio from the web (Skype, WhatsApp, or others) or store system sounds, in addition to its core role as a video player. However, before capturing this audio, you must first examine and adjust the Sound settings on your laptop. However, a few setting changes, and you're ready to go.
Using Audacity on a Windows PC to Record Audio
The advantage of Audacity for this task is that it provides an easy-to-use option for retrieving sound from your system. You don't need to fiddle with any sophisticated settings because there is an easy-to-find option for getting and recording sound from your Windows 10 PC.
Step-by-step guide:
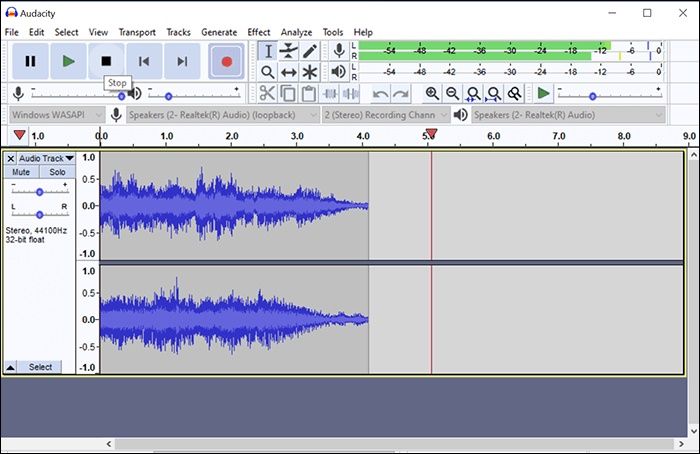
Step 1: After downloading and installing Audacity, run the program on your computer. Select "Windows WASAPI" from the first dropdown menu.
Then, select your computer's speakers from the dropdown menu next to the microphone icon. This will be the audio source for your recording.
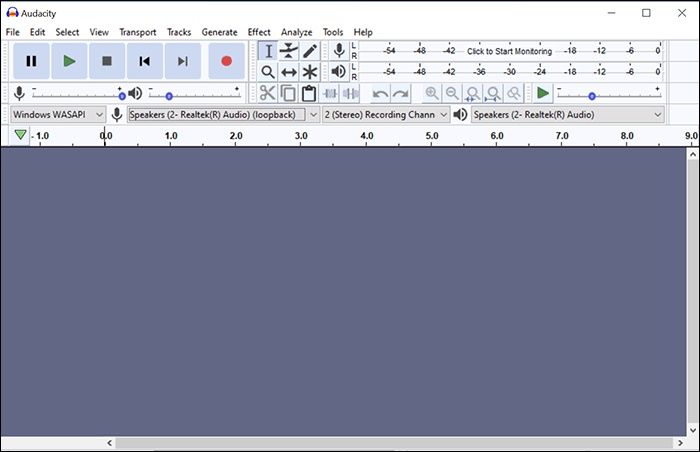
Step 2: Click the red recording icon to begin capturing sounds from your system. On your screen, you will observe the live recording process.
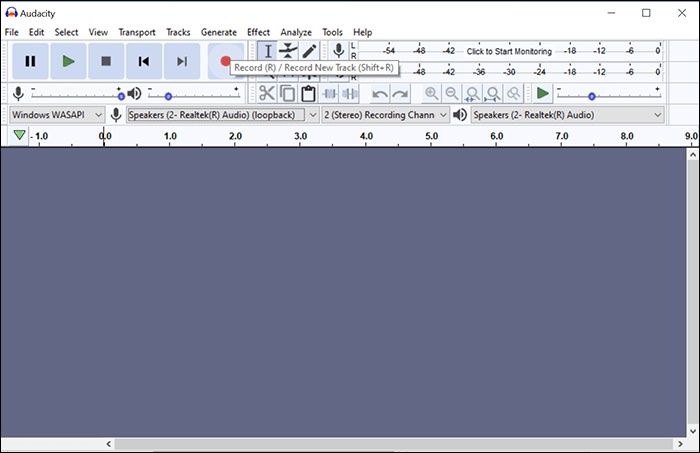
Step 3: Stop audio recording from your computer.
Step 4: Save Your Computer Audio Recording.
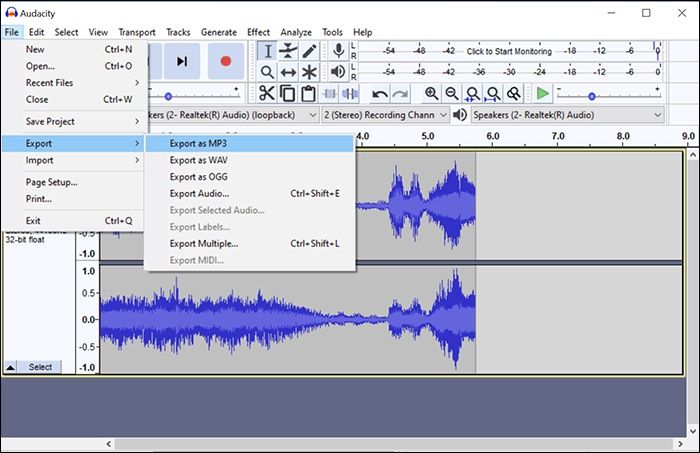
You're ready to go. Audacity has successfully recorded and stored your Windows 10 system's internal sound recording.
Using Audacity on a Mac to Record Audio
If you own a Mac, you may go to the Audacity website and download the Mac version of this audio recorder. Then, use the following guide to record Mac computer audio in Audacity.
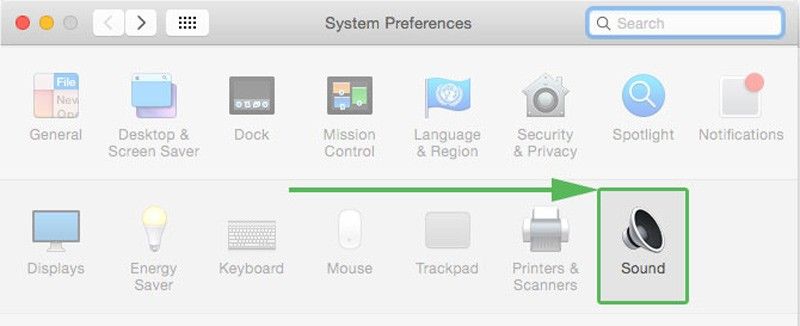
Step 1: Configure your Mac's sound settings.
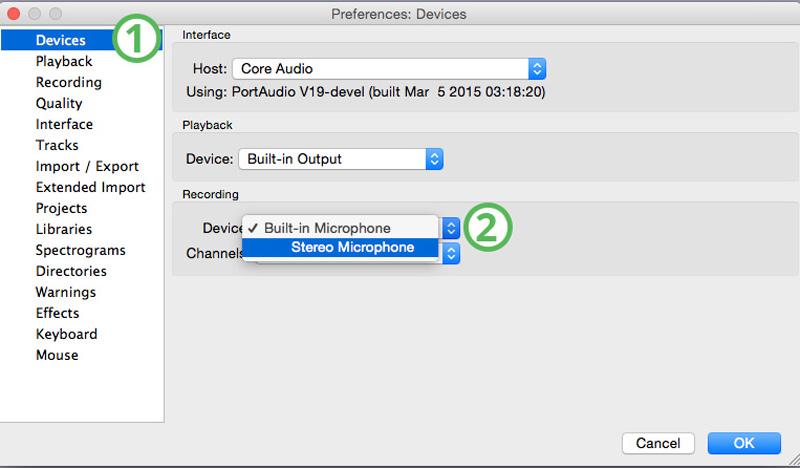
Step 2: Configure Audacity to identify the microphone.
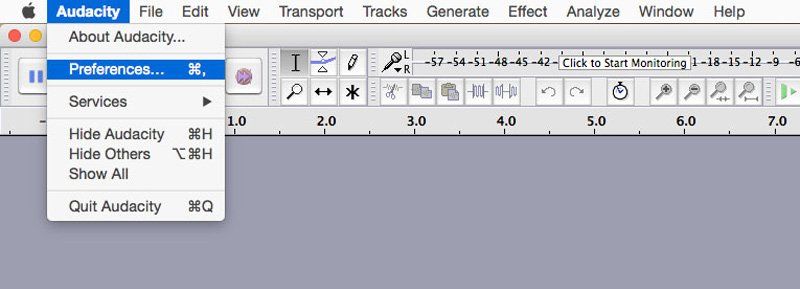
On the left, choose "Devices," then ensure the selected microphone is configured as your Mac microphone.
Step 3: Record audio from your Mac computer.
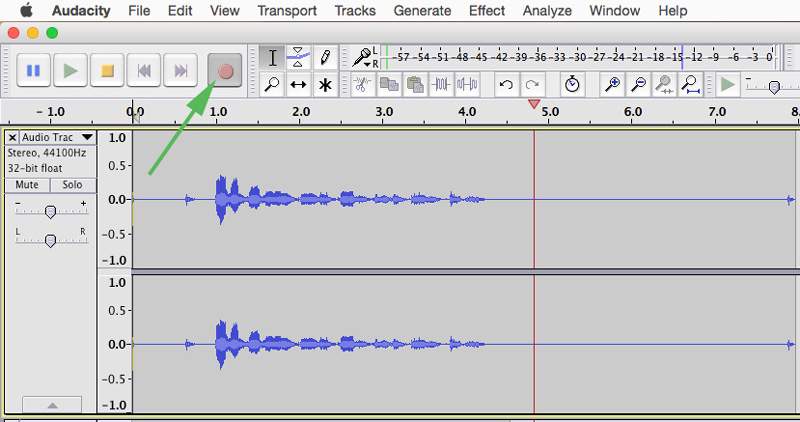
After you've finished recording audio on your computer, you can listen to it by clicking the "play" button. It will play the captured audio through the speakers or headphones on your computer.
Step 4: Export the recorded audio.
How to Record Computer Audio with Other Recorders
Method 1. EaseUS RecExperts (The Easiest Solution)
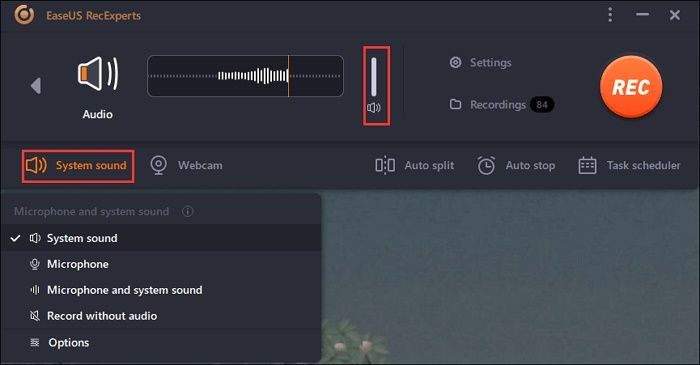
EaseUS RecExperts is a basic, easy-to-use screen recording program for Windows and macOS systems. It is a recording utility with many useful features, such as capturing specific regions of a screen and the entire screen, including webcam outputs and external microphone sound in any recordings. It also can automatically make recordings on a schedule, set automatic recording stop times, and perform basic video editing tasks, all from within a single app!
Key Features
- Full support for Windows 7, 8.1, 10, and 11
- Full support for macOS (10.13 and later)
- Full-screen and screen region recording support
- Include webcam audio and video in any recordings.
- Automatic (schedule-based) recording functionality
- Automatic file splitting and auto-stop recording functionality
- Support for audio-only recordings and exports
Price: It starts $19.95/Monthly.
Compatibility: Windows and Mac
How to use:
Step 1: Launch the EaseUS RecExperts software on your computer.
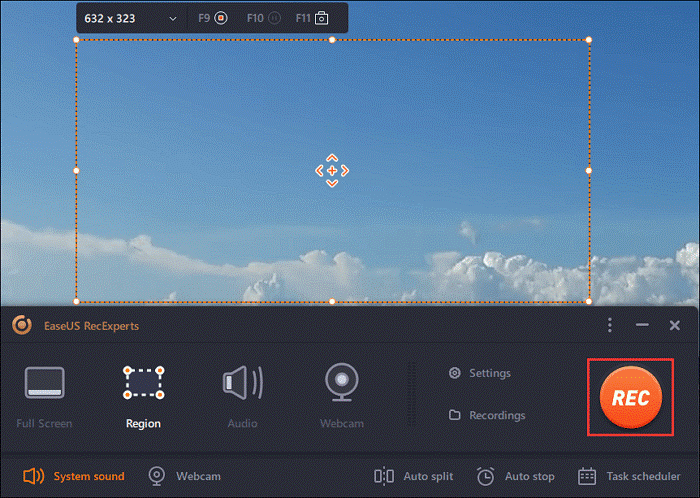
Step 2: You can either click the "Full Screen" option (for recording the whole screen) or select "Region" (for customizing the recording area). Upon that, choose the recording area with your mouse. If you want to record video with audio, you need to click the "Sound" icon on the bottom-left corner.

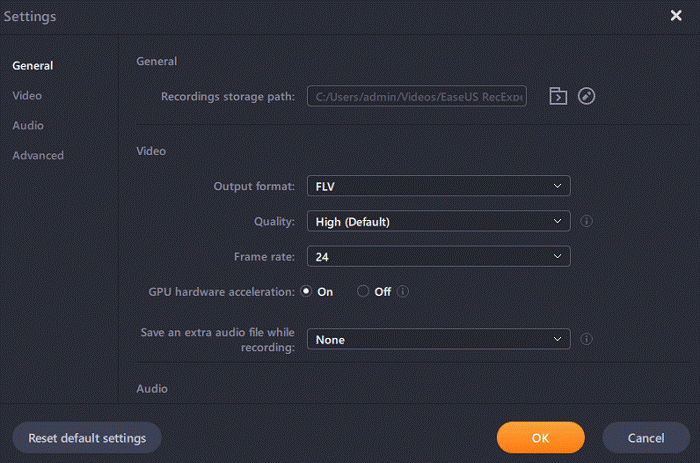
Step 3: Click the "Settings" button to apply more options and select the corresponding specification based on your needs. When finished, click "OK".
Step 4: Hit the "Sound" button on the bottom-left corner and open the system or microphone sound if you prefer to record audio and screen simultaneously. With that, select "OK" to ensure the audio options.
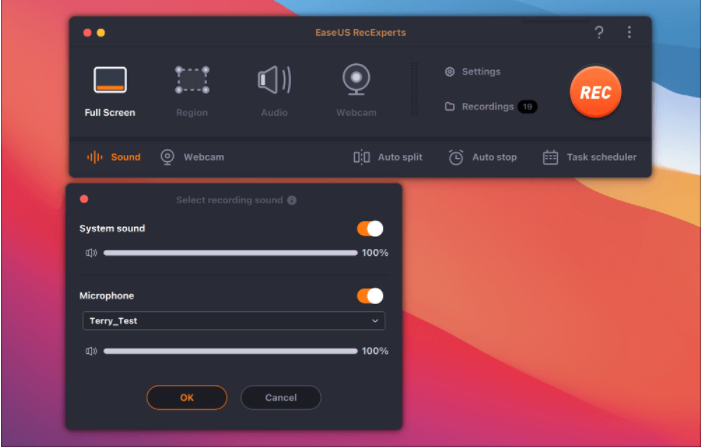
Step 5: Click the "REC" button to start recording. And click the red button on the timing bar to stop recording when it finishes.
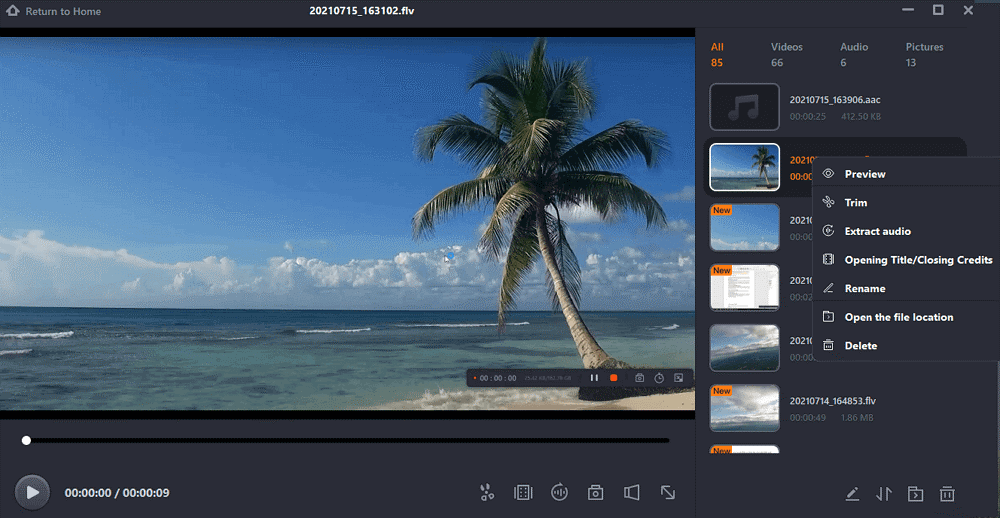
You can find the recording videos in the "Recordings" which is located in the main interface. Select the video and edit it as you want.
Method 2. VLC
VLC is a popular media player that allows you to record audio from your computer. Since this application is free and open-source, you can use it to record conversations at your home and your place of employment without any limitations.
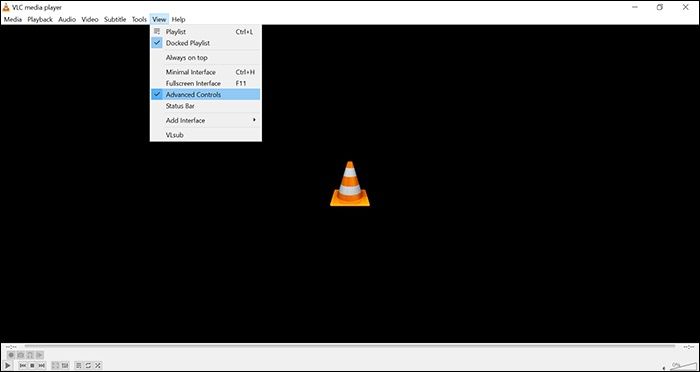
Step-by-step guide:
Step 1: Turn on the recording options
Step 2: Set up the recording source
Step 3: Begin and end the computer sound recording
You can start recording computer sounds by hitting the recording button on the program's bottom bar. Simply click the stop button to end your recording when you're done.
Method 3. Icecream Screen Recorder
Although Icecream Screen Recorder is a screen recording tool with many functions, one of them allows you to record audio from both your microphone and the computer's sound. You can quickly and simply use this capability to create as many and as long as you want computer audio recordings.
The ability to select an audio bitrate for your recording is one of the features you'll like. Many professional recorders will find this quite handy.
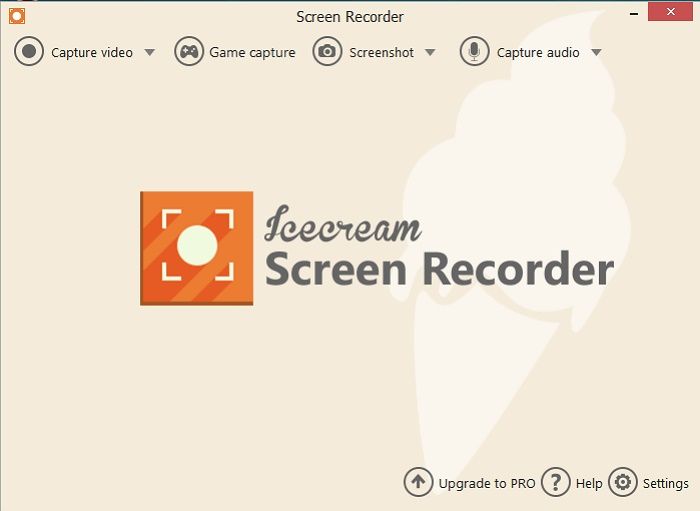
Step-by-step guide:
Step 1: Decide What to Record
Step 2: Determine the Bitrate for Your Recording
Step 3: Capture Your Computer's Audio
Step 4: Locate Your Computer Sound Recording
Conclusion
If you prefer Audacity, the instructions above should show you how to use it to record your computer's internal audio. EaseUS RecExperts is the program to use if you want greater freedom and a more current UI. The other tools also do a decent job of recording.
Price: It starts $19.95/Monthly.
Compatibility: Windows and Mac
