Apple devices are distinguished from their competitors by their uniqueness. Apple maintains a tight environment of apps and devices, and iMessage is a key component of it. This is why non-Apple devices, such as Android smartphones and Windows laptops, have no official means to access iMessage.
It can be inconvenient to unlock your iPhone every time you receive a new iMessage notice while you work on a Windows device all day. Fortunately, despite the fact that Microsoft and Apple programs rarely work well together, you may use iMessage on Windows to save time.
There are a variety of ways to run iMessage on a Windows 10 PC, so let's look at the top ones and see which one is ideal for you.
What is iMessage?
You can use iMessage on your iPhone, iPad, Apple Watch, or Mac laptop for free and secure messaging. iMessage was first introduced in 2011 with the release of iOS 5, but it has since allowed users to transmit Messages, Videos, Photos, and Stickers to other Apple devices via the internet.
iMessage is not the same as the texting program that comes pre-installed on your phone. iMessage, often known as an over-the-top (OTT) program, does not require cell data to function; all you need is an internet connection. Furthermore, if you send messages through Wi-Fi, there is no charge for sending the message.
It's vital to keep in mind that iMessage is an Apple-only messaging service. If you try to send an iMessage to an Android device, your phone will instead send it as an SMS (green message) (blue).
If you have both Wi-Fi and a paid data plan through your phone provider, you'll most likely switch between iMessage and SMS depending on the following factors:
- If you're using a Wi-Fi hotspot to access the internet.
- If you've got a data plan,
- If you're exchanging messages with other Apple users
How to Get iMessage on Windows 10 PC
In theory, iMessage isn't compatible with Windows 10. Instead, you can utilize Windows-compatible remote access programs to run iMessage. You won't have to worry about Windows and iMessage getting along.
Method 1: Using Chrome Remote Desktop
By installing Chrome Remote Desktop, you can use iMessage online. Your Windows PC, a Mac as a host, and an iPhone as the source messaging device are all required. The plan is to leave the Mac system up and running while logging in from a Windows 10 PC.
This strategy is particularly beneficial if you don't have access to your Macbook and need to check your messages. Even if you close the Google Chrome browser on your macOS device, the connection to your Macbook remains open.
Step 1: Download and install the Google Chrome Remote Desktop Remote Message Client Extension for Windows. If you don't already have Google Chrome installed, you'll need to do so first. Visit Site.
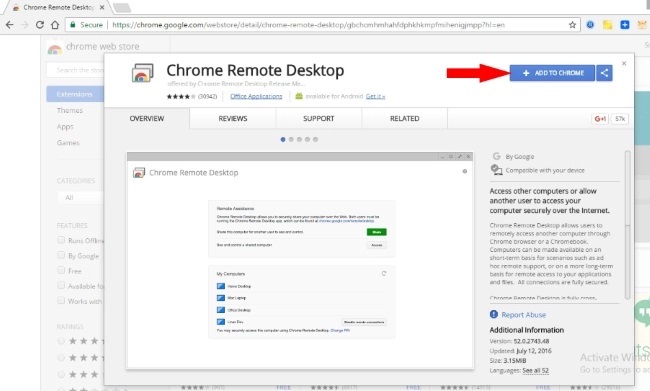
Step 2: Select Add to Chrome and Add, then wait for the Chrome browser to download and install. To do so, go to the Browser Apps area and select Launch app.
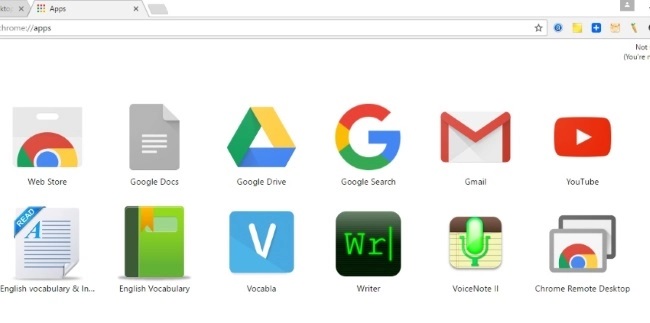
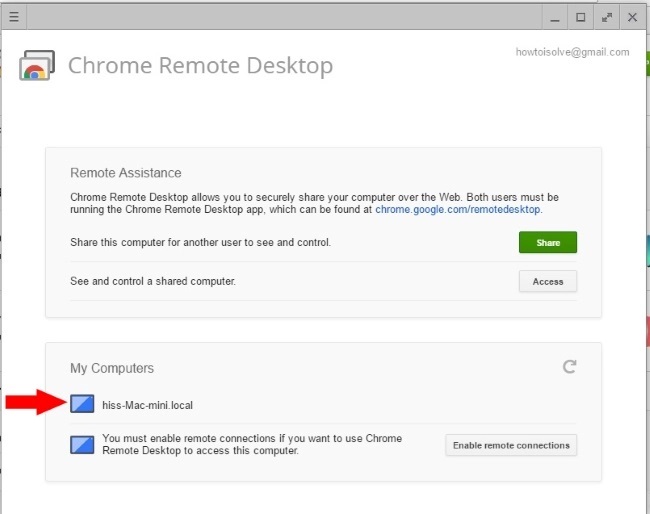

Note: You must input your Gmail account here (Email & Password). Wait for the remote desktop to start downloading; it will appear on the screen automatically.
On Mac
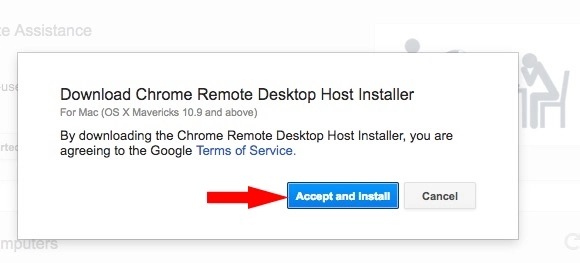
On your Mac, follow the same steps. Browse using Google Chrome, then install and open Remote Desktop.
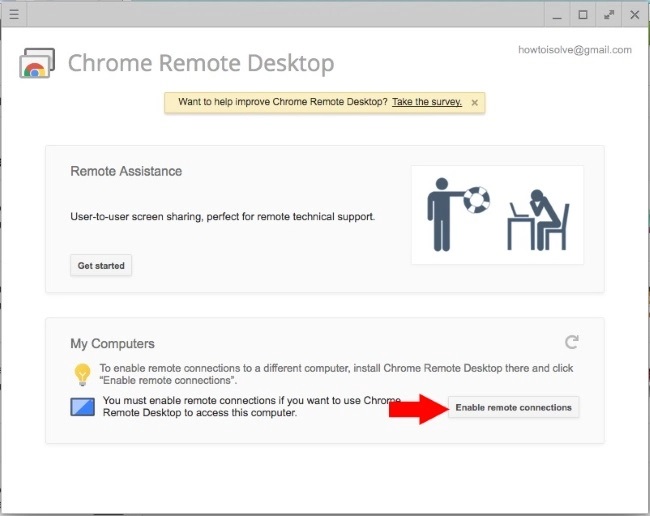
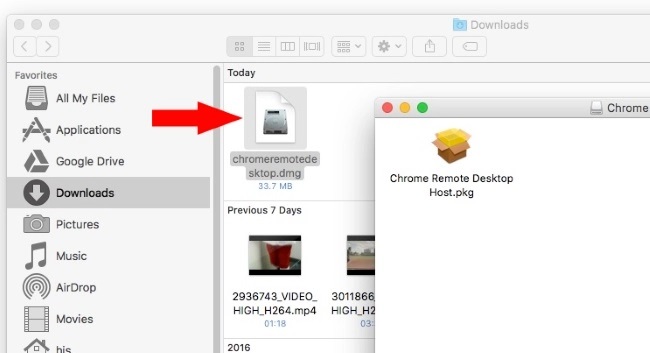
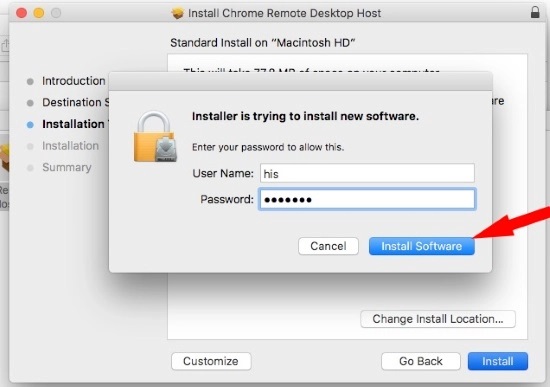
In the Mac download folder, look for the remote desktop setup file. Run and install by following the on-screen instructions.
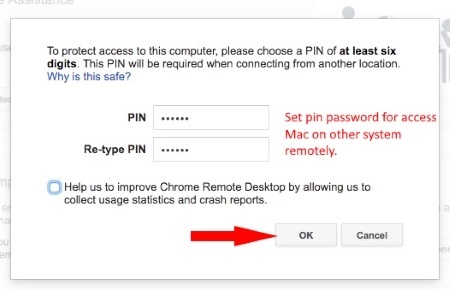
Set up a security pin for personal usage or permission for the Windows access screen.
Now, on your Windows machine, locate your remote Mac and click it to begin screen sharing.
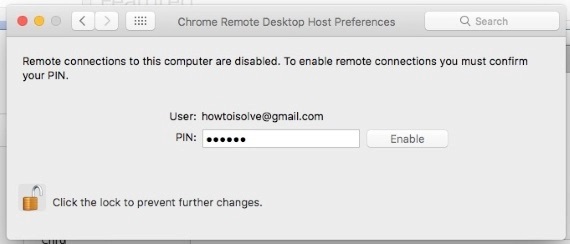
Open iMessage and begin conversing as you would on a Mac or iPhone/ iPad.
Method 2: Using iPadian Emulator
One of the greatest platforms for using iMessage on a Windows PC is the iPadian emulator. The tool is completely free and gives you access to any iOS apps that are banned, including iMessage.
To begin, go to the website and download the iPadian Emulator for Windows. Visit Site.
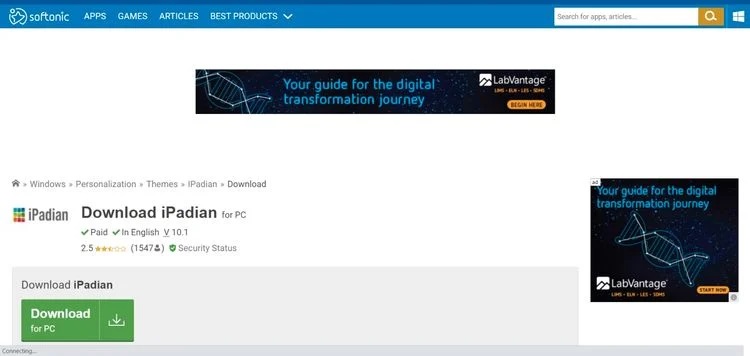
Once the installation is complete, start the emulator. To continue with the installation, check the box to accept all terms and conditions. After that, the iPadian app will launch. It should be noted that it only works in full-screen mode.
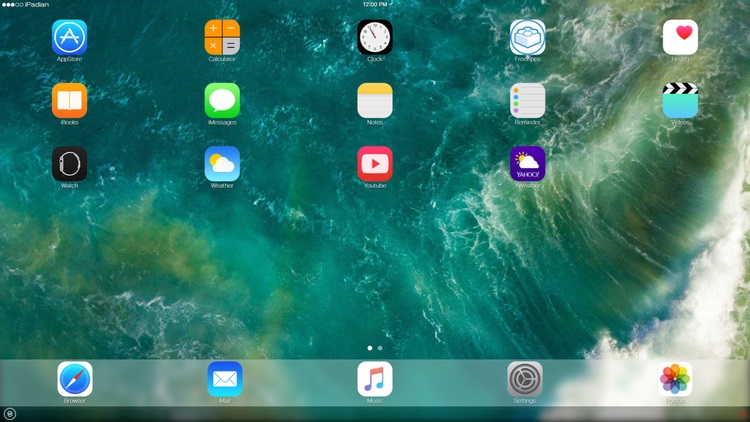
Now, in the search field, type iMessage, and you'll be able to use the app's unique capabilities on your Windows PC.
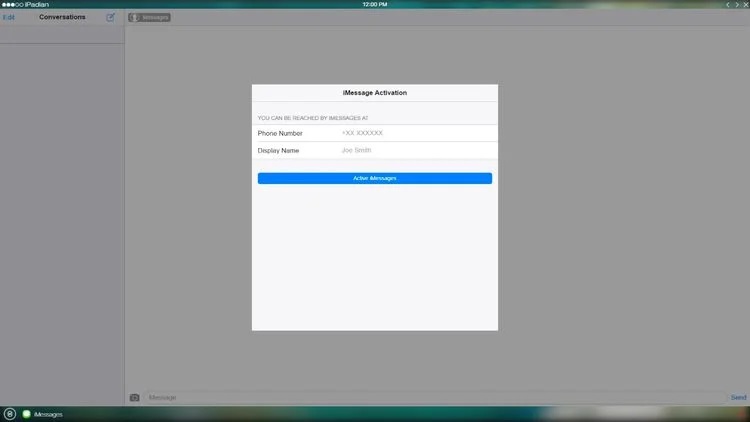
How to Use iMessage on Windows 10
1. Click the green-and-white icon in your Dock to open the Messages app. You may find it in the Applications folder or by searching for it if it isn't already there.
2. Sign in with the same Apple ID that you use to send iMessages on your iPhone. You may also be required to submit a two-factor authentication code, depending on your account's security settings.
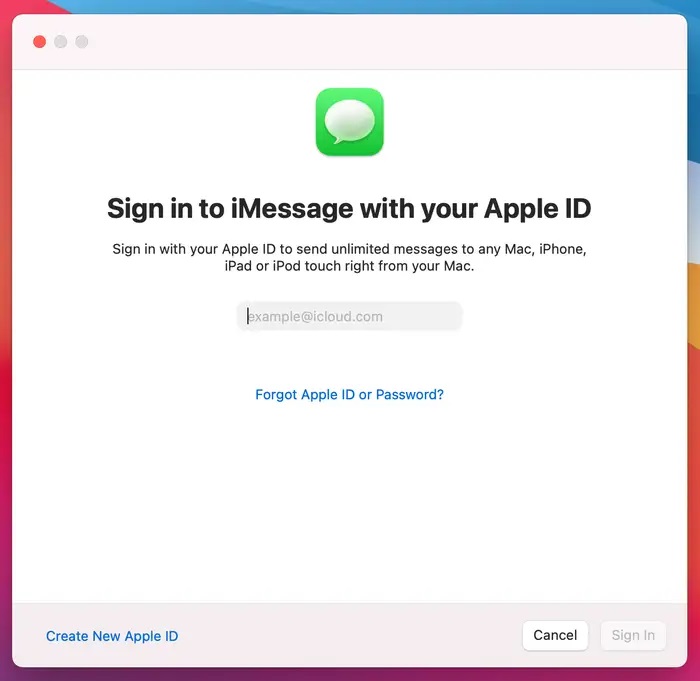
3. If you have the phone number or email address of the person you wish to text, you can begin sending text messages immediately after logging in.
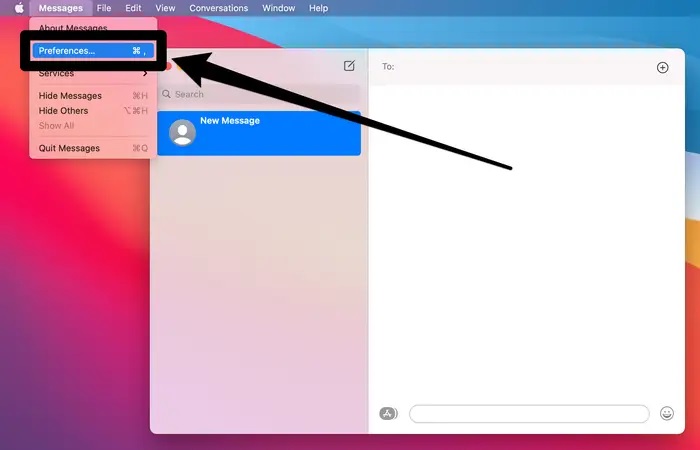
4. Select Preferences from the Messages menu bar at the top of the screen if you wish to see your existing chats and have all your text messages sync between devices.
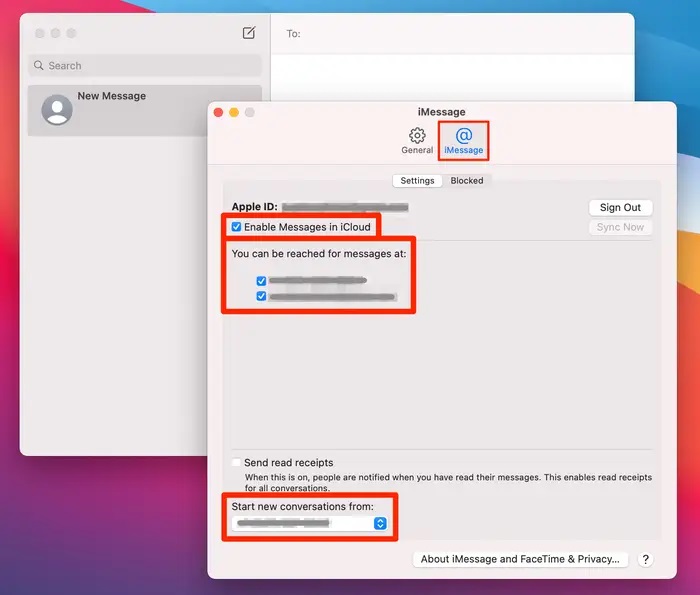
5. Toggle on Enable Messages in iCloud under the iMessage tab. If you don't see this option, it indicates you've already enabled it someplace else, so you're good to go.
6. You'll find all of the phone numbers and email addresses that people can text you at under the heading You can be reached for messages at. On this Windows PC, check the boxes next to the people you want to receive texts from.
7. Finally, select which of those numbers/addresses you want your Mac's text messages to be delivered from the Start new conversations from the drop-down menu.
Conclusion
We expect that Apple will offer a cross-platform version of iMessage for all smartphones and operating systems in the near future. We can access our iMessages and discussions from anywhere, even work, with an online messaging service.
Unfortunately, that day has not yet arrived, therefore we must rely on workarounds such as Chrome Remote Desktop.
