Locking your keyboard can be quite helpful in stopping any unwanted operator, whether it be children, pets, ignorant family, coworkers, or a friend who unintentionally clicks the keyboard. Knowing how to disable keyboard in Windows will help you avoid all these things. For instance, you might wish to disable the keyboard in Windows 11/10 when watching films on your PC with a child to prevent them from fast-forwarding or pausing the video by clicking the keys.
Possibly, the keyboard on your laptop stops working. Because every single peripheral is hardwired into the laptop, unlike desktop computers, most laptops cannot simply disconnect and swap out any peripheral at will. As a result, the laptop owner would wish to disable the laptop's built-in keyboard in situations like these and many others to prevent accidental or unauthorized keystrokes from being recorded on the machine.
How To Disable Keyboard In Windows 11/10
There are two secure ways to disable your laptop keyboard in Windows 11/10: disabling it in Device Manager or disabling the keyboard port service.
Another method to disable a keyboard in Windows is to prevent the keyboard from functioning by forcing it to use a device driver that it cannot use. Although it is not something we advise, it is possible if the other two approaches fail.
Method 1: Use Device Manager
The safest and most straightforward method for permanently shutting off a laptop keyboard, although it might not be compatible with all models.
In Device Manager, to disable a device:
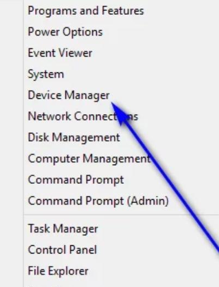
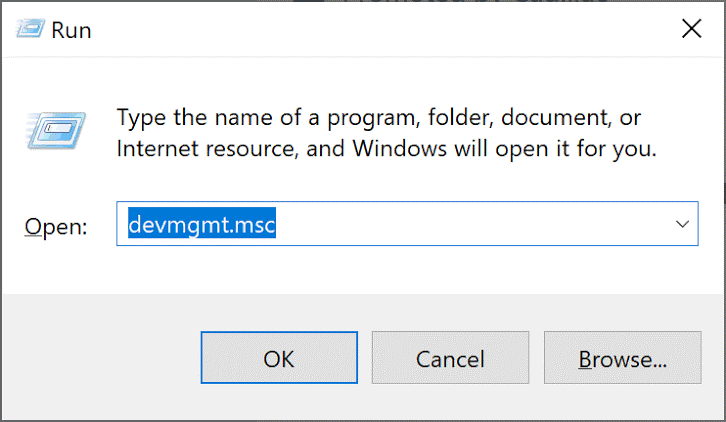
Step 1: The device Manager should be opened. You can launch the device manager in two ways: by right-clicking the Start Menu to access the WinX Menu and selecting Device Manager or pressing the Windows logo key + R to open a Run dialog box and typing devmgmt.msc into the box, then press Enter to enter the Device Manager.
Step 2: Locate and double-click the Keyboards section in the Device Manager to enlarge it.

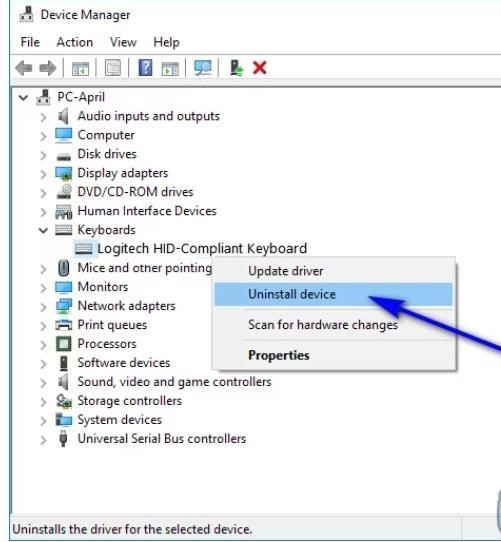
Step 3: The Keyboards section will provide a list of the keyboards currently connected to your computer. Right-click on the entry for the laptop's built-in keyboard to choose it.
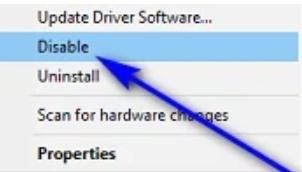
Step 4: Click Disable in the ensuing context menu. Then, select Yes in the following dialog box to confirm the action and turn off the laptop's built-in keyboard.
Do not fret if the ensuing context menu does not include a Disable option; instead, you will see an Uninstall option. By clicking on this, you can uninstall the drivers for the built-in keyboard rather than just disabling it. Then, when a dialog box requiring you to accept the action appears, click OK to give your approval and uninstall the drivers for the built-in keyboard.
Be cautious if you delete the drivers for the laptop's built-in keyboard rather than disable it because Windows 11/10 may do so after identifying the keyboard. If that occurs, you will need to return to the Device Manager and remove the laptop's built-in keyboard drivers.
Method 2: Disable the Service that controls the PS/2 port
Most laptop keyboards are internally connected through that port; therefore, if the above method to disable the laptop’s keyboard didn't work for you, you might also try disabling it in an alternative way, through the port that handles data and input for PS/2 Ports. As soon as we turn off the service, nothing will be in charge of that port's data. Thus, we'll turn off the power.
Follow the instructions below to disable the service that manages the PS/2 port.
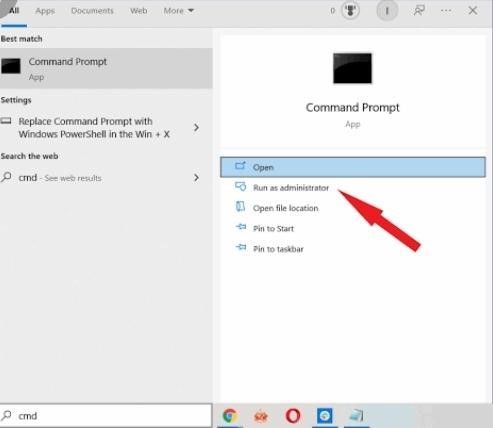
Step 1: Search for Command Prompt in the search bar and select "Run as administrator".
Type the following command:
- sc config i8042prt start = disabled
Step 2: Your laptop keyboard shouldn't function once you restart your computer.
Step 3: You can use the following instruction if you ever wish to re-enable the keyboard:
- sc config i8042prt start = auto
How To Disable A Specific Key On Your Keyboard On A Laptop
Perhaps the keyboard on your laptop is automatically pushing keys, or some of your keys are not functioning. In this situation, you can quickly remap or disable the particular keys on your computer using the methods listed below. The following techniques will help you understand how to disable keyboard on a laptop, to remap or permanently disable specific keys.
Method 1: Using PowerKey Software.
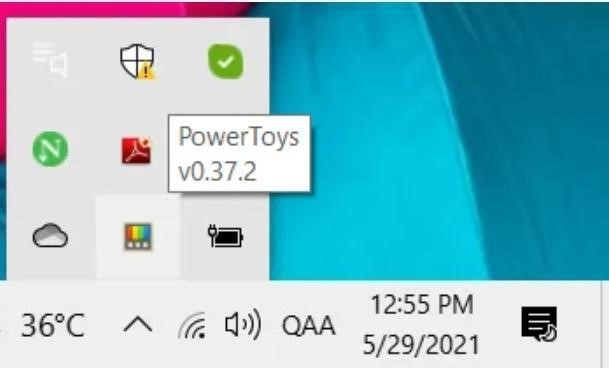
Step 1: You must use Google search to obtain the PowerKey program. Using it is free. Any Windows version, including Windows 7, Windows 8, Windows 10, and Windows 11, can be utilized with this lightweight program. You can also use the Taskbar to launch it.
Step 2: Click on the settings after launching the PowerKey window. Doing this will display the primary program interface to you.
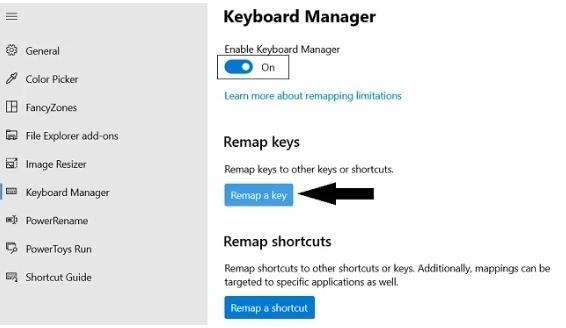
Step 3: Select Keyboard Manager from the list of available options on the left. Make sure the Keyboard Manager is turned on here. Next, select Remap a key from the Remap keyboard menu.
Step 4: This will bring up a new tab. Click on the "+" symbol to stop a key from working.
You now have the option to choose a key and the output you want that key's functionality to be remapped to because this tool is typically used to remap a key. Type a key on your keyboard to choose it.
The Pg Dn (Page Down) key will be disabled in this situation. Any key, including an Alphabet, a number, or a key from the desktop keyboard like Ctrl, Alt, etc., can have its functionality restricted from this point.)
Step 5: Choose Undefined from the Mapped and then choose the key you wish to disable (for us, that's Page Down). Type the letters "U" and "N," and the choice will display if you have trouble finding it in the confusing array of potential keys.
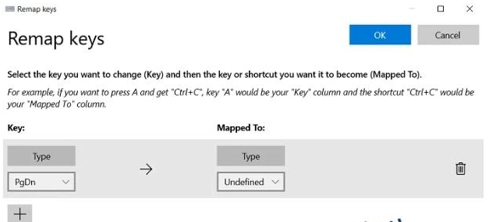
Step 6: Pressing "Ok" once the warning box appears will save these adjustments. The functionality of the key of your choice has now been successfully turned off. Click the trash can symbol and hit Ok once more to reverse this action.
To disable a Windows keyboard shortcut, utilize the "Remap a shortcut" option and follow the same procedures above.
Method 2: Using SharpKeys.
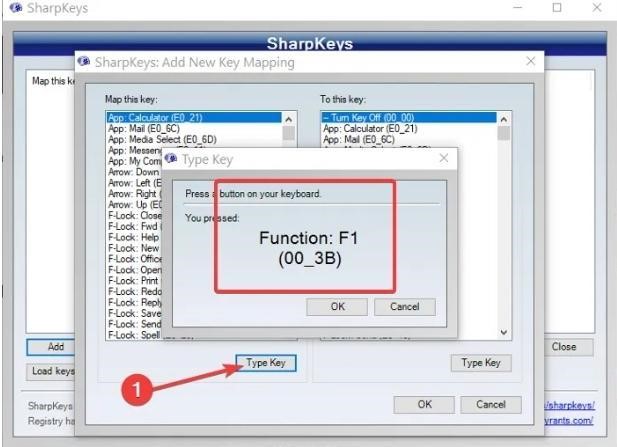
Try using SharpKeys if you're searching for a solution compatible with all versions of Windows, not only Windows 11/10. Although it provides the same service as PowerKey Keyboard Manager, I believe its user interface is less engaging.
Final Word
Locking your keyboard before leaving your desk is a valuable security precaution. We looked at two solutions for disabling the keyboard in Windows. Utilizing the device manager is the most practical method. Alternatively, you might need to disable the PS/2 port service.
We have also been able to make you understand how to disable keyboard on the laptop using third-party software. We hope you can now easily disable a keyboard shortcut or key of your choice. Thus, you can deactivate any key on your laptop, including Home, Insert, Windows, F1 Help, and others.