Reinstalling Windows can be both time-consuming and full of inconvenience. However, some events may lead to unavoidable situations where it becomes mandatory to reinstall Windows. For example, suppose you accidentally deleted some critical files, and it is crucial to get them back, or your registry got corrupted, then reinstallation can help you out.
Some unpleasant situations include circumstances where your PC has turned sluggish or showing some performance issues so that reinstallation can sort it out. Reinstallation also assists the users in cleaning up the system along with improving its overall functionality to ten folds.
In these cases, reinstallation of Windows helps remove any malware, virus, adware, or junk and also facilitates the users with the restoration of their PC to a new state. But the question arises of how to reinstall windows 10 effectively and efficiently without creating a further hassle for yourself. Here we are providing you with a complete guide.
Preparation You Need to Do Before Reinstalling
Before reinstalling Windows 10, you must prepare your PC and make a note of certain essential things as below:
- Documenting passwords, settings, and login IDs are necessary if you do not wish to see them go after reinstallation.
- Export address books, emails, cookies, bookmarks, and favorites.
- Take an image of your current desktop to help you reinstall any drivers or apps later on. You can also create a list of bundles of programs installed on your device.
- Create a backup of important data or create Windows Installation Media.
- Keep an eye on the service packs.
- Get the needed Product keys.
How to Reinstall Windows 10 Safely Without Losing Data
Follow the given steps to reinstall Windows 10 safely without any loss of your crucial data:
Step 1: Firstly, you must use a bootable Windows 10 USB to connect it to your PC. You can also insert a bootable DVD of Windows 10 into the optical drive.
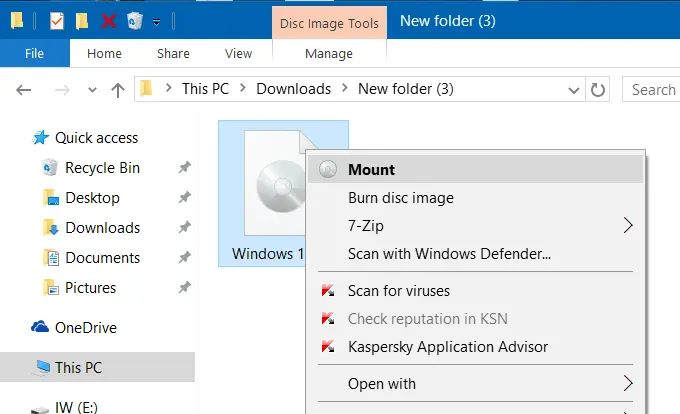
If you have an ISO image file of Windows 10, you can proceed with browsing the folder that contains the ISO file. By right-clicking on it, you have to proceed with selecting the 'Mount' option that will open the ISO image contents in file explorer.
In case you don't have any of the above, you can proceed with downloading the ISO image for Windows 10 from Microsoft. For this, you can use Windows 10 media creation tool with its default settings, downloading the addition in 32bit or 64bit type, whichever is installed currently on your Windows PC.
Step 2: You need to find a DVD drive or USB from 'My Computer' or the 'This PC' section and right-click on the same. From here, you must select the option of 'open in a new window.'
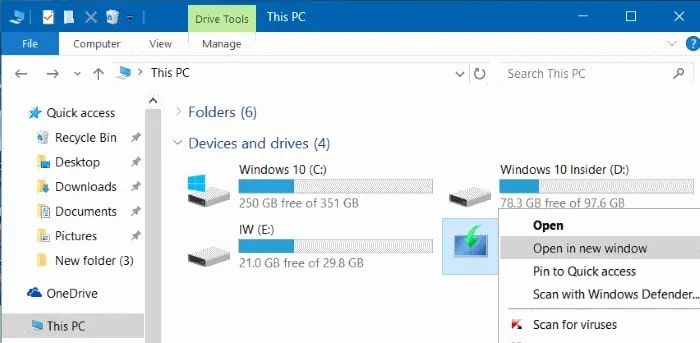
In a similar case, if you have an ISO image of Windows 10 mounted, you need to proceed with right-clicking on the mounted drive that you can find in the section of 'My computer' or 'This PC.' After that, you need to proceed with clicking on the option for 'open in a new window.'
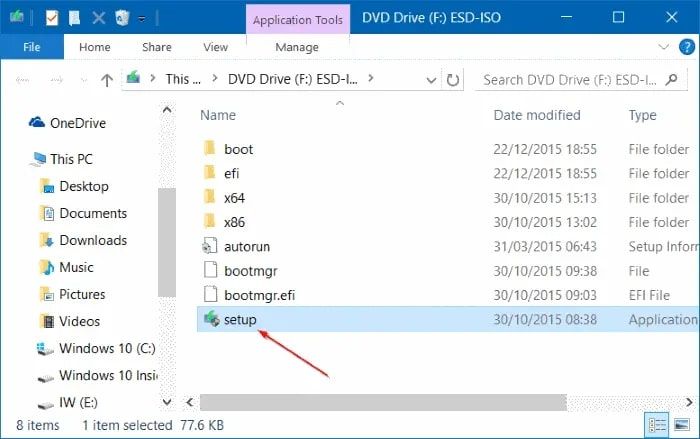
Step 3: Now, on the Setup.exe file, you have to proceed with a double click, and after that, as soon as you see the dialogue for user account control, you need to click on the 'yes' option.
Step 4: Within seconds, you will be able to see e a screen with 'get important updates,' and it will show you the following two options:
- Download and install updates (Recommended)
- Not right now
We recommend selecting the 'Download and install updates' option if your Windows 10 PC has good internet connectivity.
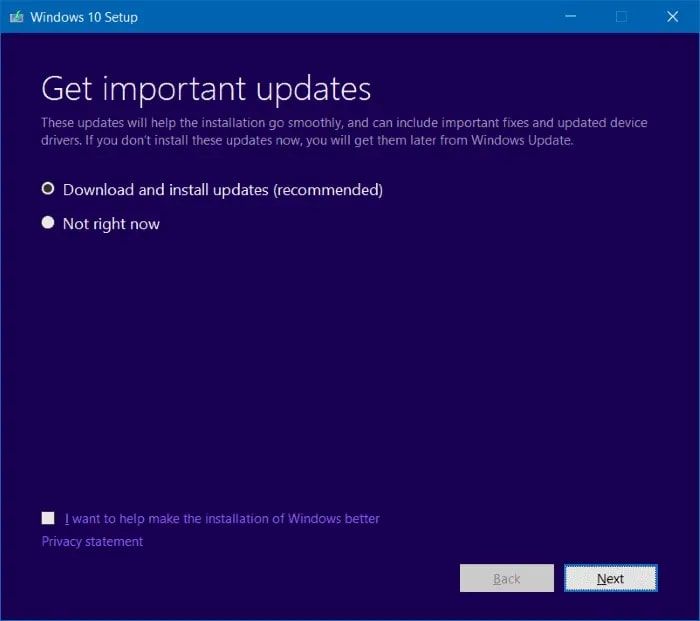
Suppose you do not want to share anonymous data or information regarding the installation process with Microsoft. In that case, you may uncheck the box with the label saying - 'I want to help improve the installation of Windows.'
After selecting this option, you need to proceed by clicking on the 'next' button to go to the next step.
Step 5: You will notice that the setup has already started checking for any updates for you. In the previous step, if you have selected the option of 'not right now,' you will not be able to see this screen.
You may have to spare around 10 minutes to let the system check for updates.
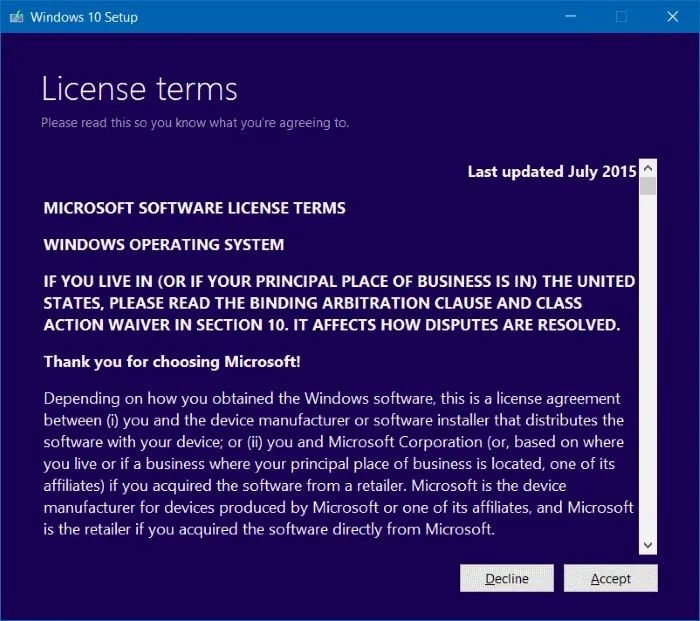
Step 6: Now, you will see the screen with license terms where clicking on the 'accept' button will guide you to proceed further in the process.
As soon as you click the 'accept' button, you will find that the setup has started looking for updates and their downloading as per the availability.
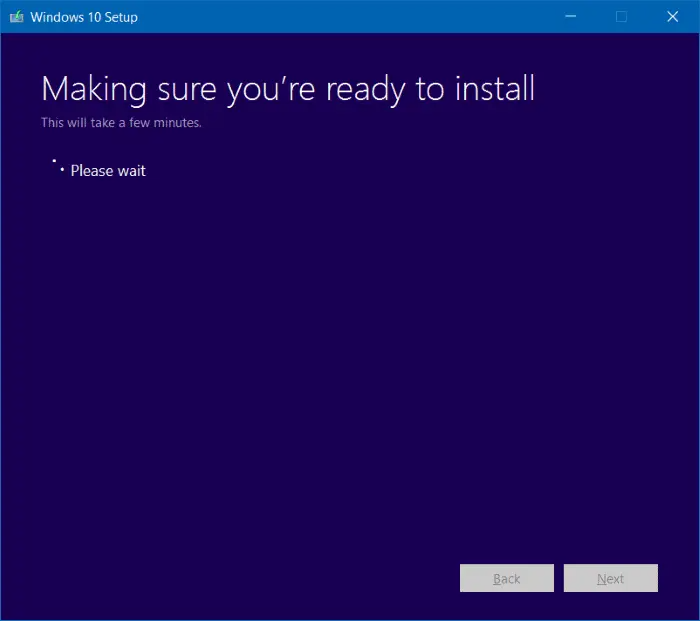
For taking the confirmation, you may also see the screen with the message- 'making sure you're ready to install' for the first few minutes. At this point, the setup checks your Windows PC to find out whether it can run Windows 10, and it also ensures that there is enough space available on your system to carry out the operation successfully.
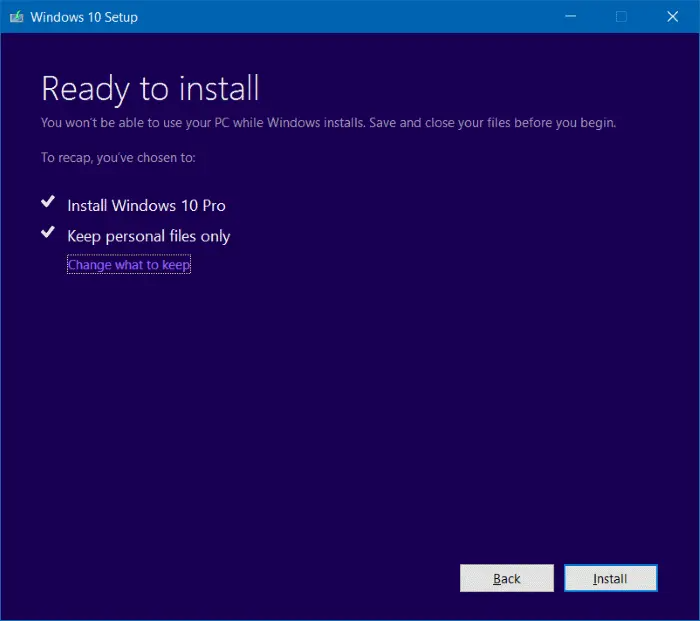
Step 7: As a final step, you will be able to see the screen with the message 'Ready to install' or 'Choose what to keep' option.
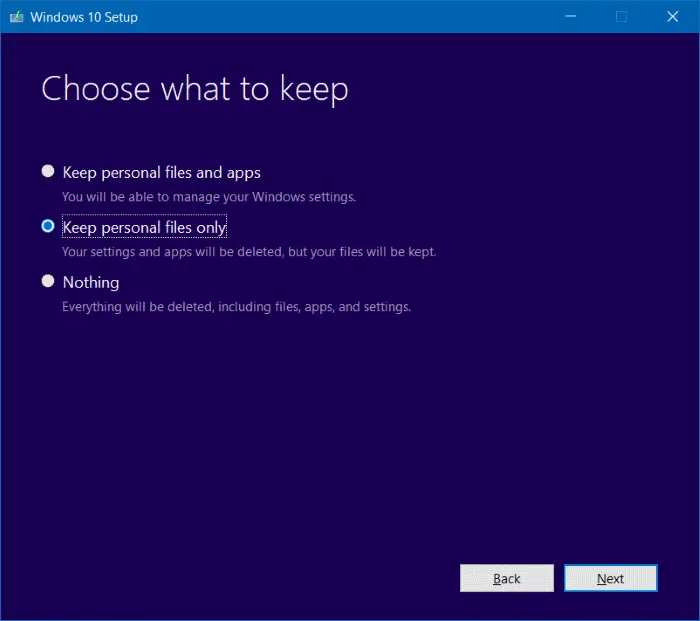
If you see the screen with the 'ready-to-install' option, you will find the label 'Change what to keep.' After that, you can choose to 'keep personal files only.' So your next move will be clicking on the 'next' button.
Natively if you see 'choose what to keep the screen,' you will have hands-on the following three options-
- Keep personal files only.
- Keep individual files and apps.
- Nothing.
You can pick any of these options according to your preference, but we recommend you choose the 'keep personal files only' option as here we are talking about how to reinstall windows 10 without losing data. After that, you must press the 'next' button.
Pro Tip: In case you wish to keep both personal files as well as apps, you can proceed with selecting the option of 'keep personal files and apps.' However, if you have any issue with Photos or Edge apps, then you can go with the possibility of keeping personal files only.
Step 8: Once you are done selecting what to keep, you will find the screen for 'Ready to install' again. However, this time, you will notice the Install button too; click on it to begin the reinstallation process.
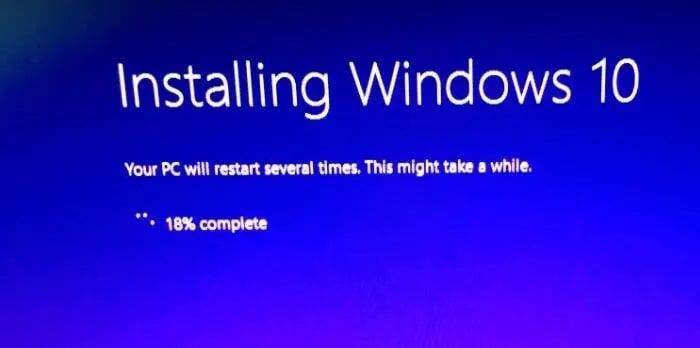
As soon as you do this, the screen with the message for 'Installing Windows 10' will appear for a few minutes, and you may notice that your PC is restarting several times during this process.
After the reinstallation is complete, options for language, country, time zone, and keyboard layout appear on the screen.
Step 9: For making changes to the settings, proceed with clicking on the 'Customize settings' option. Herein you can carefully read the available settings and turn them off or on as per your use. If you missed them, you could make changes to these settings later.
Then you have to proceed with signing in to your Microsoft account. In case you are not ready for installation and using Windows 10 by making use of a Microsoft account, you can also proceed with creating an account for local users.
There will be no prompt for activation of Windows 10. However, you can freely contact Microsoft chat support if you face any issues. You can do so by typing 'contact support' either in the taskbar or start menu and then proceed with pressing Enter key.
Sum Up
Restoring from a backup is an easier way to fix your PC, but if it has undergone some major mishap, reinstallation of Windows can help restore the facility. We hope you got a simple and sorted answer to your query about how to reinstall windows 10 with the steps mentioned above.
You can fix all the issues with your PC and may not require reinstallation for a minimum of two years. It will free your PC from any malware, junk, or virus that makes it sluggish and hamper its performance.