Windows Installer Service Could Not Be Accessed
"I recently upgraded to Windows 10 from Windows 8. Now, every time I try to download a new program, it keeps telling me the Windows Installer Service could not be accessed. The same thing happens when I try to uninstall a program. I have no clue how to fix this, and it is really hindering me. I can't install anything! Please help me. Thanks!"
If you see this notification - "The Windows Installer Service could not be accessed' while trying to install or uninstall a program, you won't be able to complete the installation or uninstallation process.
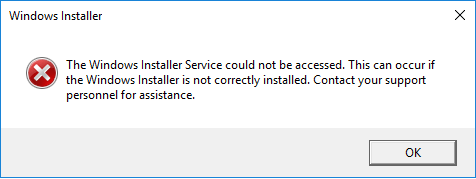
Moreover, you need to fix it or you will encounter the very same issue the next time you install/uninstall an application.
Here's quick navigation for troubleshooting the Windows installer service could not be accessed problem. Try the given methods one by one to fix Windows installer on your computer alright:
| Workable Solutions | Step-by-step Troubleshooting |
|---|---|
| Fix 1. Start Windows Installer Service | Type cmd in Windows Search box and right-click on Command Prompt, select "Run as administrator"...Full steps |
| Fix 2. Uninstall Older Version of Software/Program | We advise you to remove or uninstall the old version from your PC in advance...Full steps |
| Fix 3. Install the Latest Version of Windows Installer | Open Command Prompt and type the cmd...Full steps |
| Fix 4. Reinstall Windows Installer | Type regedit in search and hit Enter. Click "yes" to open Registry...Full steps |
| Fix 5. Re-Register Microsoft Installer Service | Press "Windows + R" keys. Type cmd and hit "Enter"...Full steps |
| Other 4 Fixes | Move to get more fixes...Full steps |
The provided methods can be applied to help you effectively fix the same issues on Windows 10/8/7, etc. Check out how to make Windows installer work again so as to install new software on your PC.
Causes of Windows Installer Not Working
Windows Installer is a Microsoft Windows component that is used for software installation, maintenance, and removal. So how to fix "Windows Installer Service could be not accessed" or resolve Windows installer is not working issue?
Here are the main causes of this error and you figure out a better solution toward this issue:
- Windows Installer is not correctly installed.
- Windows Installer files are damaged or missing.
- Registry permissions or .
- Windows Installer is outdated or has a compatible issue.
Don't worry if you are having this issue on your computer. Try the provided methods in the next part, you'll make Windows Installer work properly again in Windows 10/8/7.
9 Fixes for Windows Installer Service Could Not Be Accessed Error
Considering the causes, we collected 9 practical fixes here to help you get rid of Windows installer service error immediately:
- #1. Manually Start Windows Installer Service
- #2. Uninstall Older Version of Software/Program (that) You Want to Install
- #3. Install the Latest Version of Windows Installer
- #4. Reset Windows Installer Service Registry
- #5. Register Microsoft Installer Service
- #6. Use regsvr32 Command
- #7. Delete Duplicated MISEXEC File
- #8. Change Remove Procedure Call Services Settings
- #9. Run SFC and DISM Command
Note that 1-3 are quick fixes that you can follow to make Windows Installer Service work normally again quickly. If none of the 3 quick fixes work, you may try 4-9 fixes one by one.
Fix 1. Manually Start Windows Installer Service
There are two accesses that you can use to manually start Windows Installer. One is using Command Prompt and the other one is to manually start it.
Check out the steps to start the Windows Installer.
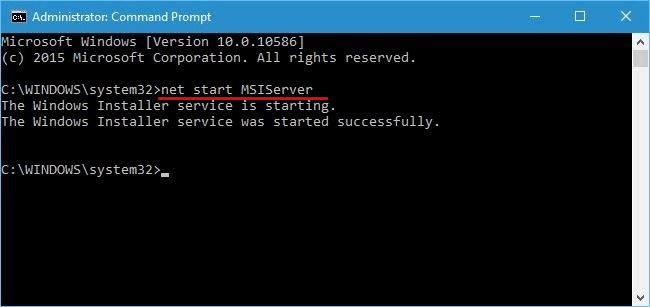
Use Command Prompt
Step 1. Type cmd in Windows Search box and right-click on Command Prompt, select "Run as administrator".
Step 2. Enter netstart MSIServer and hit Enter.
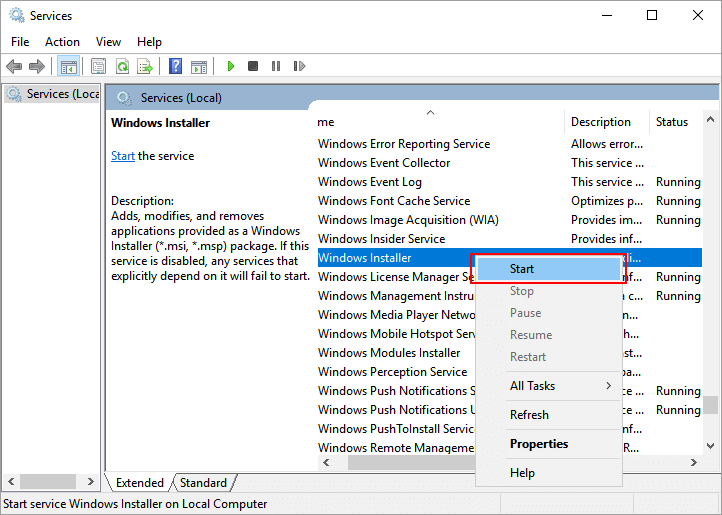
Manually Start Windows Installer using Service Settings
Step 1. Type services in Windows Search and select "Services" from the result.
Step 2. On the Service window, locate Windows Installer and check its state.
Step 3. If it's not running, right-click on Windows Installer and select "Start".
Fix 2. Uninstall Older Version of Software/Program You Want to Install
If the Windows installer is not working when you plan to install a new version of software or program, you can remove the earlier version of the software or program.
We advise you to remove or uninstall the old version from your PC in advance. Installing software without removing the older version can sometimes cause unexpected issues.
Fix 3. Install the Latest Version of Windows Installer
If Windows installer is outdated or not compatible with your current Windows OS, it may not work properly and you may receive the "Windows Installer Service could not be accessed" error.
So here is another practical way to help you out, which is to install the latest version of Windows Installer. To do so, you can either try CMD command or manually install it on your own.
Install Windows Installer via CMD Command:
Step 1.Press "Windows + R" keys. Type cmd and hit "Enter".
Step 2. At the Command Prompt, type the following lines and press "Enter" after you type each line.
cd %windir%\system32
ren msi.dll msi.old
ren msiexec.exe msiexec.old
ren msihnd.dll msihnd.old
Step 3. At the command prompt, type exit, and then press "Enter".
Step 4. Restart your computer.
Step 5. Update the Windows Installer files to the latest version.
To do so, visit the Microsoft Web sites, and then download and install Windows Installer. After the installation of the Windows Installer is complete, shut down and restart your computer normally before you install programs.
Manually Download and Install the Latest Version of Windows Installer
Step 1. Manually Download Windows Installer from Microsoft.
Step 2. After downloading, double-click the file to start the installation.
Step 3. Follow the onscreen instruction to complete the installation process.
Fix 4. Reset Windows Installer Service Registry
Note that editing Registry may cause some of your apps to malfunction. Please be very careful while you are resetting Windows Installer via Registry.
#1. Back Up Registry First
Step 1. Type regedit in search and hit Enter. Click "yes" to open Registry.
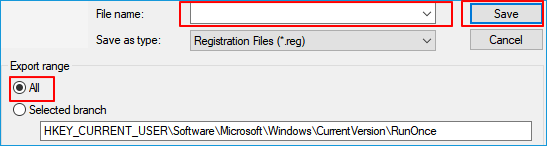
Step 2. On the Registry window, go to File and click "Export".
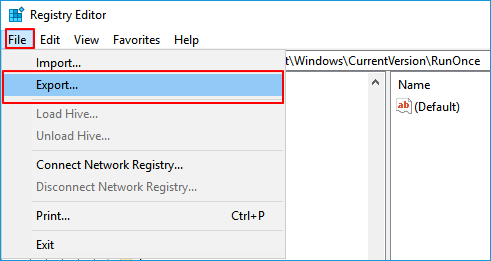
Step 3. Select "All" as the Export range, name the Registry backup, then click "Save" to export.
After this, close Registry Editor.
#2. Create a .reg File and Add to Registry
Step 1. Open Notepad or create a new text document.
Step 2.Copy all the text from the Microsoft support page (Method 1 Step 3) to a Notepad.
Step 3. Name the notepad as repairwith a file extension - .reg. In other words, you need to save the Notepad as repair.reg.
Step 4. Right-click the repair.reg file and select "Run as administrator".
Step 5. If you are requested for administrator account and password, type the password and click "Continue".
Step 6. If it prompts to install the registry keys, click "Yes".
After this, you can continue with the installation process for the programs and software on your PC.
Fix 5. Re-Register Microsoft Installer Service
If you find the Windows installer service isn't running, you can re-register the installer service. Re-registering Microsoft Installer Service is another good method to solve the Windows Installer Service could not be accessed error.
Step 1.Press "Windows + R" keys. Type cmd and hit "Enter".
Step 2. In Command Prompt, type the following lines. You need to hit "Enter" every time after each line.
%windir%\system32\msiexec.exe /unregister
%windir%\system32\msiexec.exe /regserver
%windir%\syswow64\msiexec.exe /unregister
%windir%\syswow64\msiexec.exe /regserver
If you are using 32-bit Windows, enter the commands below one by one instead.
msiexec /unregister
msiexec /regserver
Step 3. Close Command Prompt by entering "exit" and then restart your computer.
Now you have re-registered the Windows Installer Service. Check and see if you fix the Service could not be accessed error.
Fix 6. Use regsvr32 Command
Step 1. Type cmd in Windows Search, right-click on Command Prompt and select "Run as administrator".
Step 2. Type regsvr32 c:windowssystem32msi and hit Enter.
Wait for the command to run and close Command Prompt when the process completes.
Fix 7. Delete Duplicated MISEXEC File
Step 1. Open Windows File Explorer and go to C:WindowsSystem32.
Step 2. Look for msiexec.exe.
Step 3. If there is another msiexec file with no file extension or a 0KB file, delete it or rename it to msiexec.old.
Step 4. Go to Fix 1 to manually start the Windows Installer.
Fix 8. Change Remove Procedure Call Services Settings
Step 1. Type service in Windows Search and click Search from the list.
Step 2. On the Service window, locate and double-click on Remove Procedure Call (RPC) service.
Step 3. Go to the Log On tab, select "Log on as Local System Account" and check "Allow this service to interact with the desktop".
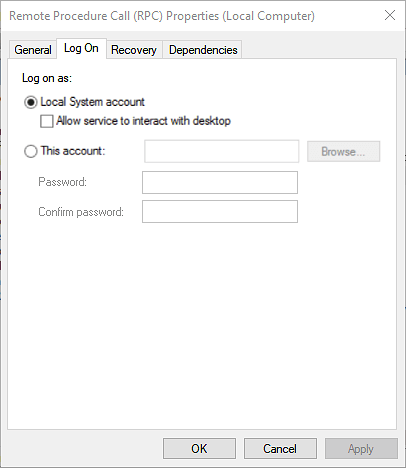
Step 4. Save changes and restart your PC.
Fix 9. Run SFC and DISM Command
Step 1. Type cmd in Windows Search, right-click on Command Prompt and select "Run as Administrator".
Step 2. Type the following command and hit Enter each time:
- sfc /scannow
- DISM /Online /Cleanup-Image /RestoreHealth
Step 3. Wait for the process to complete and type exit to close Command Prompt window.
After this, restart your PC to keep all the changes. You shall be able to use Windows Installer on your PC again.
Extra Tip: Recover Data After You Have Fixed the Error
Any of the methods above may cause data loss. If you have data loss problem after you have fixed the Windows installer service error, we can help.
Reliable hard drive recovery software - EaseUS Data Recovery Wizard can help fix this problem. It's fully compatible with Windows 10/8.1/8/7 and older Windows versions. You can download it for free and follow the steps to restore lost data from Windows 10/8/7 now.
Price: It starts $69.95/Monthly.
Compatibility: Windows and Mac
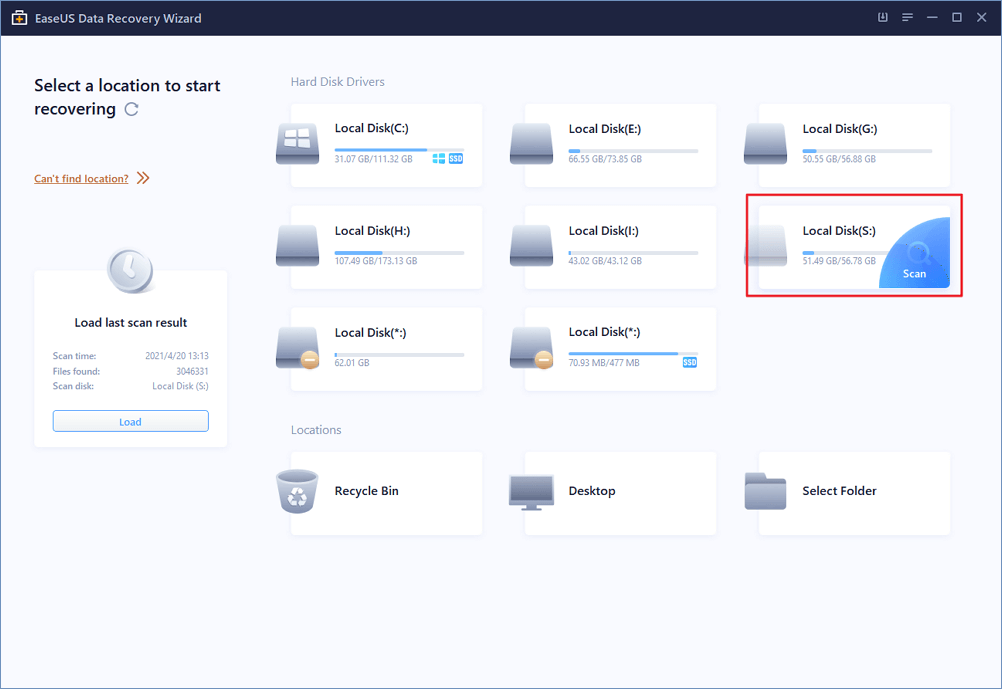
Step 1. Select a location and start scanning
Launch EaseUS Data Recovery Wizard, hover on the location where you lost data, then click "Scan".
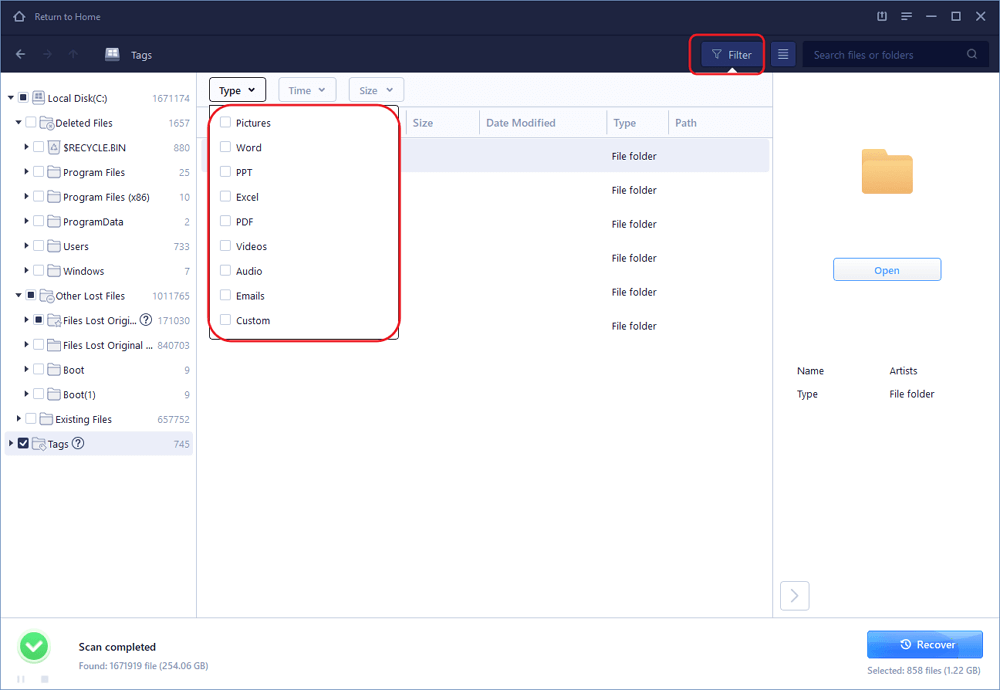
Step 2. Preview and select the files
Wait until the scanning completes. You can use Filter or search bar to find lost files.
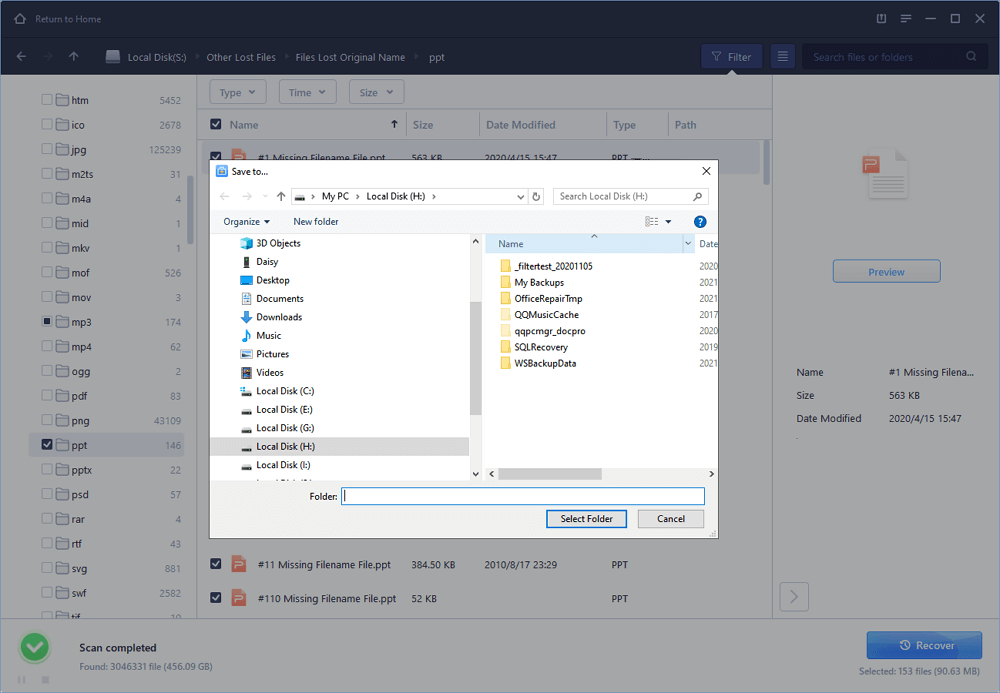
Step 3. Recover lost data
Then choose a location to save the recovered data, and click "OK". You should store the data in another place instead of the original one.
Conclusion
On this page, we explained why Windows Installer Service suddenly not work and covered 9 fixes to help you fix this error, making Windows Installer service back to work again.
Note that if you've recently installed a new version of Windows OS, remember to update or install the latest version of Windows Installer too. Usually, it would automatically update with the Windows OS.
If you lost files after fixing the "Windows Installer Service cannot be accessed error", don't worry and you can let EaseUS Data Recovery Wizard help.