System thread exception not handled is an error message that occurs in Windows 10 due to incompatible, outdated driver, memory conflicts, IRQ conflicts, etc. At the time, the system thread exception not handled error appeared with different names such as atikmdag.sys, nvlddmkm.sys, nwifi.sys, CMUDA.sys, etc. The system may not be able to detect it sometimes.
If you have experienced the same error, then this article will provide the best ways to smoothly fix thread exceptions not handled error issues. We will also look at how you can recover data from system thread exceptions not handled errors. Let’s get into details.
Best Ways to Smoothly Fix System Thread Exception Not Handled Issue
Below is the method that can smoothly fix the system thread exception not handled issue. Have a look at the following step-by-step method.
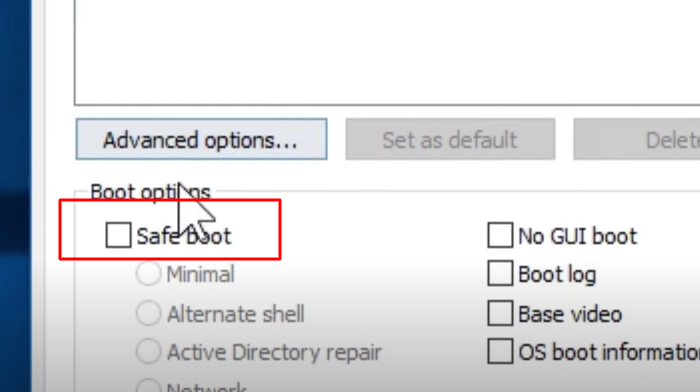
1. Boot Into Safe Mode
Every Windows operating system has a Safe mode. It is a special boot configuration that disables any third-party software and provides Windows with a secure environment. If you find it difficult to run Windows normally or your programs suddenly stop working and quit during startup, then you can use Safe mode to identify and resolve the problem. Below are the steps to use safe mode in your System.
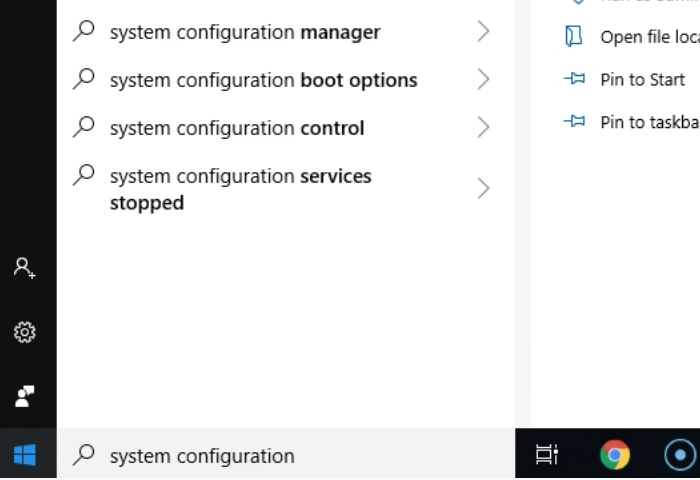
Step 1. Go to the Start menu and type System Configuration.
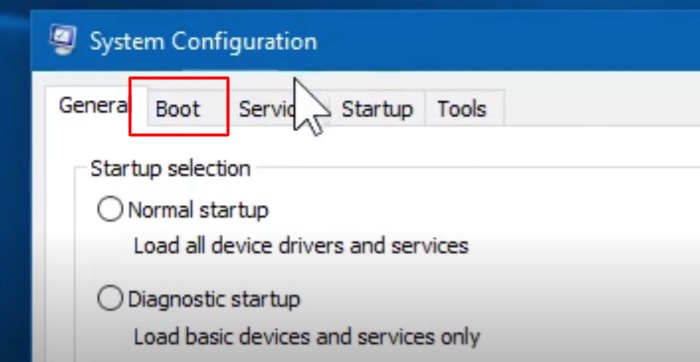
Step 2. Click on Boot Tab.
Step 3. From the Boot Option, select Safe Boot and click on OK
Step 4. The system will ask you “Restart” or “Exit Without Restart.”
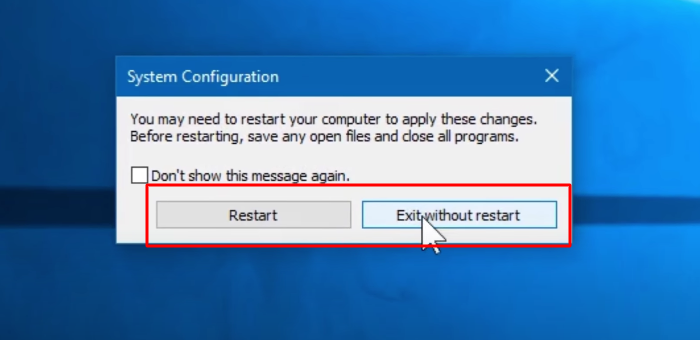
The system will Restart. Sometimes to diagnose a problem system may need to start several times.
2. Check Error Log File
Below are the steps to check the Error Log File.
Step 1. Open Event Viewer.
Step 2. Go to Window logs and select System.
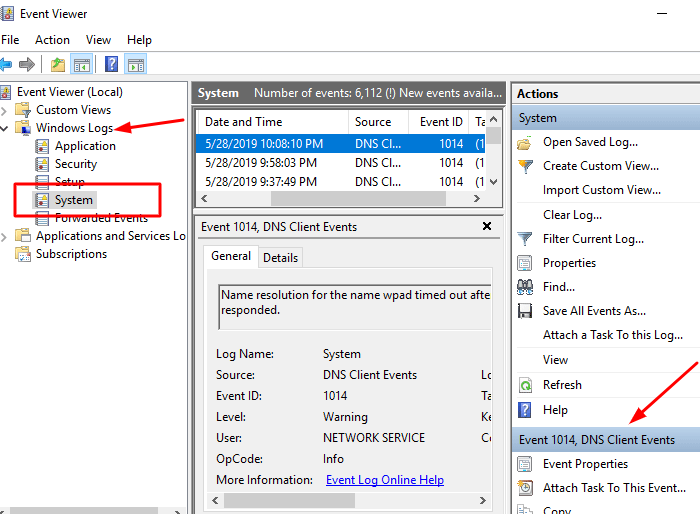
Find the error and check the information.
3. Run Memory Diagnosis
The memory diagnosis can check and fix the logical memory problems. The steps are as follows:
Step 1. Go to Windows Safe Mode.
Step 2. Press the Windows +R key, and in the run box, type “mdsched.ese”
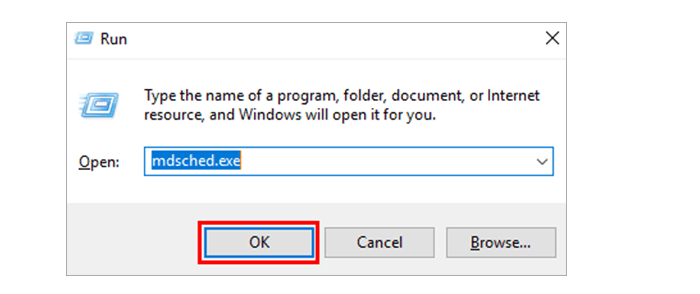
Step 3. Select “Restart now and check for problems.”
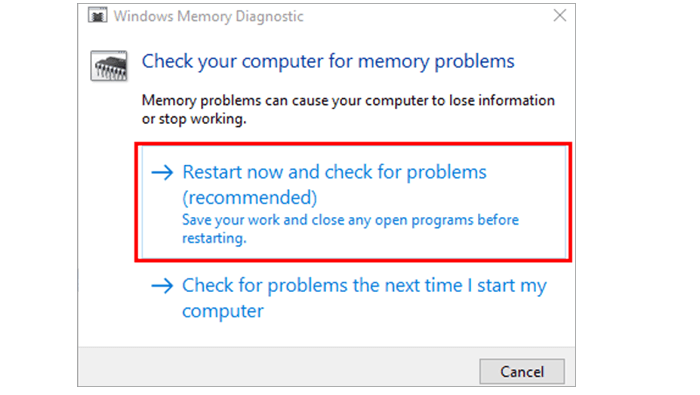
The process will take some time to finish memory diagnosis.
Step 4. Open Event Viewer to check the result.
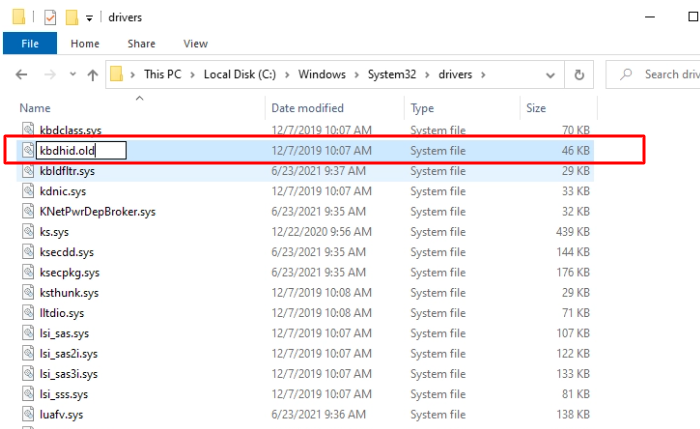
4. Rename the Faulty Driver
Sometimes renaming the faulty driver can eliminate the error. The steps are listed below:
Step 1. Press Windows key +E on your keyboard.
Step 2. Navigate the pathC:\Windows\System32\Drivers
Step 3. Find the file and rename it.
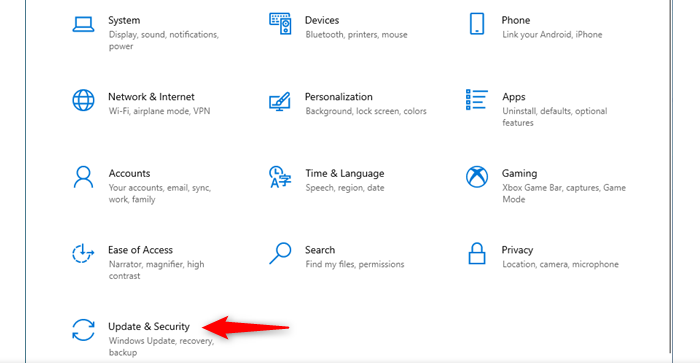
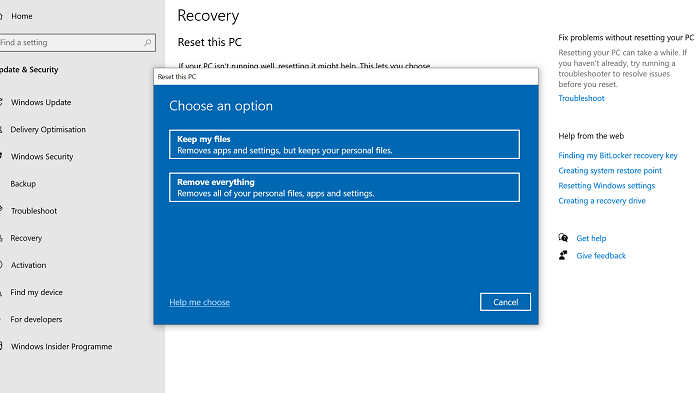
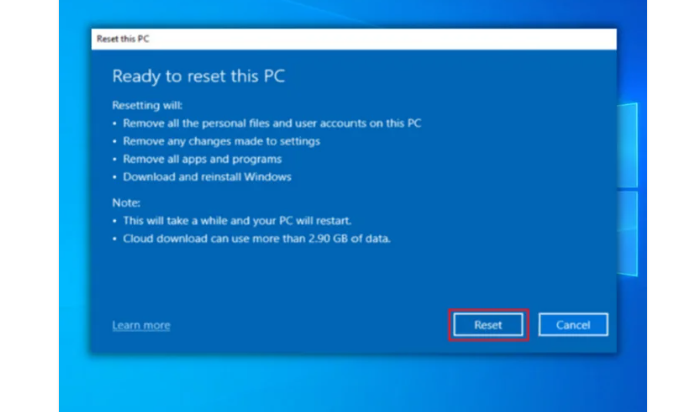
5. Reset System
Sometimes you need to reset your System to remove the thread exception not handled error. The steps are listed below:
Step 1. Press Windows Key+I on your keyboard.
Step 2. From the Windows setting, select Update & Security.
Step 3. From the left panel, select Recovery and click on Get Started
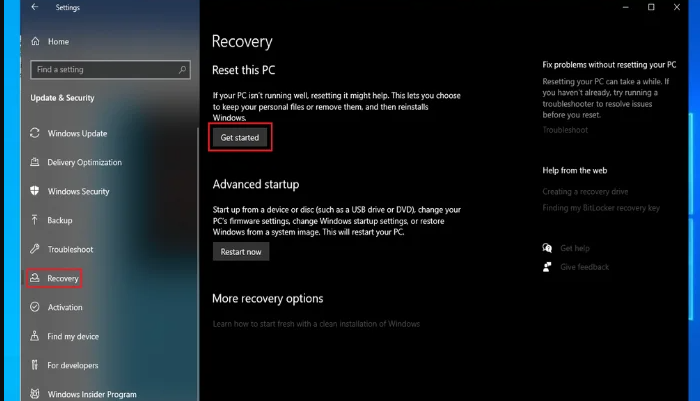
Step 4. In this step, you will choose whether you want to keep your data and files or not.
Step 5. Now, it will ask for your confirmation and then click on Reset.
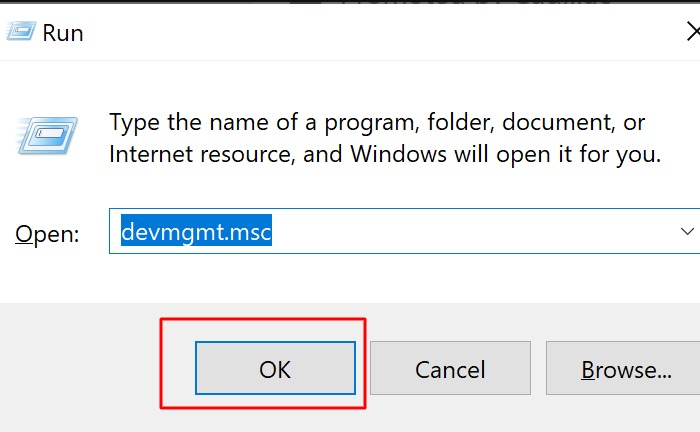
6. Reinstall the Drive
To eliminate the “System thread exception not handled” error, sometimes the corrupt drive needs to be uninstalled. Here are the steps to install the drive
Step 1. Press Windows Key+R
Step 2. In run command type “devmgmt.MSC”
Step 3. From the list of device managers, select “Sound, video, and game controllers.” Right-click and click on Uninstall
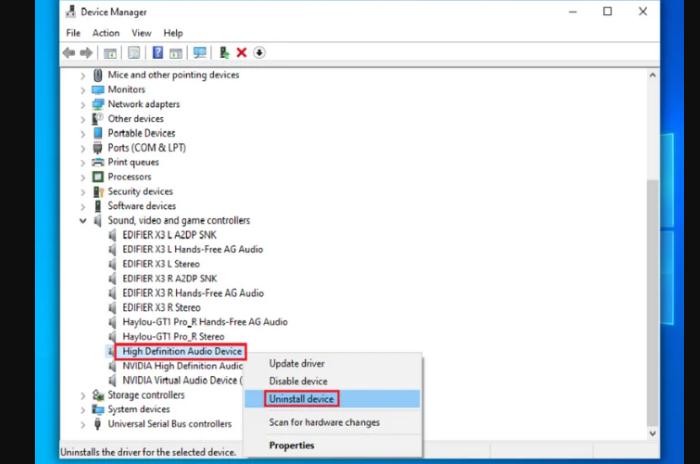
Step 4. Once the drive is removed, restart your computer.
7. Use the SFC and DISM commands
The steps to use the SFC and dism are listed below:
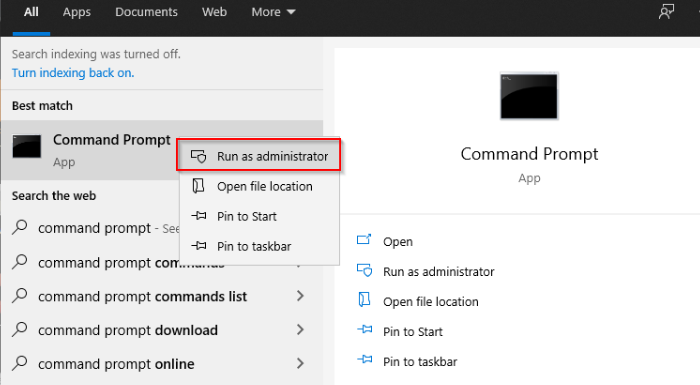
Step 1. Go to the Start menu and type Command Prompt in the search menu. Right-click and select 'Run as administrator.'
Step 2. Enter the following command:
SFC /scannow
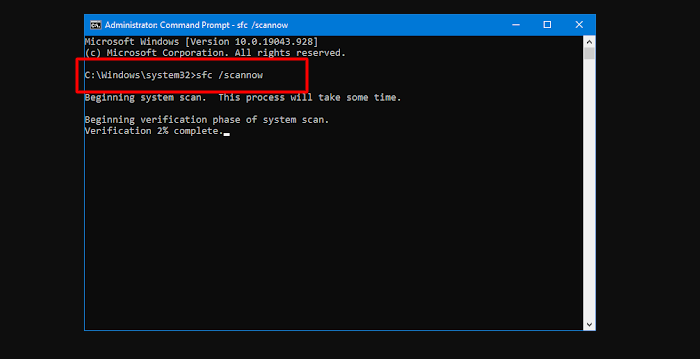
Wait for a little; it will begin scanning.
Step 3. Now, to run DISM Command, type the following text:
DISM.exe /Online /Cleanup-image /Restorehealth
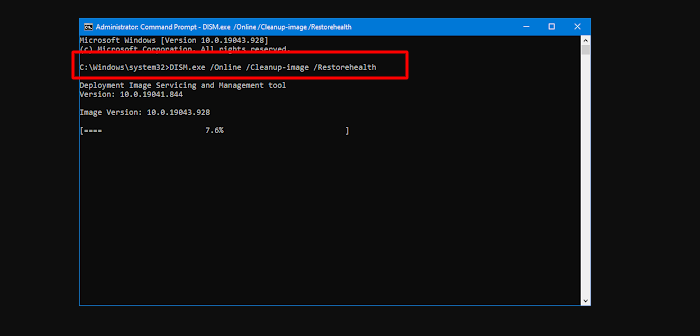
Wait for a little to complete the process.
8. Use System Restore
The system thread exception not handled issue can be fixed through system restore. It is a bit different from System Reset. System reset will revert your computer back to its default factory settings. Restoring your system will take your system back to a previous point in time.
The steps are listed below:
Step 1. Press Windows key + S
Step 2. Type System Restore and click on Recovery.
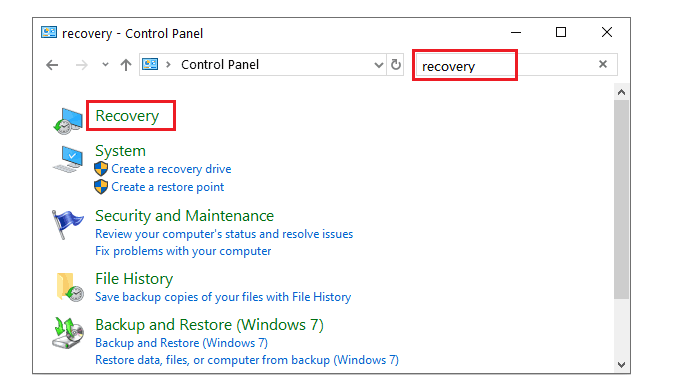
Step 3. Open System Restore link in the Advanced recovery tool section.

Step 4. Follow the screen instruction and at the end, click on Finish. The Windows will restore the System.
How to Recover Data from SYSTEM_ THREAD_EXCEPTION_NOT_HANDLED Crash
If you face the system thread exception not handled error in the Windows, it will cause hindrance on system ppt. To recover your data, you can use EaseUS Data Recovery Wizard Pro with Bootable Media. Below are the steps to recover data when the hard drive can't boot.
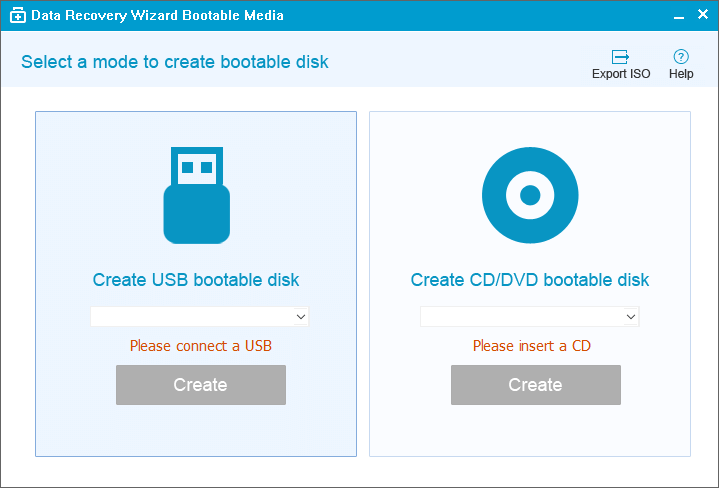
Step 1. Create a bootable disk
Prepare an empty USB and connect it to the PC. After that, launch EaseUS Data Recovery Wizard, choose the USB drive, and click "Create" to create a bootable disk.
Step 2. Boot from the bootable USB
Connect the bootable disk to the PC which won't boot, and alter your device boot sequence in BIOS.
Set to boot the PC from "Removable Devices" (bootable USB disk) or "CD-ROM Drive" (bootable CD/DVD) beyond Hard Drive. Then, press "F10" to save and exit.
Step 3. Recover data from the hard drive that can't boot
When you boot from the USB, you are able to run EaseUS Data Recovery Wizard from the WinPE bootable disk. Select the drive you prefer t to scan to locate all your data.
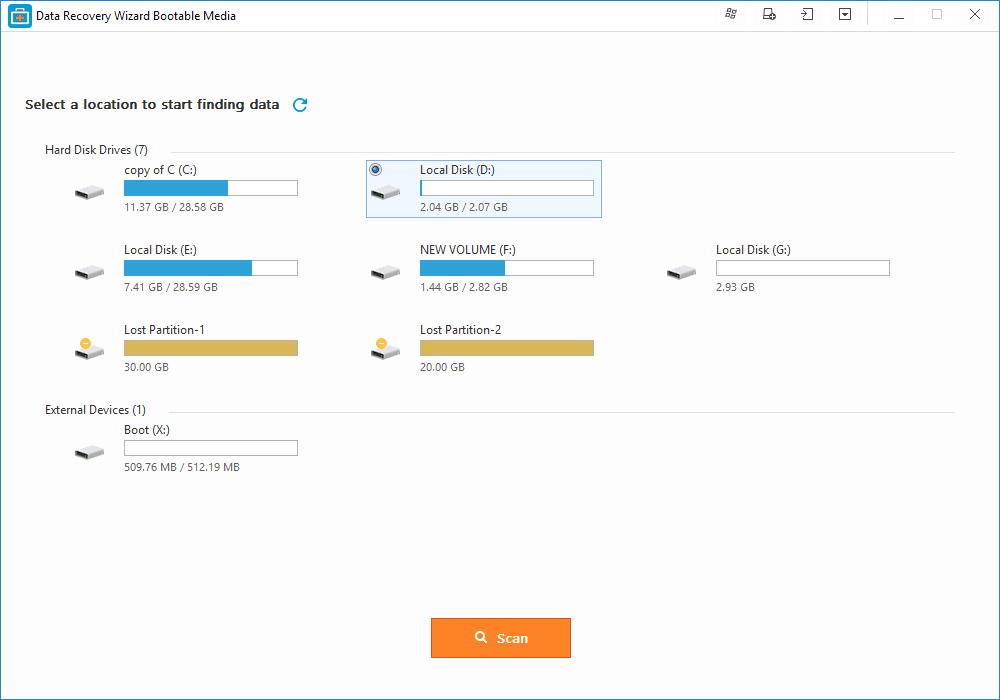
Click "Scan" to start scanning.
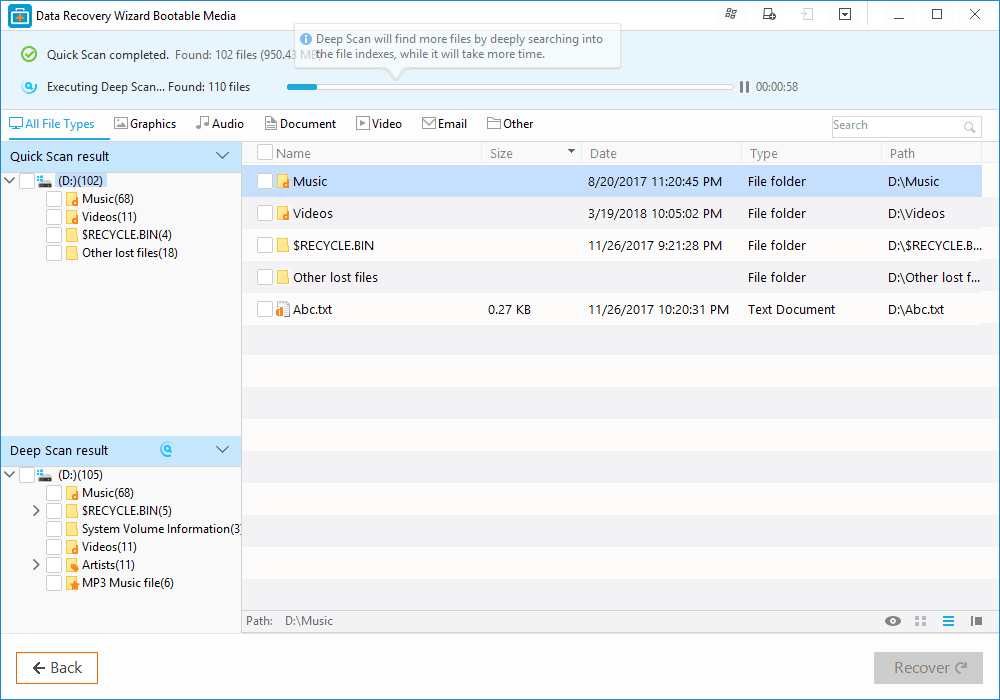
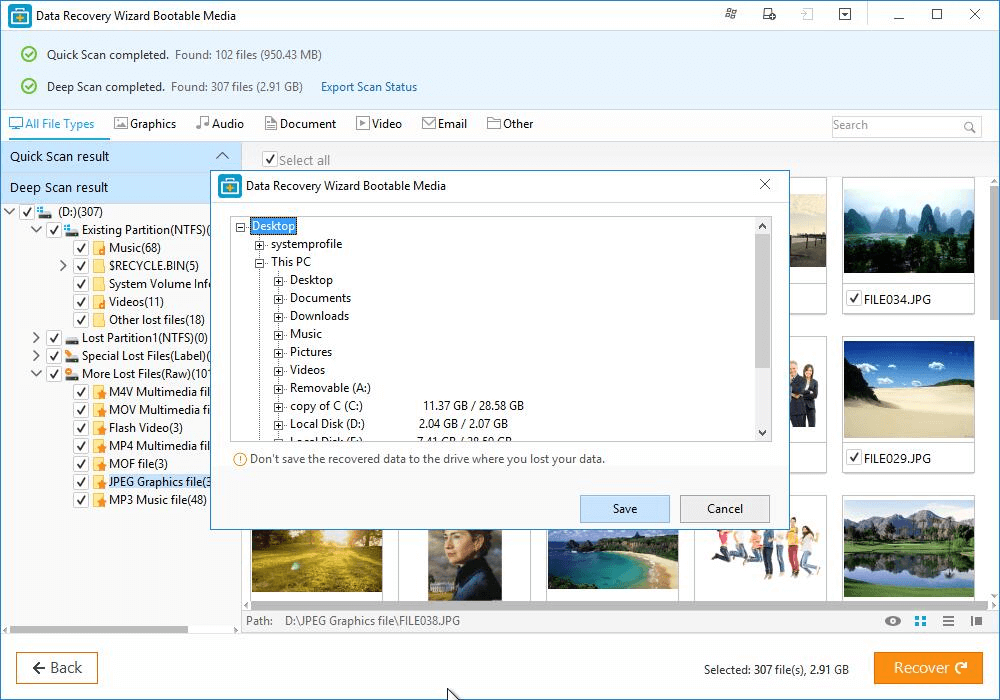
Recover data from the computer or laptop. Once the scan is done, you can preview all recoverable files and select the targeted files. With that, you can click the "Recover" button to recover your files.
Conclusion
To summarize the discussion, system thread exception not handled error can appear on your system due to an error in the drive, memory conflicts, etc. You can fix this issue by following the methods listed above. In addition, you can also recover the lost data by using a third-party utility, like EaseUS Data Recovery Wizard.
FAQ
1. What about system thread exception not handled RAM?
Memory corruption is the most common cause of RAM errors. Entering Windows or Safe Mode to check RAM can resolve this issue. If the result is favorable, double-check that the memory bank is properly inserted.
2. What about the system thread exception not handled by Nvidia?
The thread exception not handled error may be due to nviddmkm.sys, it is a driver of the Nvidia graphic card. The problem can b fixed by updating the drivers.
3. What about the system thread exception not handled overclock?
The system thread exception not handled error may be caused by CPU overclocking. To resolve this, enter BIOS to cancel overclocking, or you can update the firmware.