Why You’ll Receive “iPod is Disabled Connect to iTunes”
Your iPod may be disabled or unable to connect to iTunes for several reasons. The majority of the time, however, it is brought on by six incorrect password entries. Your iPhone is specifically disabled for one minute after six incorrect passcode entries. With each incorrect passcode attempt after that, the timer increases. Your iPhone becomes completely disabled when it displays "iPod is disabled connect to iTunes" after entering the wrong passcode ten times. You are prompted to connect to iTunes to restore the device. It is one of the iPod security features designed to protect your data, and it automatically disables your iPod to restrict access if someone tries to access your device.
Best Fixes to “iPod is Disabled Connect to iTunes”
Method 1. EaseUS MobiUnlock
EaseUS MobiUnlock is an easy-to-use application for unlocking all types of passcodes on all Apple Mobile devices. With EaseUS MobiUnlock, you can easily bypass all types of passcodes with a single click and other unique features. For example, you can remove your Apple ID without entering a password and bypassing the Screen Time Passcode. Among the additional features is the flexibility to manage three different password types and the capacity to turn off iPhone backup encryption without a password.
Using EaseUS MobiUnlock guarantees an efficient and quick solution for unlocking your Apple mobile devices and a high success rate. EaseUS MobiUnlock also does not require any technical expertise.
Price: Its Windows version starts at $29.95/Month, its Mac version starts at $49.95/Lifetime.
Compatibility: Windows and Mac
Follow these steps to learn how to use EaseUS MobiUnlock to fix the "iPod is disabled connect to iTunes" issue.
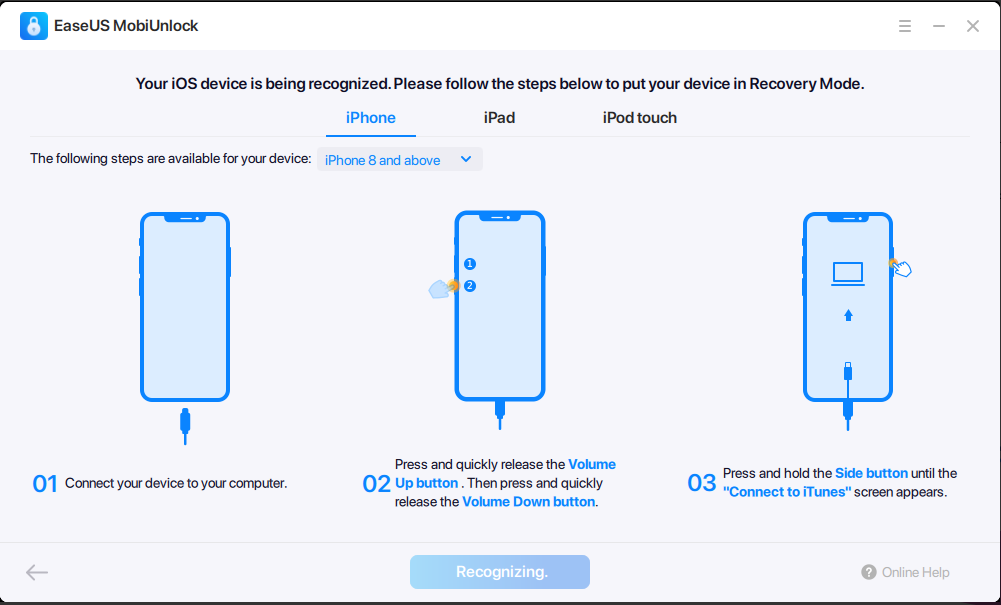
Step 1. Connect your iOS device and boot into Recovery Mode. Before entering recovery mode, ensure the device is securely connected to the computer.
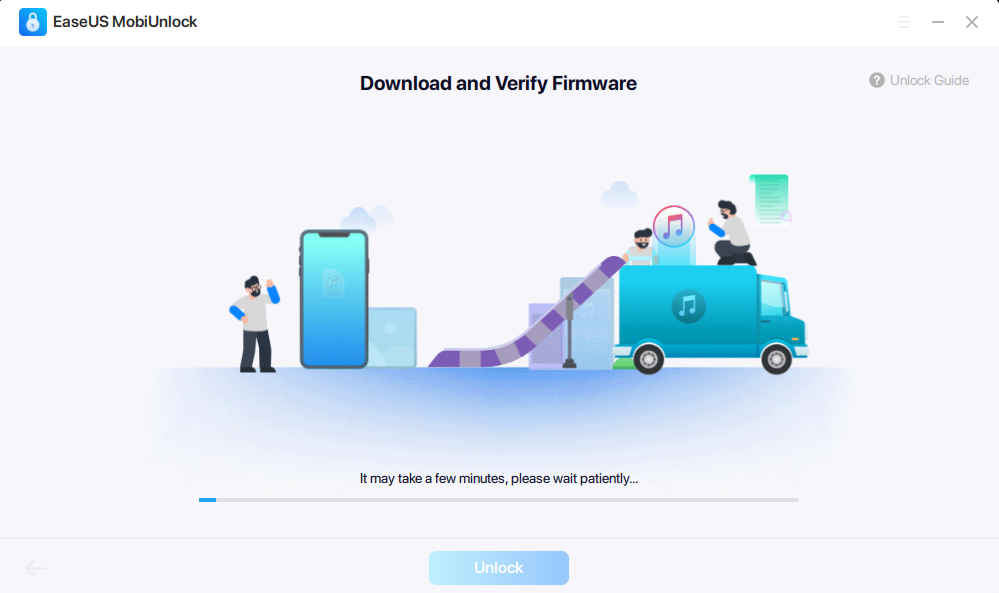
Step 2. Before using EaseUS MobiUnlock, the firmware must be downloaded and verified. First, the application will detect the device type and version number you wish to unlock. Then, the application will automatically verify the firmware you choose or one you download from the network after selecting the PC.
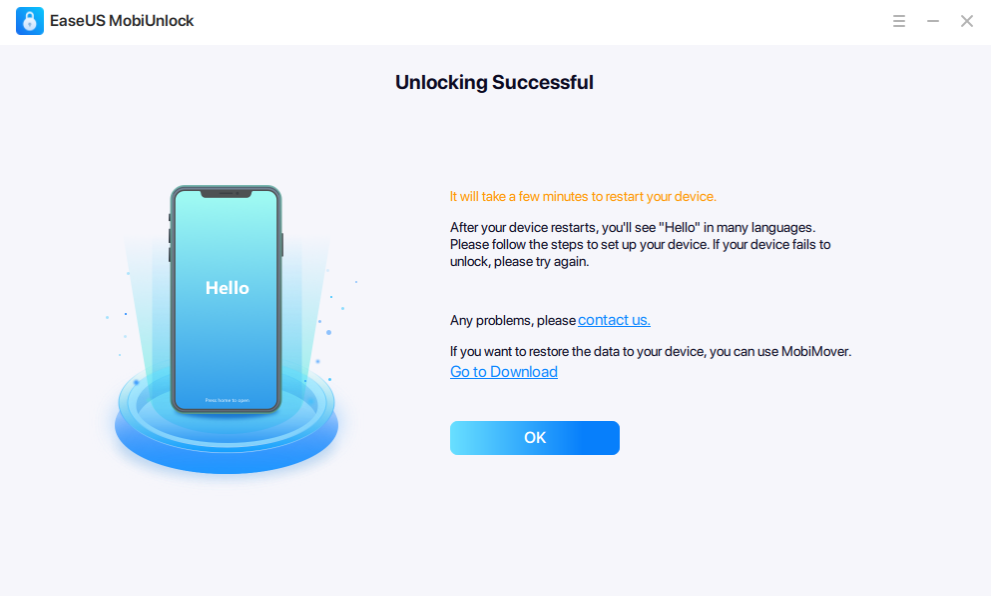
Step 3. Start by selecting Unlock and entering the verification code. Then, follow the instructions to unlock your gadget and wait for it to finish.
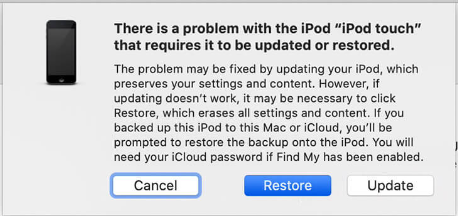
Method 2. iTunes
If iTunes and your iPod are already synced, you can use iTunes to restore the disabled iPod. All the information on your iPod, including the screen passcode, will be deleted when you restore it using iTunes, except it is already backed up. You can then fix the problem by following the quick guide below.
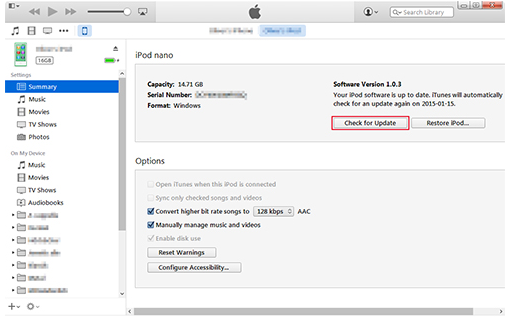
Step 1. Connect your device to the PC or Mac you have previously synchronized it. Open iTunes and select your iPad device.
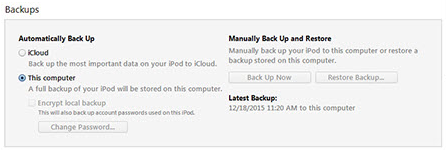
Step 2. To create a backup before restoring the device, go to the Summary and select Backups. Next, choose this computer and click "Back Up Now."
Step 3. Once the backup is complete, go to Summary and select "Restore iPad" to resolve the issue. After that, you can reinstall the device and restore your data from an iTunes backup.

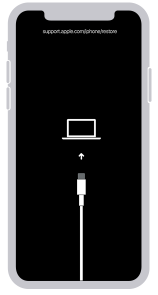
Method 3. Put your iPod into recovery mode
You can enter recovery mode on your iPod before restoring it if it has not been synced to iTunes. Then, following the process, you can either restore your backup or set up your iPod as new.
Step 1. Connect your iPod to a computer and turn your iPod off. To turn off your iPod, press and hold the "top" button for a few seconds.

Step 2. Press the Volume Down button on an iPod touch from the 7th generation. Next, use the Home button on an iPod touch from the sixth generation or earlier. As soon as you have connected your iPod to the computer, press and hold the appropriate button.
Step 3. Continue holding the button while waiting for your iPod touch to enter recovery mode before releasing it.
Step 4. Open iTunes, choose the iPod from the list, select the Reset iPod option, and then follow the on-screen directions to finish the process.
Method 4.Remotely erase iPod via iCloud
If the three previously explained methods can still not fix your device, you can try an iCloud-based recovery system. However, doing so will erase all of your device's data while potentially fixing the issue with your iPod touch being disabled and refusing to connect to iTunes.
Step 1. Log in to iCloud Web with the same Apple ID you used to sign-in on your iPod.
Step 2. Click the Find iPhone section and choose your iPod from the All Devices drop-down list.
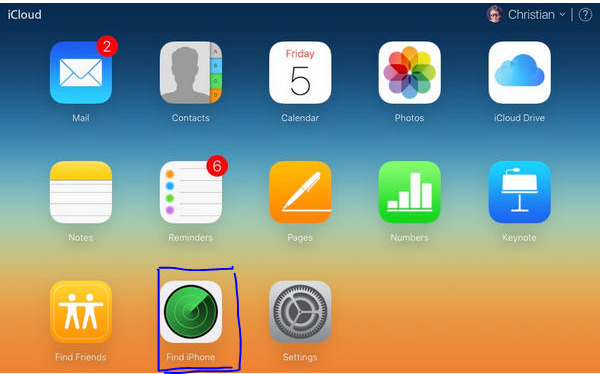
Step 3. Select Erase iPod from the menu that appears when you click on your iPod. To complete the process, confirm and follow the on-screen prompts.

Method 5. Turn on DFU Mode for your iPod Touch.
DFU Mode is another viable method to fix the iPod is disabled connect to iTunes issue. It is more difficult to understand, but you can relax because this method will not erase your data. Still, you won't be able to backup before performing the process, similar to recovery mode.
Step 1. Ensure your device is successfully connected to the computer via a USB cable.
Step 2. It would be best if you simultaneously held the "Home" and "Power" buttons.

Step 3. After a brief period, don't press the lock button, but keep holding down the home button. The only thing that should happen is for your screen to remain black while iTunes reports that it has found your iPod in recovery mode. You can now let go of the home button.
Step 4. If nothing appears on the screen, enter DFU mode.
Step 5. To exit DFU mode, press and hold the Home and Power buttons and stop when the Apple logo is displayed on your device.
Bonus Tip: How to Back up iPod
EaseUS MobiMover is an iPhone manager and data transfer tool that is easy to use while offering features that allow you to send data from one Apple device to another and back up data from an iPhone to a PC. With EaseUS MobiMover, you have complete control of your information, and transferring data from an old iOS device to a new one is simple.
Price: Its Windows version starts at $23.95/month for 3 PCs, its Mac version starts at $39.95/month for 3 machines.
Compatibility: Windows and Mac
In addition, you can follow these steps that explain how to backup your iPod information.
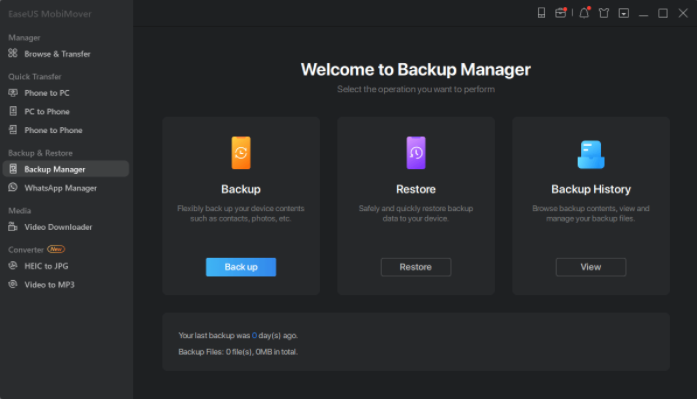
Step 1. Connect your iPhone/iPad to your PC with a USB cable and click "Trust" on your device. Then launch EaseUS MobiMover and click "Backup Manager" > "Back up".
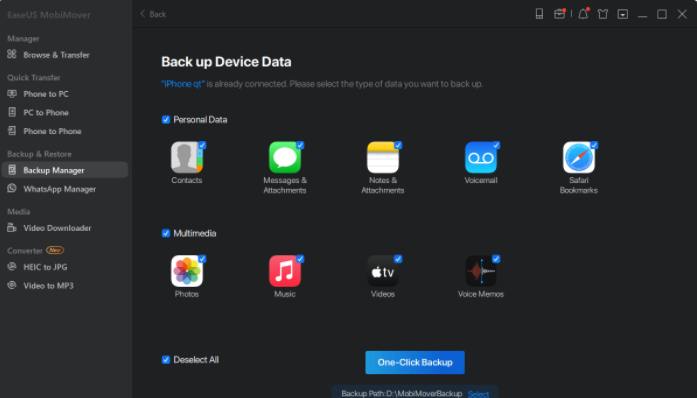
Step 2. Check the types of files you need to backup. Afterward, click the backup button to start backing up your iPhone or iPad.

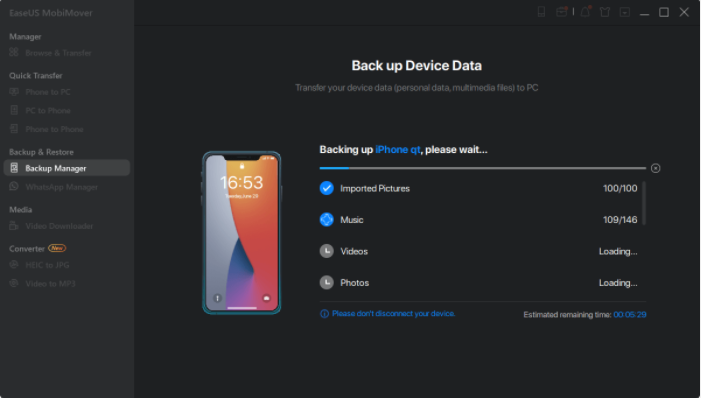
Step 3. Depending on the size of the content, the time the backup will spend varies. Wait patiently for the backup to complete.
Conclusion
Hope you were able to fix the "iPod is disabled connect to iTunes" issue using the methods described above. Feel free to explore any of the methods, following the guide will bail you out of the problem. It is also recommended that you utilize EaseUS MobiUnlock, a quick and effective method that ensures a high success rate when attempting to resolve the problem.
Price: Its Windows version starts at $29.95/Month, its Mac version starts at $49.95/Lifetime.
Compatibility: Windows and Mac