Visualize yourself downloading an important file, and suddenly you come across the screen message that says ''your PC ran into a problem and we'll restart it for you. We understand how frustrating it is to close all the tabs, restart the PC, and face the same problem again.
If you've been there, you're not alone.
Known as one of the most common BSOD blue screen errors, it's often caused by hardware malfunctions and calls for a quick window repair.
In this article, we've broken down all the tried and tested ways to solve the BSOD error in no time.
Why Your PC Ran Into a Problem and Needs to Restart
Although there can be many reasons to initiate the restart message on your PC, the most common ones include the following:
1. Deleted registry files from the system32 folder
2. RAM running at a high speed
3. Corrupted system file
4. Overheating
5. Virus attack
6. Forceful shutdown
Whatever the case, the BDOS error is a severe threat to your PC and repeatedly shows on the screen even when you restart the PC.
How to Fix It When Your Device Runs into a Problem and Needs to Restart
1. When You Can Boot into Safe Mode
Method1. Update the Drivers
If your PC has run into a problem because of faulty drivers and needs to restart, simply update the drivers.
Step 1: Go to the Start button or click on the windows icon on the desktop.
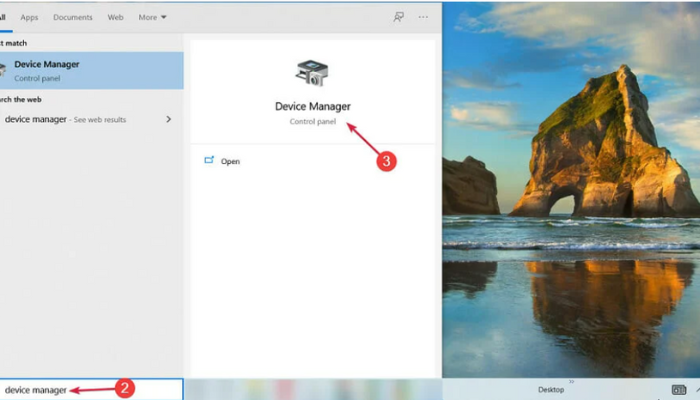
Step 2: Now, type ''device manager'' in the search bar and choose that from the options.
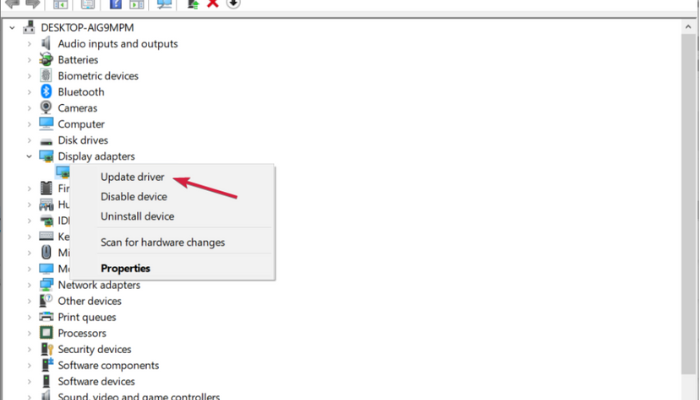
Step 3: Now, choose the device you want to update and click on ''Update Drivers''.
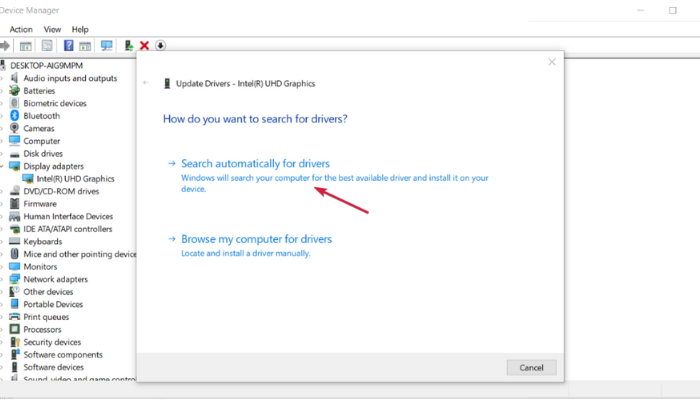
Step 4: Next, go to the option ''search automatically for drivers'' to allow your system to look for updates that need to be installed.
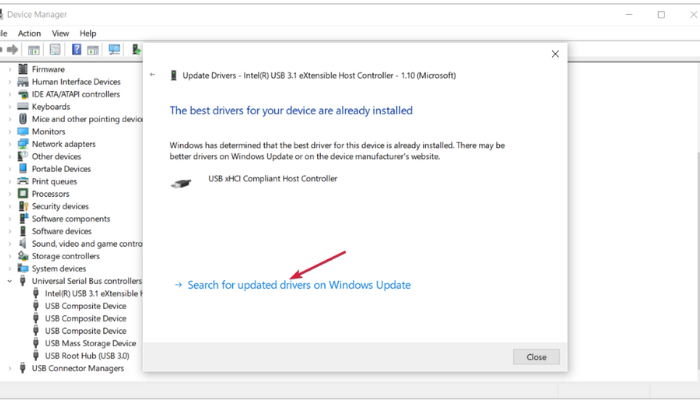
Step 5: If the search doesn't start, select now ''search for updated drivers on windows update''.

Step 6: Once the search ends, you'll land on the Windows Update menu and click on the option ''Check for Updates'' to install any new or pending updates on your system.
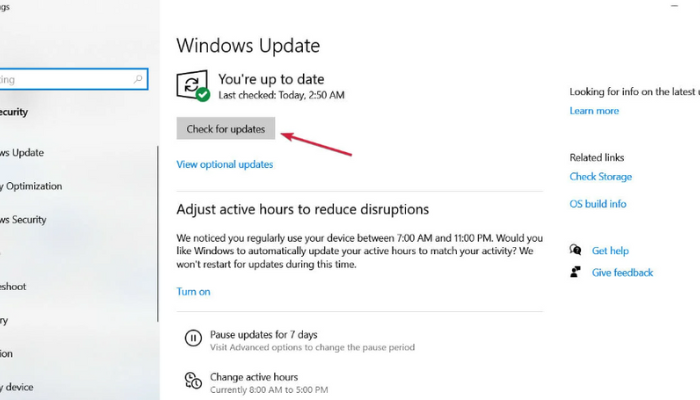
Step 7: Lastly, click on ''View All Optional Updates'' to check if your device is up to date with all the updates to proceed further.

Method2. Check the Disk
Often, errors in the disk can also result in serious PC issues and require an immediate restart. If you've not changed your hard drive lately, run the CHKDSK command to check the disk with the help of the steps below.
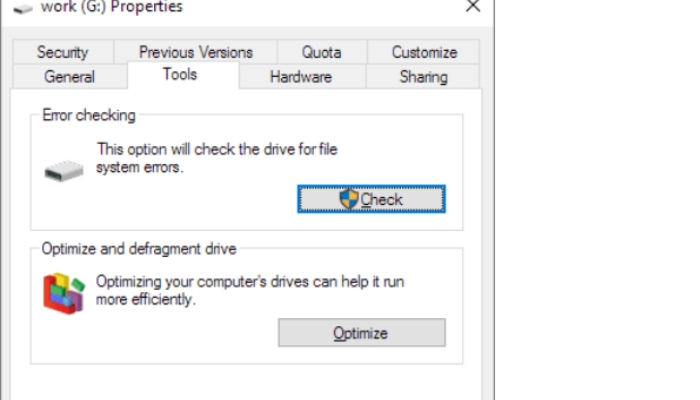
Step 1: Go to file explorer and click on ''This PC''. Next, right-click on that and select ''Properties''.
Step 2: Click on the ''tools'' and proceed by hitting ''check'' to get all the information about the drive.
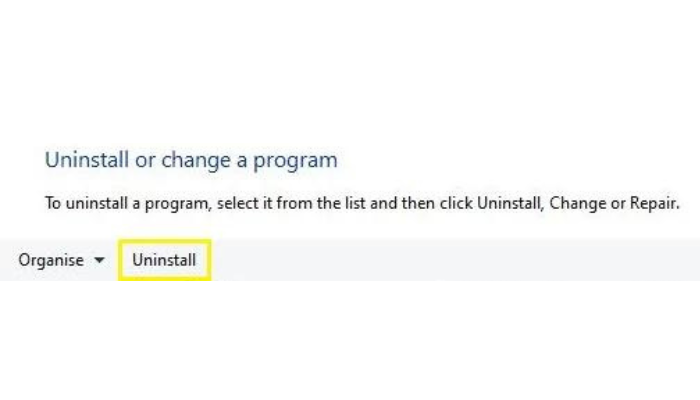
Method3. Uninstall Recently Installed Applications
If you have recently installed any application that didn't proceed well, it's best to uninstall that and free up some space.
Follow these steps to install applications when Windows is in safe mode.
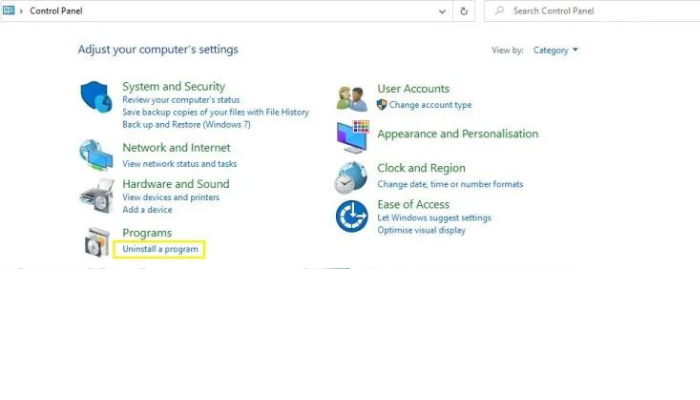
Step 1: Click on the ''Windows icon'' present at the bottom left corner of the desktop.
Step 2: Go to ''Programs and Features'' to see the installed applications on the PC.. Next, ''Select'' the programs you want to uninstall.
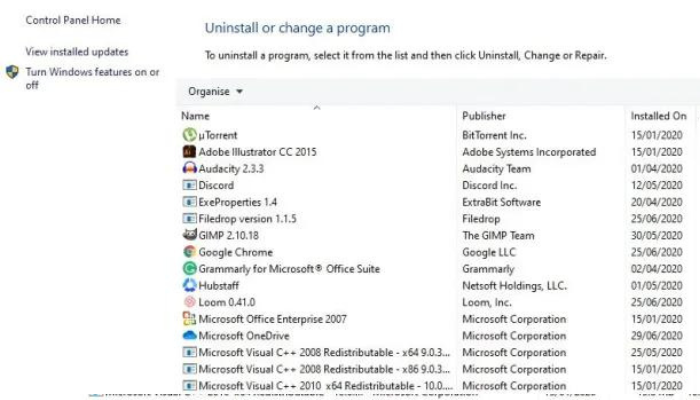
Step 3: Once done, select ''install'' or ''change'' a program.
Method4. Change the Memory Dump Settings
Memory Dump is the place where all the sensitive forensic data is stored. Changing the setting helps in deleting the unnecessary items and resolve problems with the hard drive.
Step 1: Click on the Windows icon and type ''advanced system settings'' in the search bar.

Step 2: Switch to ''Advanced Tab' and go to ''Settings''.

Step 3: Open the Windows for ''Start-up and Recovery'' and hit okay to save the changes.

Method5. Run the DISM Scan
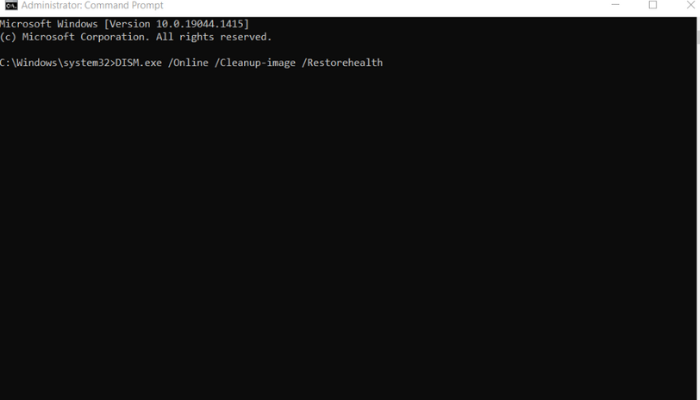
Put simply, DISM scan helps in identifying and solving file system errors in the PC. To run the DISM scan, take out a few minutes and read the steps.
Step 1: Go to ''Start'' and type ''Command Prompt'' in the search bar.
Step 2: Once the command prompt window opens, type ''Command'' as seen in the picture and hit enter.
Step 3: Wait for a few minutes until the DISM scan is completed.
Step 4: Once the scan is completed, restart your PC.
Method #6. Force Windows to shutdown
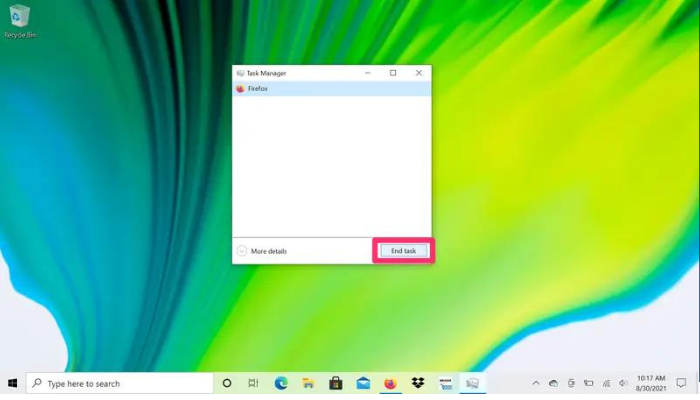
If you've encountered an error on your PC, shut down the windows to bring the system back to normal. Follow these steps to reinitialize the windows with a force shutdown.
Step 1: Go to Start and click on shut down or press the shift+power key for a few seconds.
Step 2: Let the PC rest and then press the power key again.
Step 3: If the issue has been resolved, press the recommended key to permanently disable the fast startup feature.
2. When You Can not Boot into Safe Mode
Method 1. Run Startup Repair
If you've been juggling PC errors due to a failure in Windows Boot, performing a startup repair can help you out.
Step 1: Go to ''Start'' and press the ''Power Button''. After a few minutes, press the ''Shift+power button'' to restart the PC.
Step 2: While the windows boot up, choose ''Troubleshoot > Advanced Options> Startup repair from the startup options.
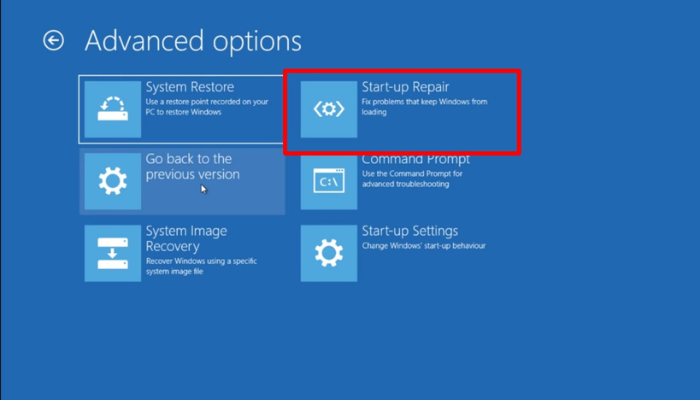
Step 3: Next, use any reliable PC repair tool available and ''Start a PC Repair'' to help windows detect the problems found in the PC.
Method 2. Perform System Restore
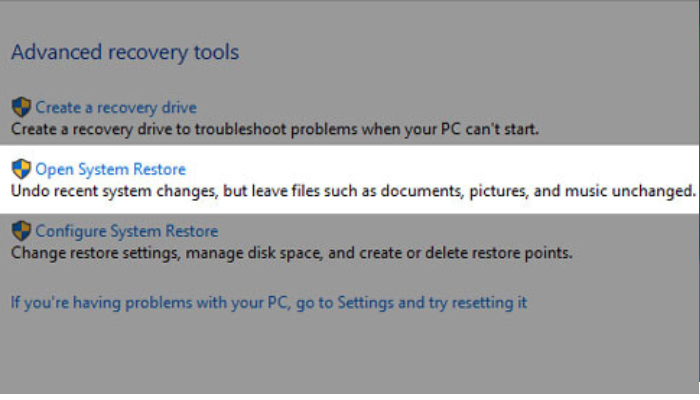
Every PC has a ''System Restore Point'' available to save all the data and prevent data loss during system failure, file corruption, and other scenarios.
To perform a system restore, follow the steps below:
Step 1: Go to the ''Windows Icon'' or click the ''Start'' button and search for ''System Restore''.
Step 2: Now, select the option ''Create a Restore Point,'' which will open the system properties window on the screen. Click on ''System Restore'' and hit ''Next''.
Step 3: Lastly, click on the ''Restore point'' you want to see and select ''Ok''.
Method 3. Perform System Image Recovery

Performing a system image recovery can help you identify the errors in images. To perform this method, follow the steps below:
Step 1: Connect a USB or hard drive that stores all the images on your PC to prevent data loss.
Step 2: Once connected, go to the ''Windows Boot'' and click on Troubleshoot> Advanced> System Image Recovery.
Step 3: Now, ''Select'' all the images you want to recover and copy them to the ''Computer Wizard''.
Step 4: Once done, hit ''Next'' and repeat the steps until all the images are transported.
Step 5: Lastly, follow the instructions on the ''Wizard'' to format the disk and perform ''System Restore''.
Step 6: Lastly, ''restart your PC'' and check if the error has been resolved.
Method 10. Restore Registry Configuration
Restoring registry configuration is an important step to save the registry information using the command prompt. Follow the steps mentioned to restore the registry and improve the functionality of your PC.
Step 1: Go to ''Start'' and type ''Command Prompt'' to select.
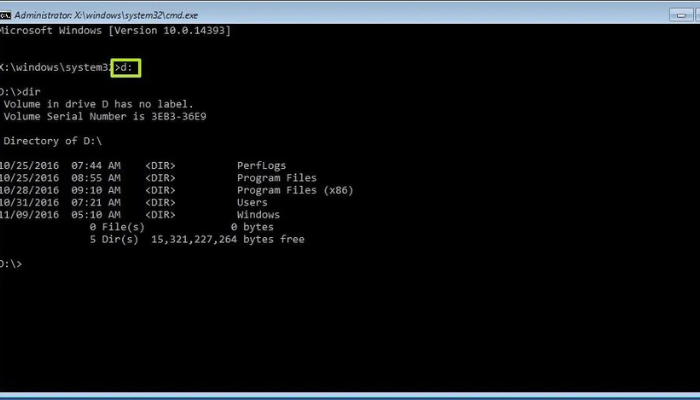
Step 2: Enter your login details and password to start the process.
Step 3: In the command prompt Windows, enter the following code in the box.
- C:
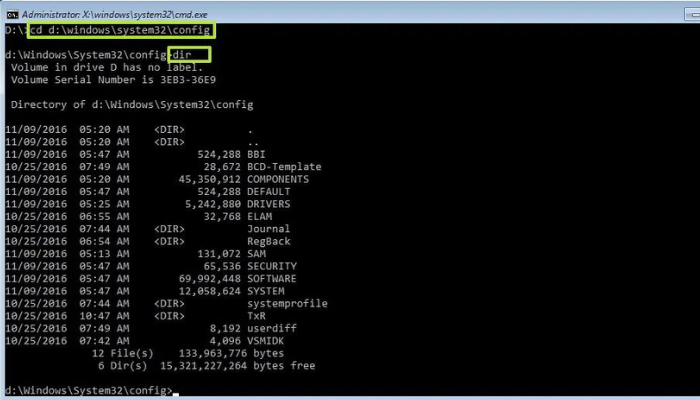
- CD Windows\System32
- CD config
- DIR
- CD regback
- DIR CD.
- REN default default1
- ren sam sam1
- ren security security1
- ren software software1
- ren system to system1
- CD regback
- copy * c:\windows\system32\config
Method 11. Reset Or Reinstall Your Windows
If you've had issues with your Windows, a good step is to reset or reinstall windows with the help of the steps given below. Before you start, make sure to save the key files in the system partition.
Step 1: Search for settings and go to recovery in the category of update and security.
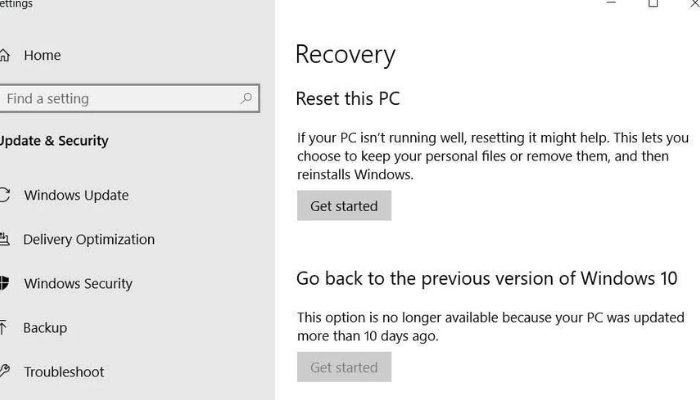
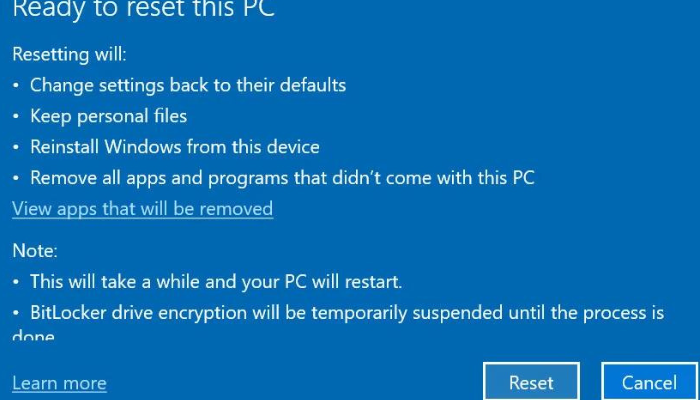
Step 2: Bash the option ''Get Started'' present under Reset this PC.
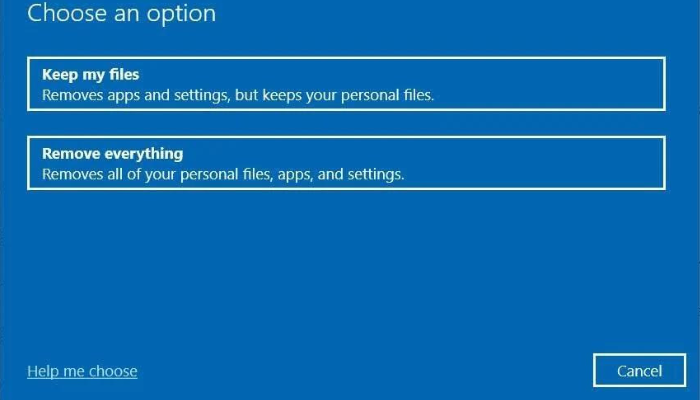
Step 3: This will open the windows for Reset this PC. Choose the option ''Keep My Files'' and start the reinstallation of windows not to lose any data in between.
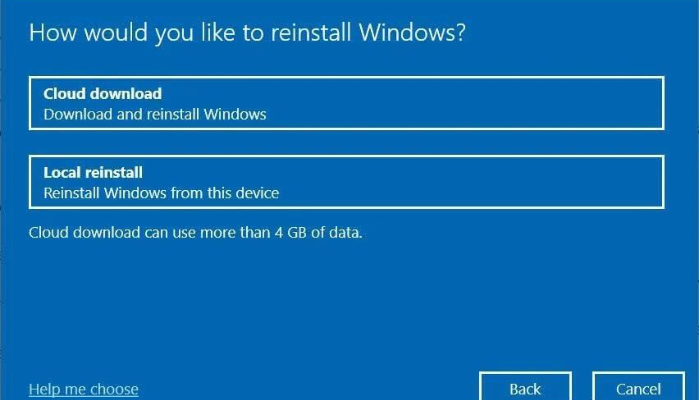
Step 4: Next, select the option ''local reinstall'' and then review the current settings of your windows.
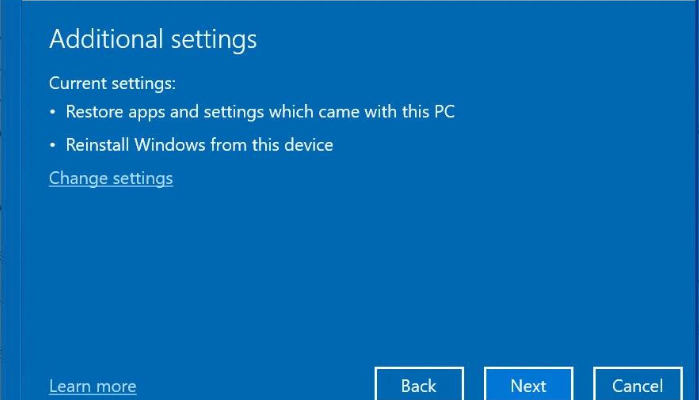
Step 5: Here, you can also change the settings on for your PC before installing windows all over again.
Step 6: Lastly, answer the confirmation msg to reset your PC and click on reset to reinstall the existing operating system on your PC.
Bonus Tip: How to Prevent Other PC Issues

Using the system mechanic ultimate defense is one of the best PC repair tools available on the market. Backed by the latest AV and data protection, the tool helps in everything from securing web browsing, managing passwords, and removing malware from others.
Whether you want to speed up your ram memory or clean your hard drive, System Mechanic Ultimate Defense is the perfect PC cleaner to help you remove clutter, recover lost files, and do everything on your own.
With strong antivirus capabilities, the tool is super easy to use when it comes to protecting, cleaning, and taking care of your system.
The software offers over 30,000 different solutions backed by advanced technology to keep your PC safe from all vulnerabilities
In short, EaseUS is your 7-in-one powerful PC repairing tool to give your PC a new life with smart online technologies that shield the system.
Price: It starts $79.95/Year.
Compatibility: Windows 11/10/8.1/8/7
How To Use It
Using the iolo System mechanic tool is easier than it sounds and better if you follow the steps carefully. Let's walk you through the step-by-step guide to using the System Mechanic tool like a breeze.
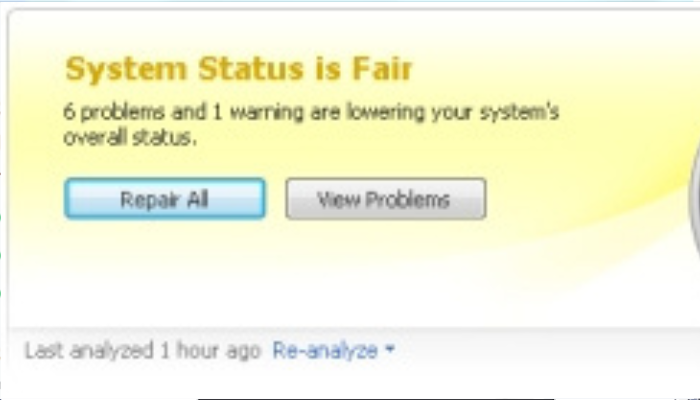
Step 1: As soon as you'll open system mechanic tool, you'll be asked to run an analysis on you PC.
Step 2: Once the analysis is done, click on ''repair all'' on the box system status is fair.
Step 3: Set up automated monitoring and repairs and again select repair all.

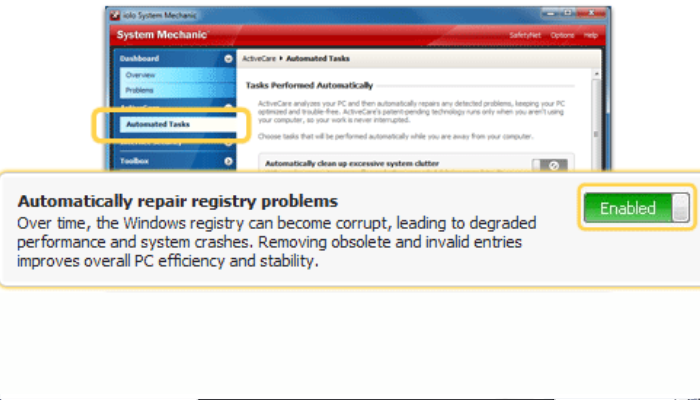
Step 4: Now, go to the Automated Tasks option and choose active care- a patented technology integrated into the software.
Step 5: Lastly, turn on the ''automated tasks'' option to enable the software automatically repair all registry problems.
Conclusion
If the BSoD error is due to a hardware malfunction, the following solutions can help you bring your PC back to shape and resolve the faulty components.
If the problem is still there, try using the iolo system mechanic ultimate defense tool to improve your PC's overall security, privacy, and performance while offering you a smooth user experience.