Most Windows users tend to stick to an older version of Windows. Windows 10 and Windows 7 are some of the top OS. if that is so, then it's time for you to upgrade it. Microsoft recently unveiled Windows 11, which has unique features and an improved interface than Windows 10. Microsoft is offering this up-gradation free for the old Windows users.
All you will need for your PC should meet some of the minimum hardware requirements for Windows 11. The requirements are like 64-bit CPU, 4GB of RAM. And 64 GB of storage. You will similarly get Windows Update as Windows 10 updates have been previously. When it comes to Windows 11, it comprises a fresh UI, starts menu overhaul, performance improvements, and updates to improve multitasking.
Useful Tips for Windows 11 upgrade
1. Check if your PC will run Windows 11
Start the process by checking if your PC can run Windows 11 properly. So, what are the minimum things required? Here we will get the list below:
- CPU- 1Ghz or faster on a compatible 64-bit processor or System on a Chip
- GPU- DirectX 12-compatible with WDDM 2.0 driver
- RAM-4GB or higher
- Storage- 64 GB or higher
- Firmware- UEFI, secure BOOT Capable
- TPM- Version 1.2 or 2.0
- Display- HD (720 P) display more significant than 9" diagonally, 8 bits per color channel.
- Internet- Stable connection for Windows 11 Home edition
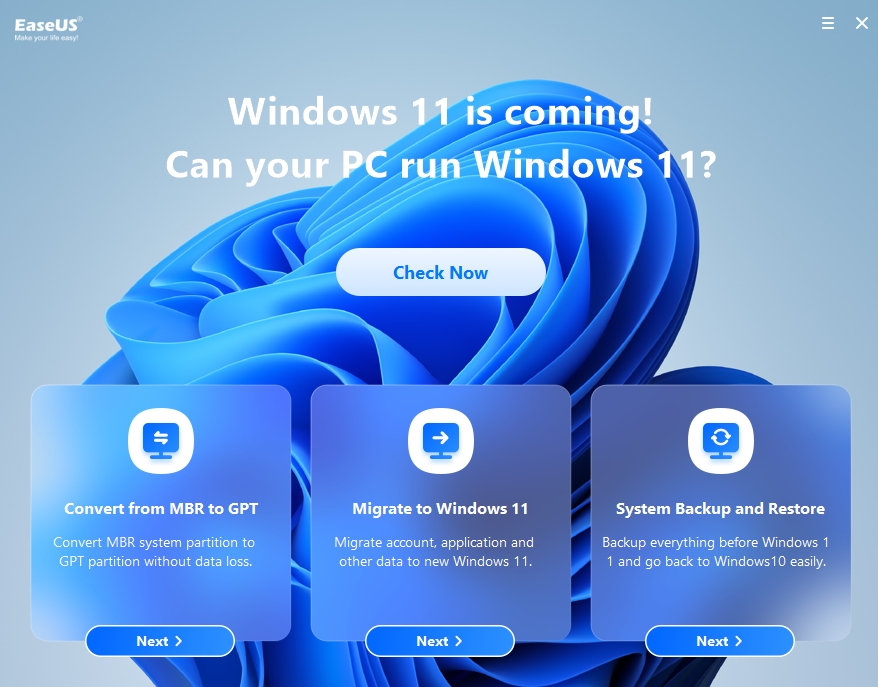
We recommend you use the EaseUS Windows 11 Upgrade checker to check if your PC meets all the requirements or not for the Windows 11 upgrade.
2. How to fix your PC can not run Windows 11
If your PC can not run Windows 11, then there maybe some of the common incompatible configuration items like:
- UEFI Secure Boot is disabled
- TPM 2.0 is disabled
- The system disk is in MBR instead of GPT
Fix to UEFI Secure Boot is Disabled
Fix to The system disk is in MBR instead of GPT
Fix to UEFI Secure Boot is Disabled
UEFI Secure Boot is one of the vital security features which ensures that the system boots only trusted operating Systems. It usually helps to protect System from malware and is usually available on all modern computers. To have Windows 11 running on your PC, you must enable the UEFI Secure Boot.
Step 1. Press Windows+R to open the Run window.
Step 2. Type and enter msinfo32
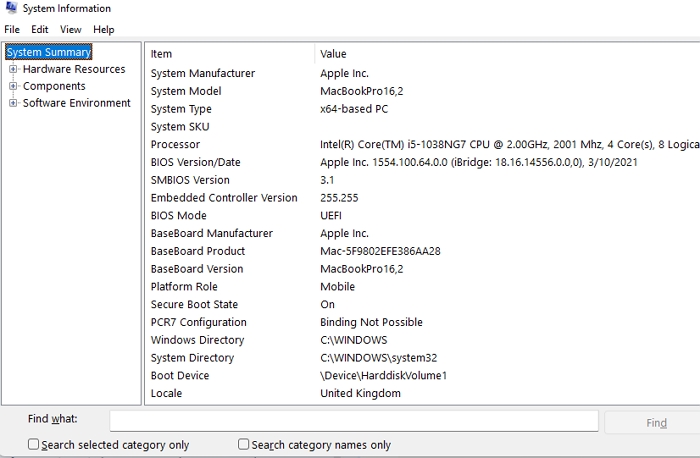
Step 3. It will open the system information where you will get a System Summary now check the Secure Boot State is on or not. If it's off, enable it by following the steps below.
Step 4. Shut down your computer Reboot it, and during Startup, open the BIOS or UEFI menu by pressing F1, F2, F10, F11, DEL keys. Remember, the key may vary, and it depends on the manufacturer. So better check the user manual to get the correct information about the key to open your BIOS menu.
Step 5. Go to the Boot tab on your BIOS menu. You may have to go to the Advanced Mode. Look for the Secure Boot option, check if it's enabled. If not, then enable it. Save and exit, then start your PC.

Trusted Platform Module, also known as TPM, is a crucial chipset installed on motherboards that stores sensitive security data. You have to enable TPM on your System before installing Windows 11.
Step 1. Press the Windows key to launch Start Menu and search for Windows PowerShell. Right Click on Windows Power Shell and click on Run as administrator.
Step 2. Now it opens the Administrator Windows PowerShell screen. Type and enter get-tpm command. Check whether TPM is present and enabled or not.

If TPM is not enabled, you must enable it through the BIOS menu. Follow the below-mentioned steps to enable TPM in BIOS Menu.
Step 3. Reboot your computer, and during startup, open the BIOS or UEFI menu by pressing F1, F2, F10, F11, DEL keys.
Step 4. Once the BIOS or UEFI menu opens, tap the Security option. You have to look for TPM and check if it is enabled. If not, then enable it.
Step 5. Now, make sure to Save and Exit. Then, restart your PC.
Fix to The system disk is in MBR instead of GPT
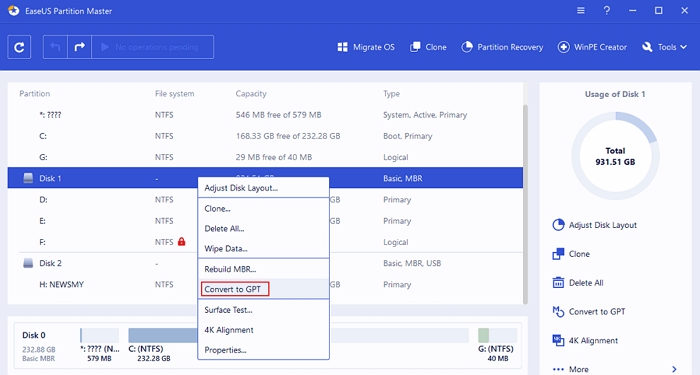
To admittance the improved security features of UEFI, Windows 11 sacrifice the older Master Boot Record (MBR) partition scheme and instead use the modern GUID Partition Table (GPT) Scheme. So, it is necessary to convert MBR hard drive partitions to GPT. If your PC can't run Windows 11, it's necessary to check whether you are using the MBR partition scheme or GPT.
Learn how to convert MBR to GPT without data loss
2 ways to upgrade Windows 10/8/7 to Windows 11
This section will help you with two exact methods to upgrade Windows 10/8/7 to Windows 11:
Method 1. Upgrade to Windows 11 via Windows Update
Method 2. Clean Install Windows 11 from an ISO file
Method 1. Upgrade to Windows 11 via Windows Update
Rather than waiting for the upgrade to reach your System, you can go through Microsoft's Windows 11 Installation Assistance.
Step 1. Open the Windows 11 page, download the Windows 11 Assistance, click on the button that says download.
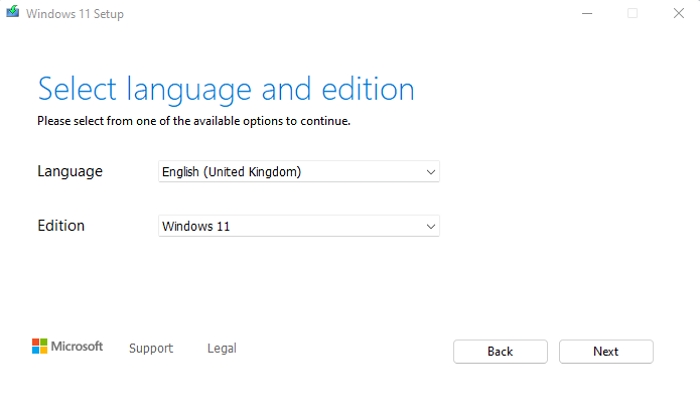
Step 2. Run the downloaded Windows 11 InstallationAssistance.exe.file. Click the Accept and Install button to upgrade to Windows 11. It will start downloading the setup.
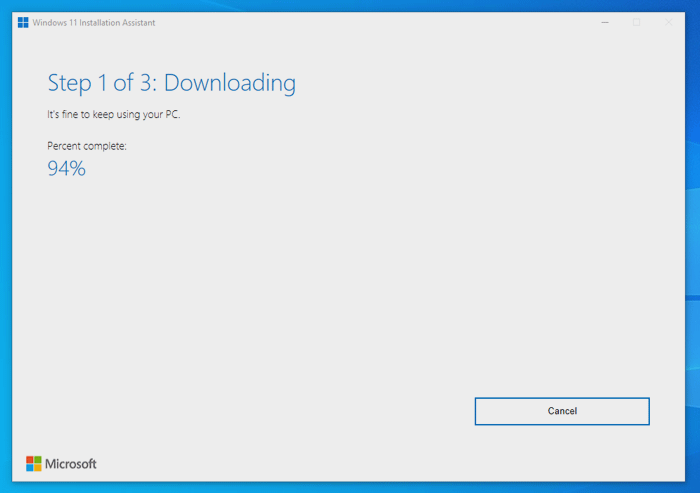
Step 3. After the installation process, you will be prompted to restart your PC immediately or wait for 30 minutes
Step 4. After the PC reboots, you can now sign in to Windows again with your new Windows 11 desktop.
If method one doesn't work for you, you can go with method 2.
Method 2. Clean install Windows 11 from an ISO file
When it comes to clean installation of Windows 11 from an ISO file, it can be done in two ways:
- Make Windows 11 Bootable USB with Media Creation Tool
- Download Windows 11 ISO file and Create Windows 11 Bootable USB
Let's know the exact steps.
1] Create Windows 11 Bootable USB With Media Creation Tool
The good thing is on Windows 11, the media creation tool can be used to create bootable USB for Windows 11. Usually, this method is to install a fresh copy of Windows 11. But you can also apply this method to your System if it doesn't support Windows 11. Before starting, make sure to take a complete backup of personal data. You need at least one 8 GB or higher USB drive for your System.
Step 1. Go to the Windows 11 download page. Then click on Download link under the Create Windows 11 Installation Media section.
Step 2. Open the installation file and click on Accept. Click on the Next button.
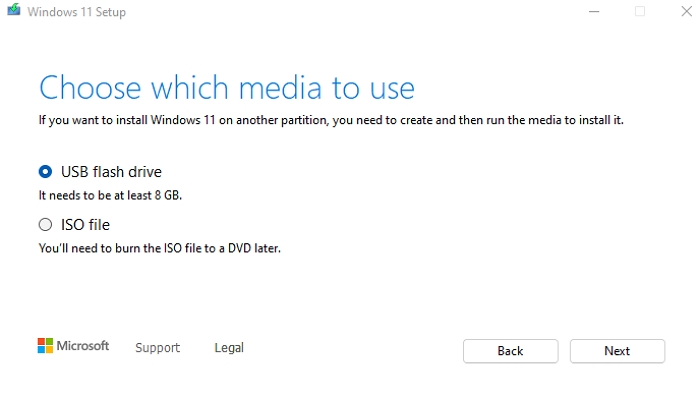
Step 3. Select the USB Flash drive option and click on Next. You will see your USB flash drive on the list. Once you click on the Next button, please wait for it to add the Windows 11 setup to your USB flash drive.
Step 4. Once the downloading of files is complete, you can launch the Windows 11 setup wizard and continue the installation process.
2] Download Windows 11 ISO file and Create Windows 11 Bootable USB
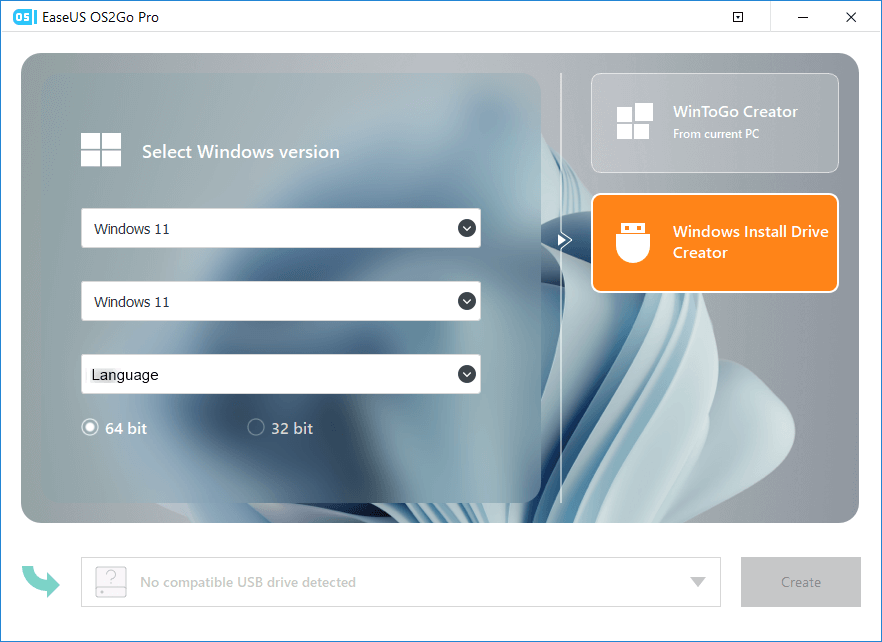
If you are not comfortable with the Windows Media Creation Tool, you can directly download the Windows 11 ISO file. Then the ISO file can be directly mounted on a USB flash drive. To do this process, you will need to use the most reliable and safe third-party tool, EaseUS OS2Go.
Price: It starts $19.95/Monthly.
Compatibility: Windows
Step 1. The Win11 builder is integrated with the EaseUS OS2Go software. Click the download button and launch the program after installation.
Step 2. Switch WinToGo Creator to Windows Install Drive Creator. The obtained system information is available on the home screen, and it keeps updating all the time. Apart from Windows 11, Win11 builder also supports you to download Windows 10/8.1.
Step 3. Connect your USB flash drive to the computer. Win11 builder will automatically detect your USB device, so all you need to do is click the Create button.
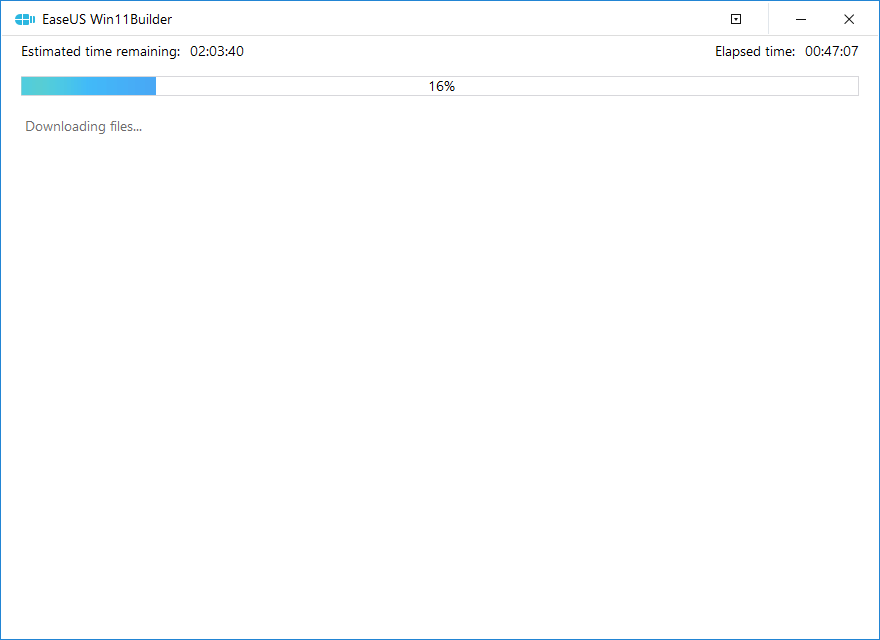
Step 4. The software will empty your USB drive data if it's a used one. Once the downloading process begins, wait there until it finished or leave for a while to do you own job.
Step 5. After successfully downloading the Windows 11 iso image file on the USB drive, start to install Windows 11 from the bootable USB drive on your computer by following the installation wizard step by step.