Sometimes downloading interesting GIFs or videos via the internet becomes a hassle and sharing them with friends and family becomes a headache. In such a situation, a screen and audio recorder come to help. This option allows you to record the screen with sound and feasibly complete your task.
This article provides three practical tools to help you smoothly record screen and audio on both Mac and Windows devices in your desired format. You can utilize them for your business meetings, voiceovers, presentations or lectures, etc., to set your priorities right.
3 Ways to Record Screen and Audio at the Same Time
Method 1: Use EaseUS RecExperts to Record Screen and Audio on Windows & Mac
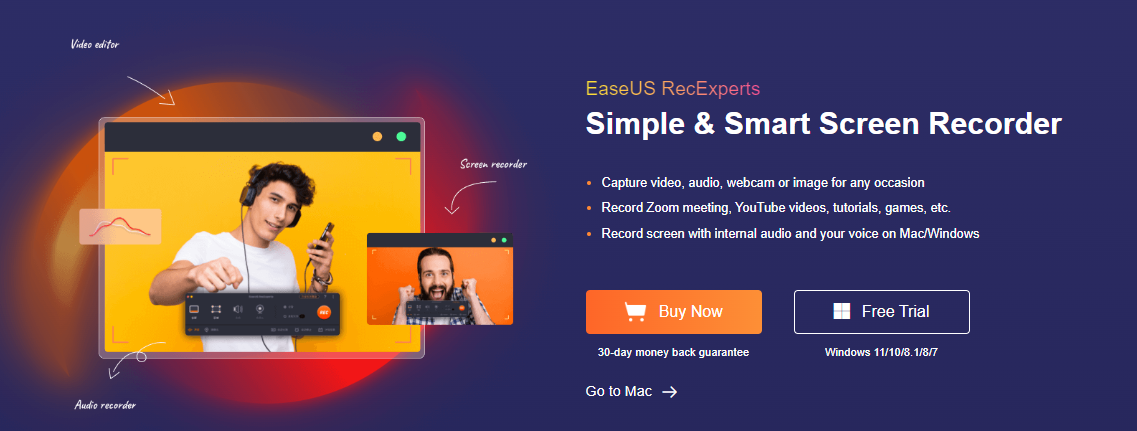
EaseUS Recexperts is a handy screen and audio recorder that aids the users in recording anything perfectly for any occasion. The software is flexible as it helps customize part of the screen or full screen. It works for Mac and Windows devices and aids in recording webcam, screen, and voiceover as a simultaneous function or separate utilities. Whether an online meeting or live audio or video streaming, this software makes it a seamless experience for you. It can be utilized by teachers, employees, or people in business looking for good quality videos along with precision in audio quality.
![]() Pros
Pros
- It supports 10-plus formats for output
- The users can trim or preview recordings with its fantabulous tools built-in by EaseUS Rec Experts
- It supports full HD videos in 1080p and 4K
![]() Cons
Cons
- Some advanced features need to be paid.
Price: It starts $19.95/Monthly.
Compatibility: Windows and Mac
Step-By-Step Guide For Mac
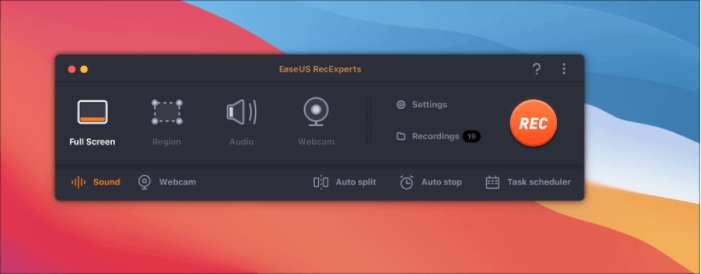
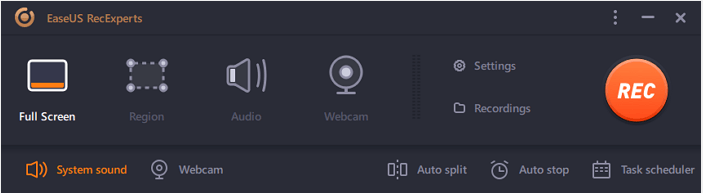
Step 1. Open the your favorite video and launch EaseUS RecExperts on your Mac. If you prefer to capture the whole screen, you can select the "Full Screen" option. Alternatively, you can choose "Region" to customize the recording area and select the recording area with your mouse.
Meanwhile, to capture the screen with audio, you'll need to click the Sound icon at the bottom left corner.
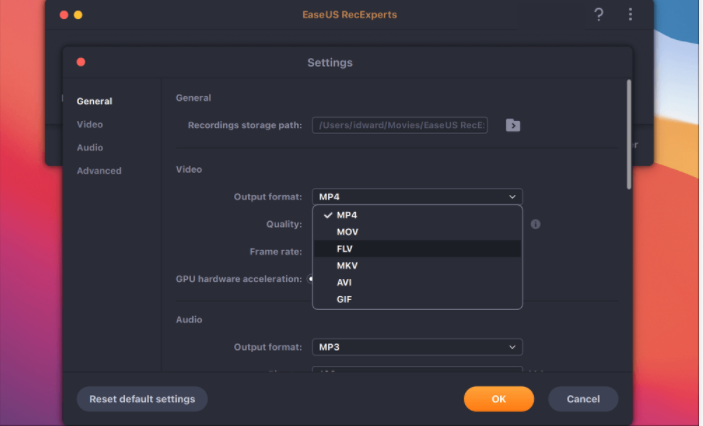
Step 2. You can apply options like changing the output format of the video, the quality, etc by clicking the "Settings" option.
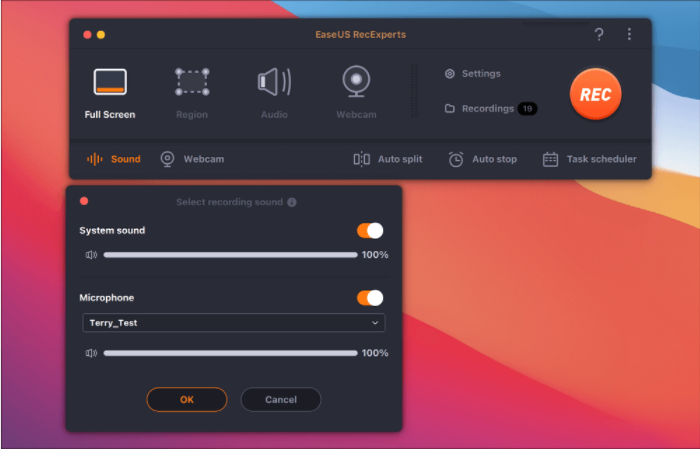
Step 3. Once done, go back to the main screen and hit the Sound icon. With that, enable the system or microphone sound if you want to record audio and screen simultaneously. Confirm the audio options by clicking "OK" , then hit the "REC" button to start recording.
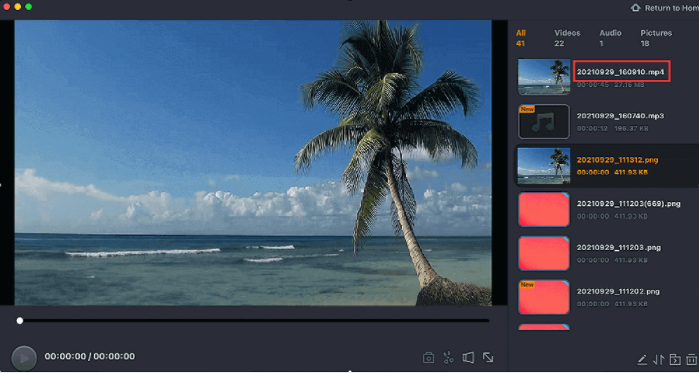
Step 4. After you finish the recording, click "Stop" to end the process. You are allowed to watch the captured video in "Recordings" and review the target saving from the lists.
Step-By-Step Guide For Windows
Step 1. Run EaseUS RecExperts on your Windows. If you want to capture everything on your screen, click the "Full Screen" option. This is a perfect choice when playing the streaming video in full-screen mode.
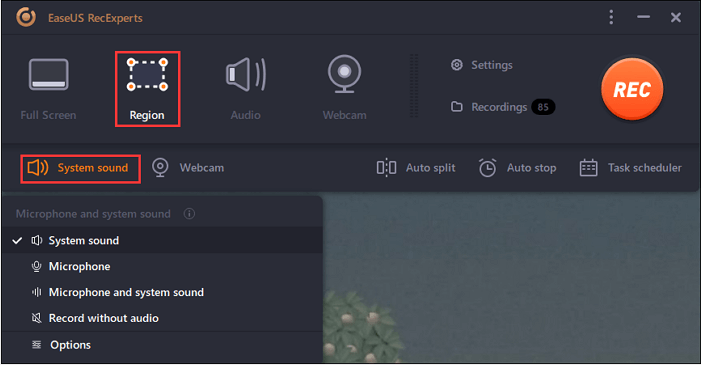
Step 2. Alternatively, you can opt for "Region" to record the specific area if you want to play the streaming video in a window.

Step 3. Now, you can hit the "System sound" button to choose the sound source you prefer and adjust the volume. Upon that, click "REC" to start recording.
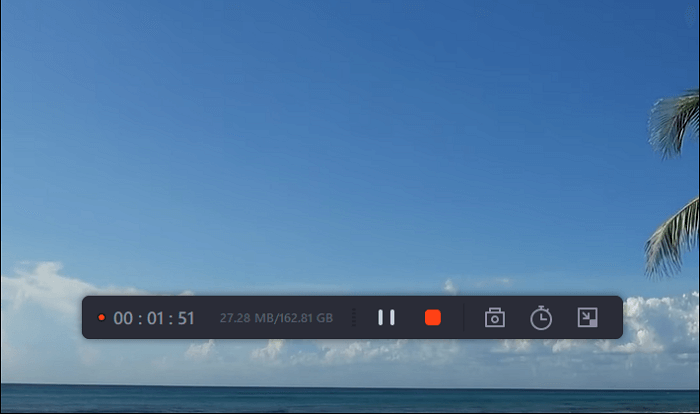
Step 4. When the recording is ongoing, you'll see a toolbar floating on the screen, which you can avail yourself of to pause or stop the recording process.
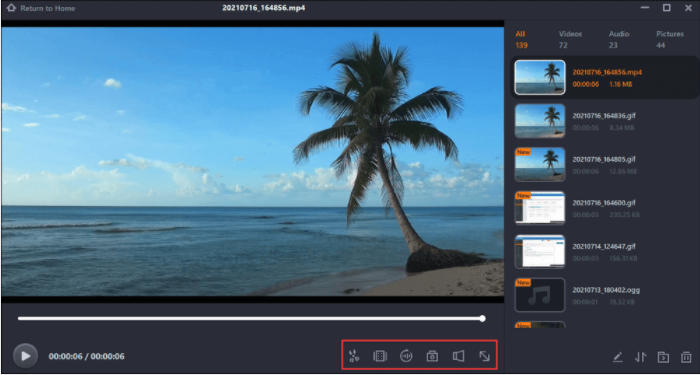
Step 5. Once you are done with the recording, click on the red stop button and then your captured video will be automatically saved on your device. You are also allowed to view the recording and utilize tools for trimming it, extracting audio from it, or adding an opening and ending section as the built-in media player appears.
Method 2: Use QuickTime Player to Record Screen and Audio on Mac
Quick time player is a full screen and audio recorder that works mainly for recording screencasts on Mac devices. Users can edit by flipping and splitting video clips and watching required videos. It can play almost any format of files, and you do not need to install third-party software if you have hands-on it. Instead, it assists the users in making presentations or lesson plans by utilizing the recording of audio and video altogether.
It can be utilized for screencasting and making lessons by the teachers. For example, you can use the software to record audio and video to create lesson plans to help those students who were absent during the lectures.
![]() Pros
Pros
- The design and user interface of this software are focused and straightforward
- It makes the users do recording of screencasts on their Mac devices
- You can use it to digitally assess students' or employees' work and provide feedback
![]() Cons
Cons
- You can do screen recording only in .mov format
- It does not have attractive features
Step-By-Step Guide
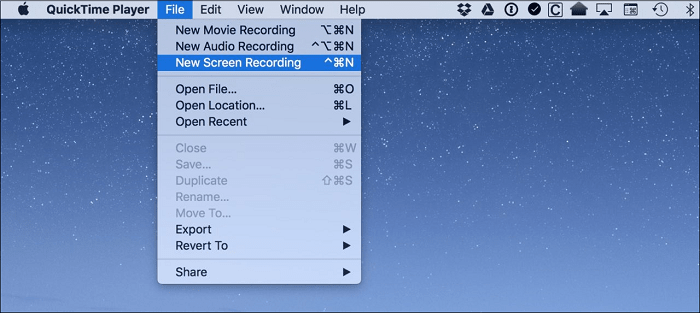
Step 1: Open the QuickTime Player, click on 'File,' then on 'New screen recording.'
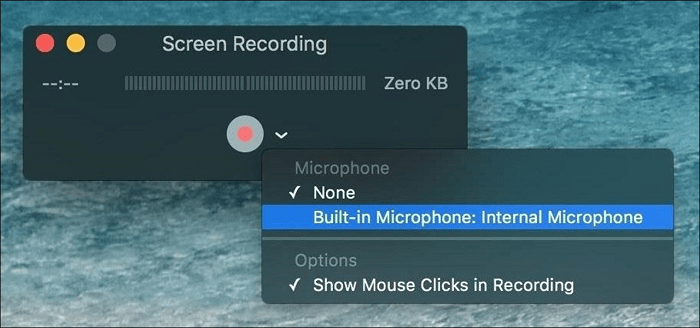
Step 2: On the prompt, before clicking on the record button, tap the down arrow and choose the required options.
Step 3: Now go ahead on the record button once the pop-up appears on the screen. If you are looking to record the whole screen, go ahead by clicking on any part of the screen.
Tap and drag over a particular section if you wish a part of the screen to get recorded, and for this, you have to tap on 'Start Recording.'
Step 4: Once the recording finishes, click on Stop Icon from the menu bar on top.
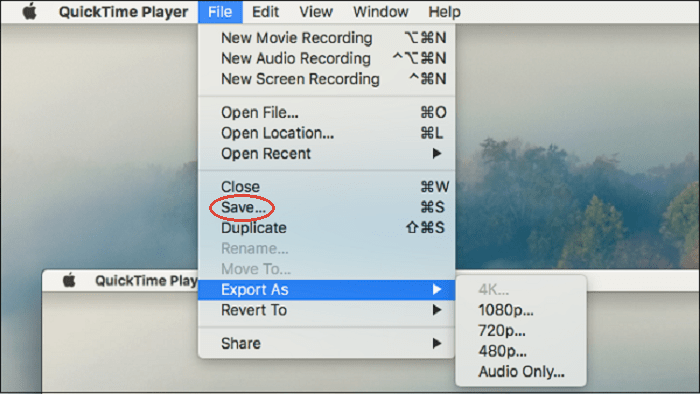
Step 5: You can review the recording, and once satisfied, save it by opening the 'File' and then the 'Save' option by giving a proper name to your video.
Method 3: Use ShareX to Record Screen and Audio on Windows
ShareX is an incredible screen and audio recorder that helps record, edit, and share the video. It also assists in capturing GIFs and screenshots and aids the user with a customizable recording area. It converts the videos into desirable formats and has a color picker facility to transform your pictures and make them look mesmerizing.
ShareX can be utilized by anyone who wants to screen record a particular screen area and share it with their friends or audience. It also assists in the upload of images, text, or any other file supported on the software.
![]() Pros
Pros
- It helps in automatically capturing the screen
- Allows the users to take screenshots along with making instant GIFs
- It aids the users in the customization of the area of recording
![]() Cons
Cons
- There are limited screen recording options
- The user cannot toggle between the options while recording is going on
Step-By-Step Guide
Step 1: Type 'get sharex.com' on any web browser.
Step 2: Proceed with downloading the installation file.
Step 3: Set up the software with on-screen instructions.
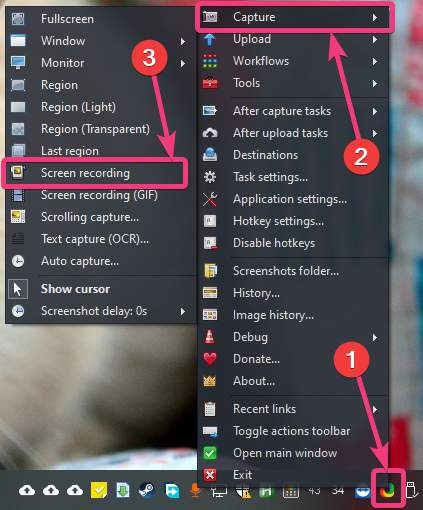
Step 4: Open ShareX, then find 'Capture and Screen Recording.'
Step 5: On the prompt, go ahead with downloading and installing of FFmpeg.exe file in an automatic mode and tap on the Yes button.
The Bottom Line
Herein we have sorted three practical tools to work as a screen and audio recorder in different situations to suit your needs. For example, EaseUS RecExperts aids Windows and Mac users in recording screens with audio in top-notch 4k and 1080p quality and fantastic sound quality.
You can use Quicktime player for Mac, especially if you are looking to prepare lectures for your absent students. Or you can use ShareX if you are a Windows user for recording videos and sharing them with family and friends. You can choose any of these; however, we suggest EaseUS Rec Experts as it works for both Windows and Mac to render fantastic recording quality.
Price: It starts $19.95/Monthly.
Compatibility: Windows and Mac