We're constantly finding new ways to use technology for teaching as it advances. Instructors are frequently being requested to make instructional materials available to students at home using high-speed internet access and cloud-based data storage. While this may make some programs more accessible and allow students to work at their own pace, it also places much strain on instructors.
Fortunately, Google Classroom provides various tools for communication and information sharing. Google Classroom is a collection of web resources rather than a single program. It assists educators in creating assignments, collecting student work, returning graded sheets, and more. It's a crucial aspect of the education industry's digital transformation.
Recording a video of yourself describing the task can be a fantastic approach to enhancing your students' learning processes and reducing time spent writing instructions. It may also make the instructions easier to comprehend.
This tutorial will show you how to record videos for Google Classroom using three different approaches.
How to start a Google Classroom
Creating a class is among the first actions you'll do in Classroom. You can assign tasks to pupils and make announcements in a classroom.
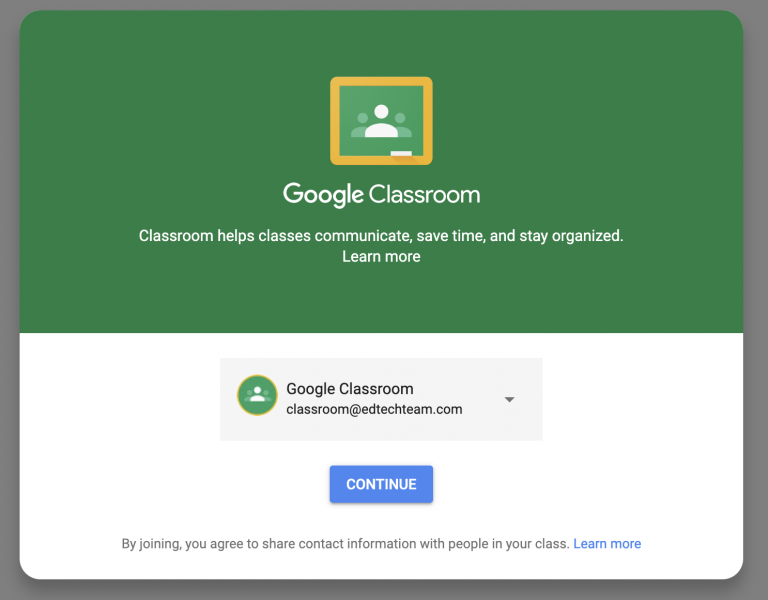
Step 1: Sign up for a Google Classroom account at classroom.google.com.
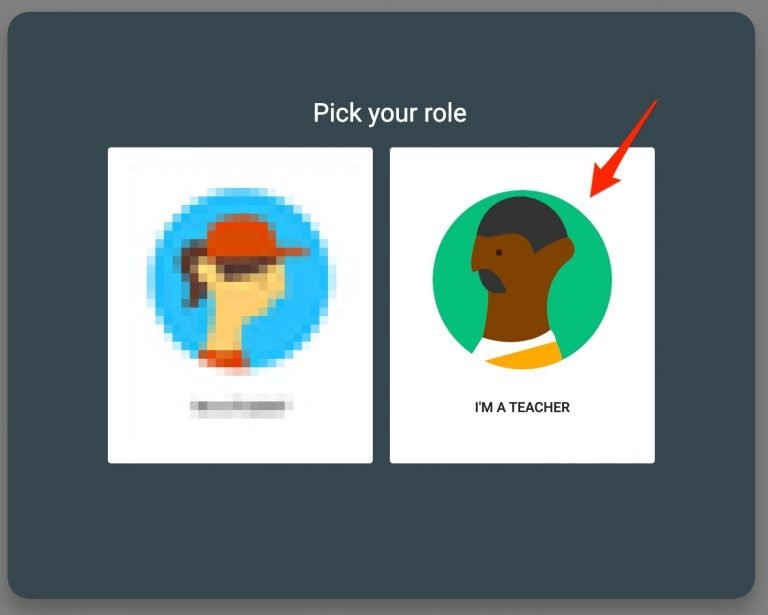
Step 2: Choose the role of the Teacher from the drop-down menu.
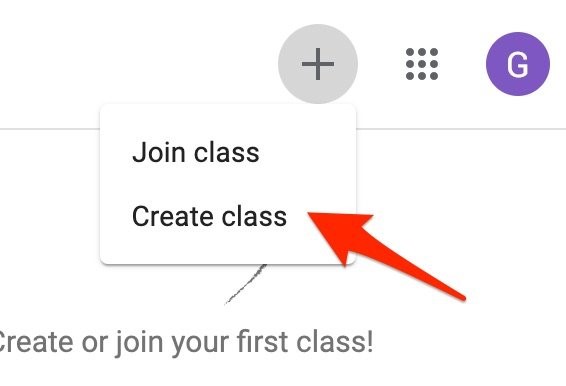
Step 3: From the Classroom Home page, select + and then Start class.
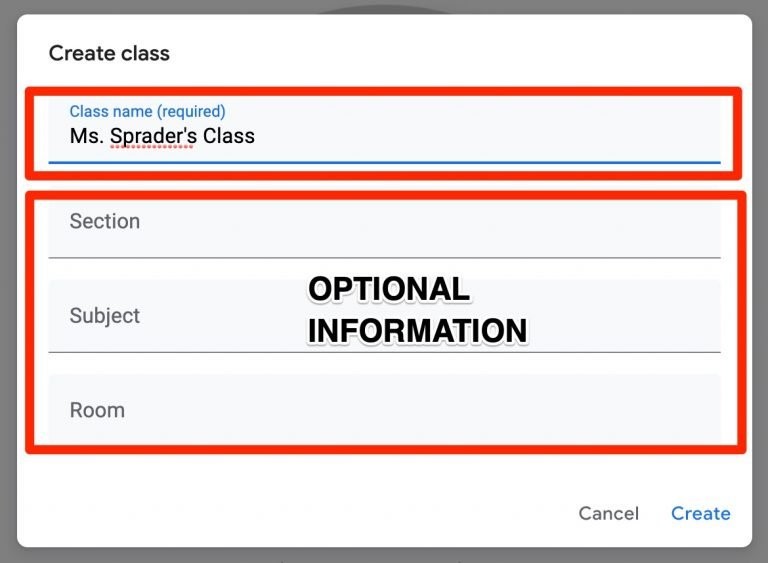
Step 4: Assign your class a name that you and the students will remember.
Step 5: Tap Section and fill in the data for a short overview of your class, education level, or teaching time. A class code will now appear on the screen. To invite participants to your class, copy and share the code.
3 Methods to Record Video for Google Classroom
Method 1: Use EaseUs RecExperts to Record Video for Google Classroom(Windows)
Method 2: Use QuickTime to Record Video for Google Classroom(Mac)
Method 3: Use Vidmore Free Online Screen Recorder to Record Video for Google Classroom
Method 1: Use EaseUs RecExperts to Record Video for Google Classroom(Windows)
EaseUS RecExperts is a feature-rich yet lightweight screen recording application for Windows 11/10/8/7. The Windows screen recorder's key features are grouped into three categories: recording the Monitor screen, recording sound, and recording the camera. You may modify the recording zone with the "Region" feature, which implies that you could record without clipping the video later.
Features:
- Freely record the screen, audio, as well as webcam.
- You can record online meetings, seminars, and webinars.
- Schedule recording to record the screen at a designated time
- Automatically dividing recordings is supported.
- Provide tools for altering and extracting built-in data.
Price: It starts $19.95/Monthly.
Compatibility: Windows and Mac
Here is a step-by-step guide on how to utilize the EaseUs RecExperts to record video for Google Classroom
Step 1: To begin, open EaseUS RecExperts. "Full Screen" and "Region" are the two screen recording choices available. If you choose "Full Screen," the entire screen will be captured.

Step 2: If you choose the "Region" option, you'll be prompted to specify the recording region. Ensure whatever you wish to capture is contained within the choice box's boundaries.
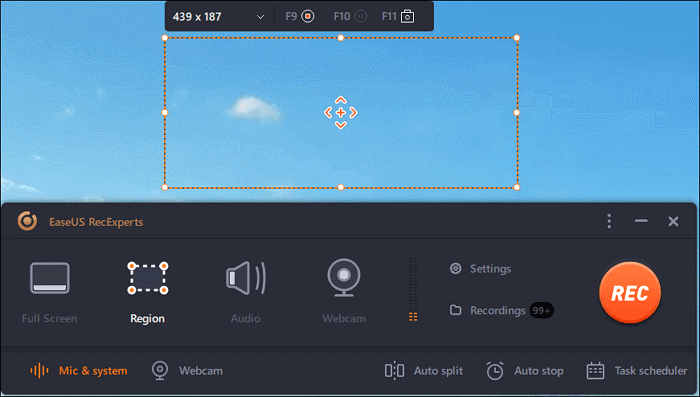
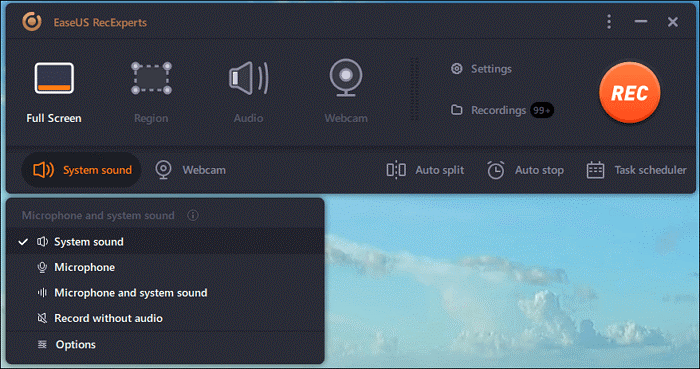
Step 3: Select from various alternatives by tapping the icon on the bottom left corner of the main screen. The microphone, as well as system sound, can be recorded independently or concurrently on this recorder. You can alter the volume and microphone equipment using the "Options" button.
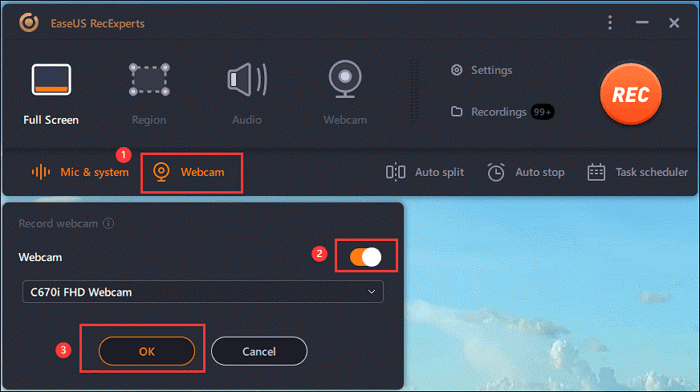
Step 4: At the bottom of the screen, click the "Webcam" icon to capture the webcam simultaneously. When you press the button to activate webcam recording, a drop-down menu will appear, allowing you to choose the recording device. To verify your settings, click "OK."
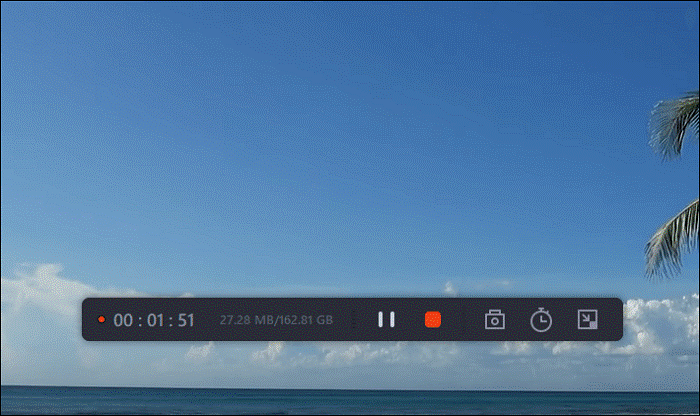
Step 5: Return to the main page and press the "REC" icon to begin recording. A hovering toolbar provides controls to pause and stop the recording during the recording. The camera symbol could also be employed to capture screenshots, and also the timer icon may be used to stop it automatically.
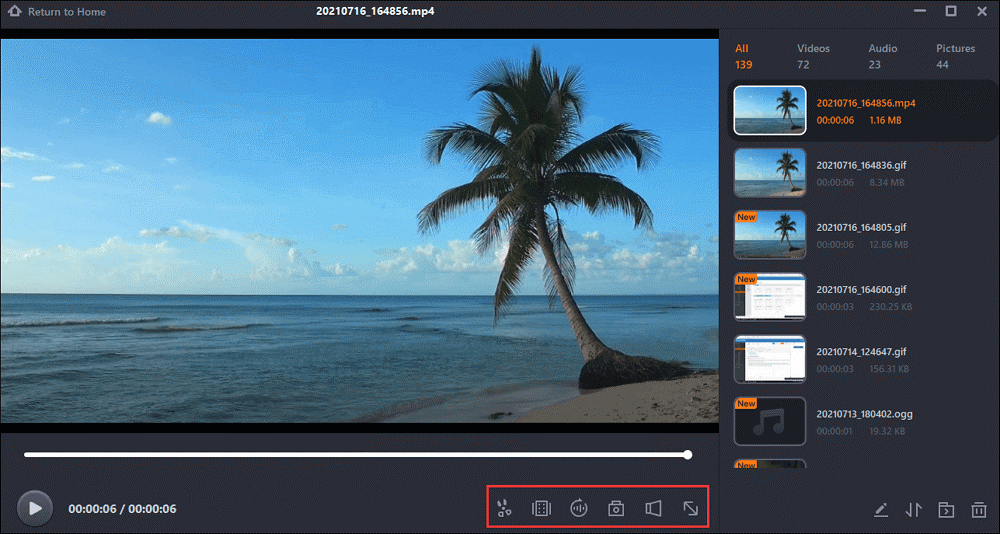
Step 6: The recorded videos will be kept on your computer. When the media player loads, you'll notice a collection of tools for trimming recordings, extracting audio, and adding opening and ending credits to the saved files.
Method 2: Use QuickTime to Record Video for Google Classroom(Mac)
If you're a Mac user who wants to capture video for Google Classroom, you can always use QuickTime Player, Apple's official screen recording software. For Mac users, QuickTime Player is the preferred media player, and it also has screen and audio recording capabilities.
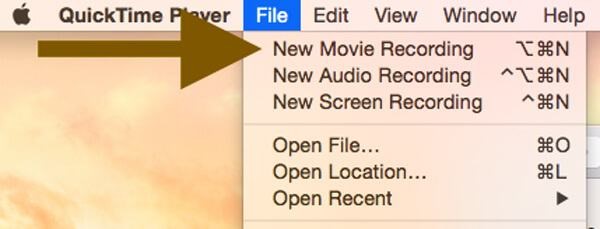
Step 1: Open QuickTime Player on your Mac, pick File from the toolbar, and then New Movie Recording from the drop-down menu.
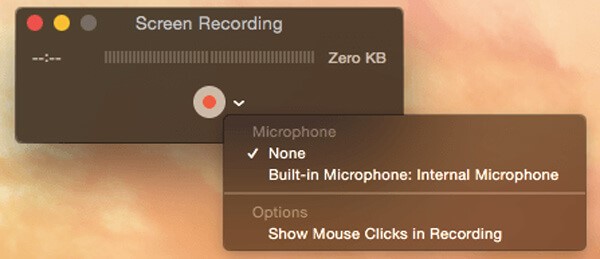
Step 2: A Screen Recording interface will now display on the screen. Simply press the record button to choose a recording location, such as the whole computer screen or a specific zone. You must first enable the webcam on your Mac to record your face.
Step 3: To end the video recording, click the Stop button in the system tray, which would be to the left of the Wi-Fi symbol.
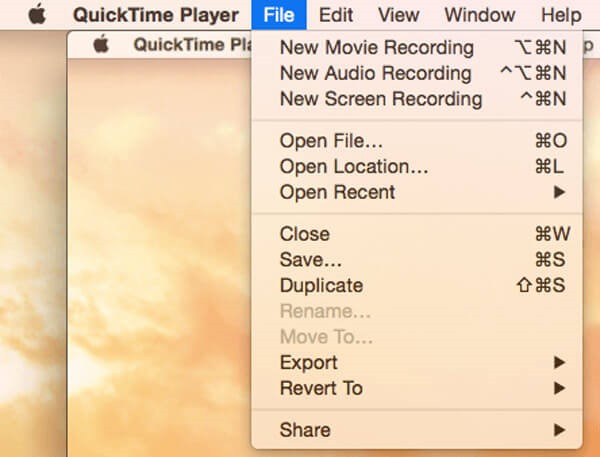
Step 4: You could retain the captured video on your Mac by clicking File and selecting Save.
Method 3: Use Vidmore Free Online Screen Recorder to Record Video for Google Classroom
Main Features of the Vidmore Free Online Google Classroom Recorder include:
- With a single click, you may capture videos from Google Classroom.
- Save high-quality footage of Google Classroom and conferences.
- Provide a plethora of personalized and preset settings.
Use the following steps to record on Google classroom.
Step1: Download and install the Google Classroom recorder. Launch the video recorder for Google Classroom on your computer after installing it. To proceed, select Video Recorder from the main screen. In the app or the browser, go to Google Classroom.

Step 2: Record your class
Turn on DISPLAY on the main screen, select Custom and Click region/window, and select Google Classroom or your browser. To capture video from Google Classroom with audio, toggle on System Sound. Activate Webcam and Microphone if you wish to add your reactions to the recording; otherwise, deactivate them. When the class starts, press the REC button.

Tip: If you wish to record a lesson automatically, use the Take Schedule option. You can sketch on the video or make comments as it's being recorded.
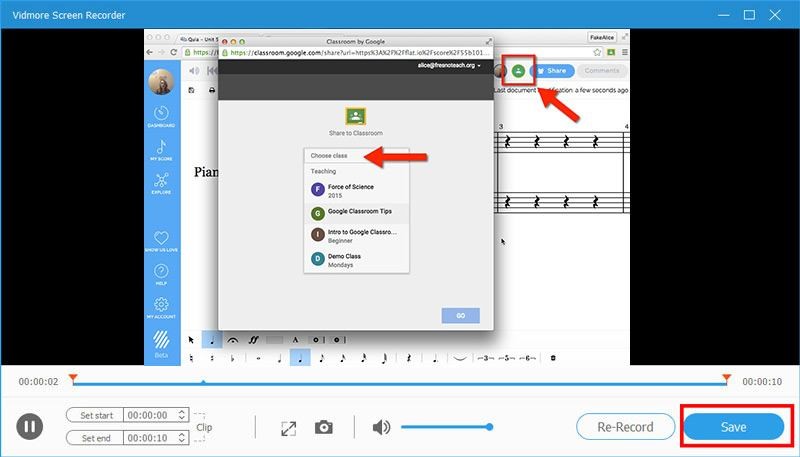
Step 3: When the class is finished, press the Stop button to bring up the preview screen. You may preview the class recording with the Cut tool and eliminate any superfluous frames. Finally, save the Google Classroom video to your hard drive by clicking the Save option.
Wrapping Up
Increasingly teachers and students are creating and grading assignments these days. Google Classroom is common among educators because it is free and simple to use. If you want to capture videos in Google Classroom, you can use EaseUS RecExperts on Windows to accomplish that.
Price: It starts $19.95/Monthly.
Compatibility: Windows and Mac
