It's not surprising that your videos are the largest files on your Mac. Compressing films is a wonderful technique to reduce their file size, whether you're running out of space on your hard drive or trying to share a movie that's too huge. And, with so many alternatives, deciding where to begin can be difficult.
But don't worry; if you continue reading, you'll learn how to compress a video on a Mac.
How to Compress a Video on Mac via WinX HD Video Converter Deluxe (Best and Easiest way)
Re-encoding video, reducing video dimensions, lowering bitrate, and chopping off less relevant bits are all techniques to make video files smaller. And now, we'd like to introduce WinX HD Video Converter Deluxe, a fantastic video compressor that can handle everything listed above.
Price: It costs $24.95/3-month, $49.95/Annual, and $51.95/Lifetime.
Compatibility: Windows and Mac
Step-by-step instructions
First and foremost, we must download and install WinX HD Video Converter Deluxe on our computer. This tool is available in both Windows and Mac versions.
Step 1: Open the video you want to compress
Drag and drop it into WinX's main UI or select the + Video button in the top left corner to open the source video.
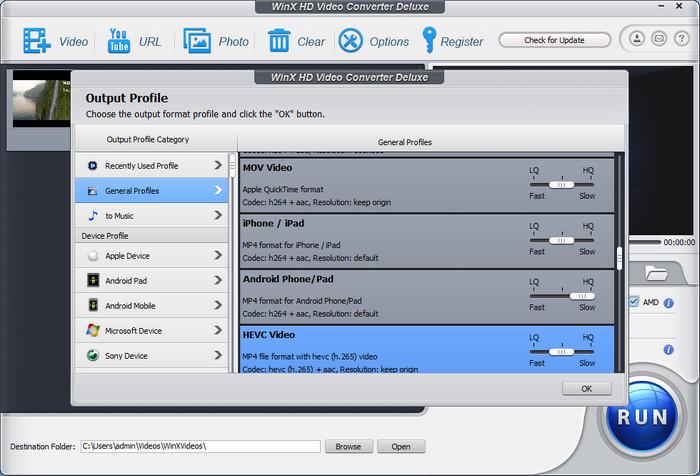
Step 2: Determine the output format.
WinX has more than 420 output profiles for common formats, devices, programs, and social media sites. You can choose between keeping the original format or changing it.
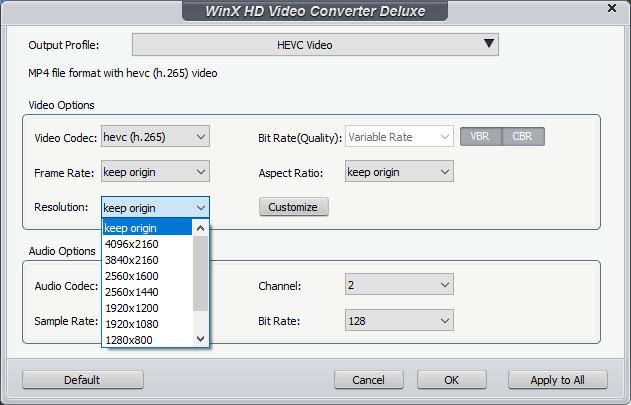
Step 3. Compress the video.
Adjust the audio and video parameters. You may access parameter settings by clicking the gear icon. You'll be able to change the bit rate, frame rate, resolution, sampling rate, and other settings there.
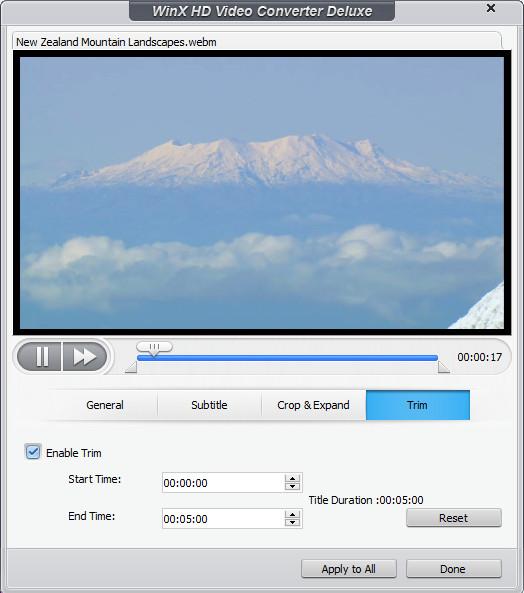
Cut video. The Trim tab will appear once you click the Edit button.
Check the Enable Trim box, and you can now trim out some clips to minimize video length and size.
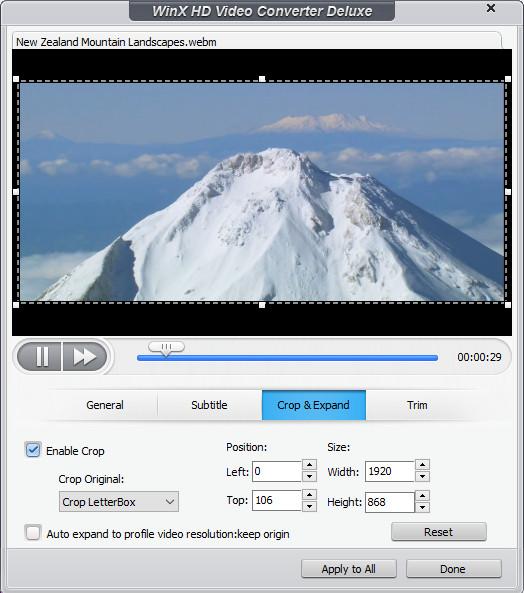
Crop video. A Crop & Expand tab is located next to the Trim tab. If you check the Enable Crop option, your movie will have a dashed border around it. You can clip black bars and more by dragging the edge.
Step 4: Save the compressed file to your computer.
Press the RUN button in the bottom right corner once you've completed all of the settings. The video resizer will then begin compressing your video as needed.
How to Compress a Video on Mac via iMovie
Apple's iMovie is a well-designed and flexible movie editing program. It is available for free on all Apple devices. With a few simple steps, you may minimize the size of a film on your Mac or iPhone using iMovie.
Step-by-step guide
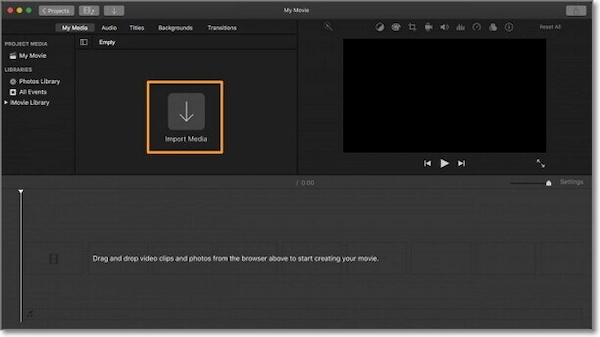
Step 1: Launch iMovie and import your movie files. On the interface, click the Import Media icon. In the pop-up window, you can select video files. Drag the video into the timeline after that.
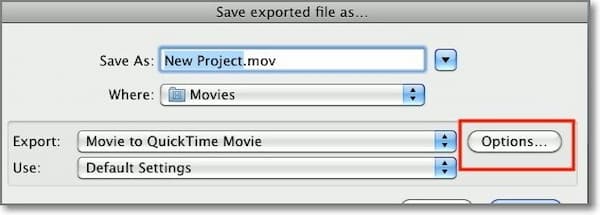
Step 2: At the top of the screen, select file. Navigate to the Share menu and select the Export to QuickTime option. The video's settings can be customized via a pop-up window. In the windows, click the Options button.
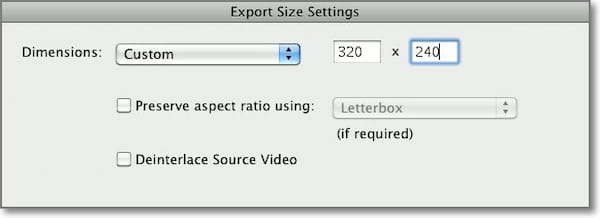
Step 3: Once in the Movie Settings window, you can change the video's size. Change the dimension by clicking the Size button. Then, to save the movie, click the OK option.
iMovie is a useful program for compressing films. However, it can only be used on Apple devices.
How to Compress a Video on Mac via QuickTime
QuickTime Player is regarded as one of the best media players and all-around Mac programs. It's also a great built-in solution for reducing the size of your videos on Mac. To compress a movie in QuickTime Player, follow these steps.
Step-by-step guide
Step 1: Launch the Quicktime Player.
Step 2: You should be greeted by a pop-up window that asks you to select a video. If not, choose file> Open File from the menu bar.
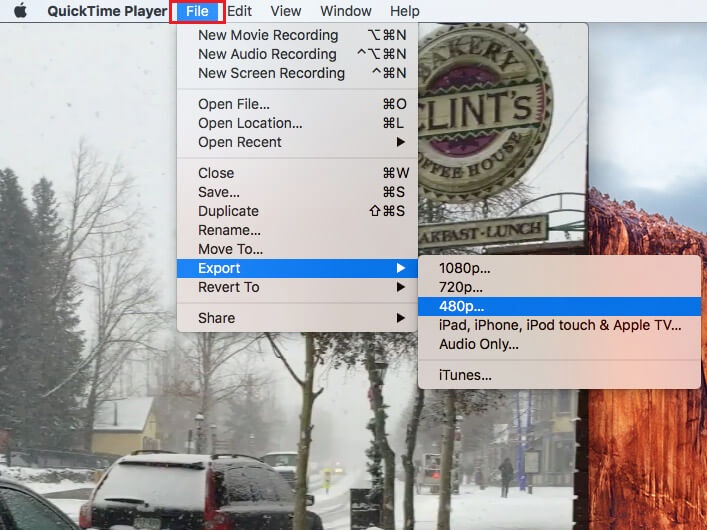
Step 3: Then select file> Export As.
Step 4: As soon as you do this, a list of video resolutions will show up. Choose the next-lowest resolution.
Step 5: Give your video a name and select a location to save it.
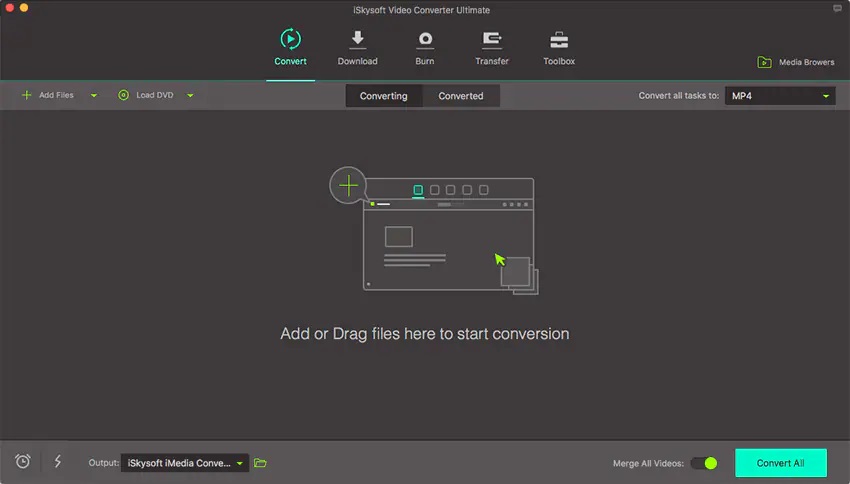
How to Compress a Video on Mac via iSkysoft Video Converter Ultimate
Step 1: Import Your Files
At the top of the screen, after you run the software, you will notice the options to "Convert," "Burn," and "Download."
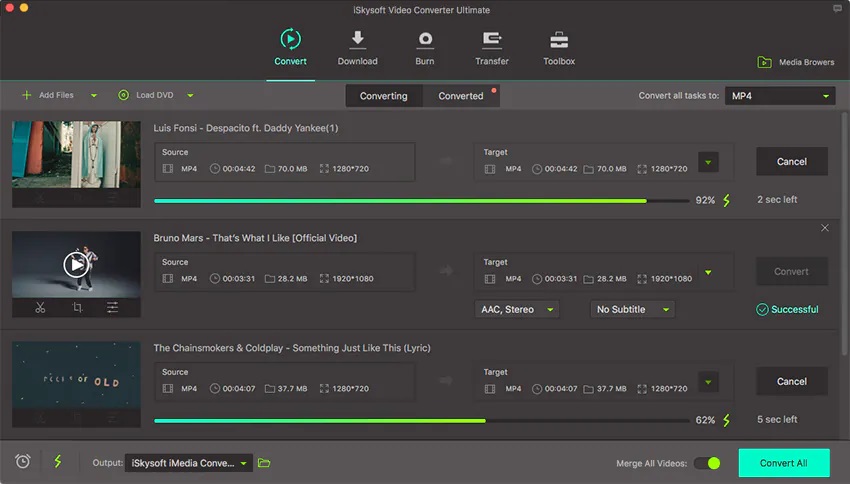
Step 2: Choose a Format
When you click the "Format" icon, a selection of different icons will show the various format possibilities from which you can choose.

Step 3: Convert
After choosing your format and making any required adjustments, you can convert the file (s). You can choose the output folder for your file after it has been converted. Once you've determined the location, click the "Convert" button to begin the conversion process.
Wrapping Up
While it may appear difficult at first, reducing video file size on a Mac does not have to be frightening. The good thing is that you have numerous options. We highly recommend WinX HD Video Converter Deluxe to compress a movie on a Mac. This guide will help you compress your films on Mac, whether you use one of the built-in tools or one of the solutions suggested.
Price: It costs $24.95/3-month, $49.95/Annual, and $51.95/Lifetime.
Compatibility: Windows and Mac