M.2 SSD is intended to provide high-performance capacity in small, low-power systems such as ultrabooks and tablet PCs. It offers fast read-write performance especially in big file transfers, image editing, multimedia transcoding, as well as real-time formatting. So many users want to move to an M.2 SSD.
Do you wish to clone HDD or SDD to M.2 SDD, and you are not familiar with the steps and process? Are you searching for a quick and easy way to clone an HDD or SSD to an M.2 SSD?
Well, you don’t need to worry too much about it. In this article, we offer the complete steps to clone a hard drive to help you successfully finish the work.
4 steps to clone HDD/SSD to M.2 SSD in Windows
The cloning of an HDD/SDD disk to an M.2 SSD in windows can be done in four easy steps. Therefore, let us discuss the steps in detail.
Step 1. Add the new NVMe M.2 SSD to your PC
Step 2. Find a reliable disk cloning software
Step 3. Clone HDD/SSD to the NVMe M.2 SSD
Step 4. Boot your PC from the cloned M.2 SSD
Step 1. Add the new NVMe M.2 SSD to your PC
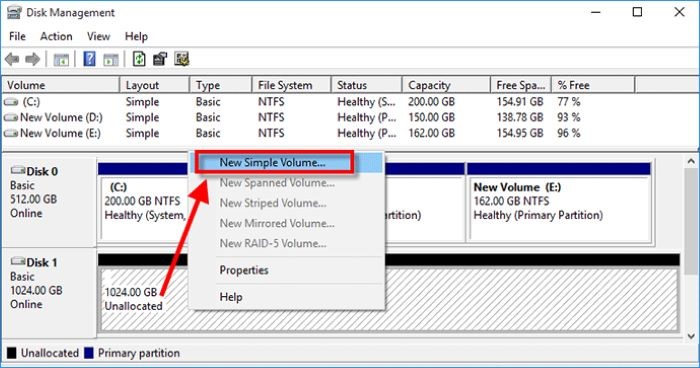
The first and foremost step to begin your cloning process is to add the new NVMe M.2 SSD to your computer system. After you have inserted the NVMe SSD, assemble back the computer, and log in to Windows. Once you log in to the computer, ensure that the newly inserted M.2 NVMe SSD appears with the proper disk letter.
If you do not see the correct disk letter, go back to Disk Management, then build a new partition upon that NVMe SSD. This will ensure that your system has fulfilled the physical requirements for the cloning process to begin.
Step 2. Download and install a reliable disk cloning software
After connecting the M.2 SSD, you'll need to find a reliable disk cloning tool to ensure you don't end up losing any important information. EaseUS Disk Copy, a simple drive cloning software that provides a fast and user-friendly process can be your best bet. This software performs well in cloning a hard drive for disk upgrading, system transfer, data transmission, file backup, or any other function. With a strong and versatile cloning capability, It additionally allows you to clone data even from bad sectors and is compatible with several versions of Windows.
Reason for recommendation:
- Supports copying MBR disks to the GPT disks required by Windows 11.
- Windows relocates seamlessly between HDD onto SSD.
- Offers disk/partition/os cloning.
- Reduce time and effort by using fast and dependable Windows 11 replicating software.
Price: It starts $19.90/Monthly.
Compatibility: Windows
Step 3. Clone HDD/SSD to the NVMe M.2 SSD
After you have finished the installation of the disk cloning software, now you would have to clone HDD/SDD to the NVMe M.2 SSD. Here are the steps to move ahead with the cloning process.
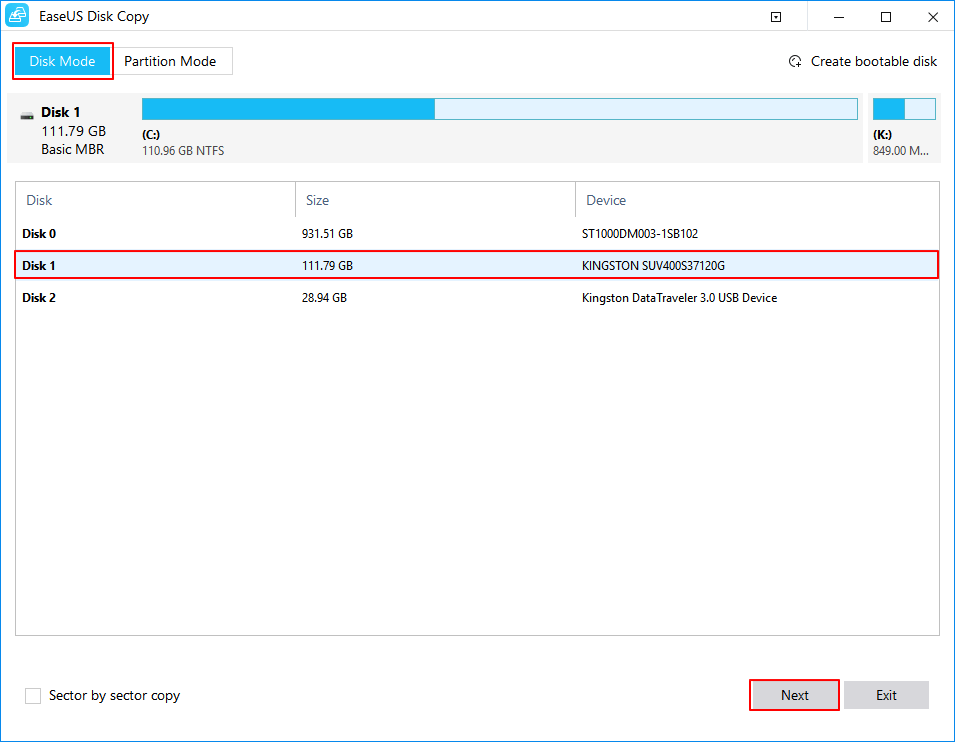
Step 1. Download, install and run EaseUS Disk Copy on your PC.
Click "Disk Mode" and select the hard drive that you want to copy or clone. Click "Next" to continue.
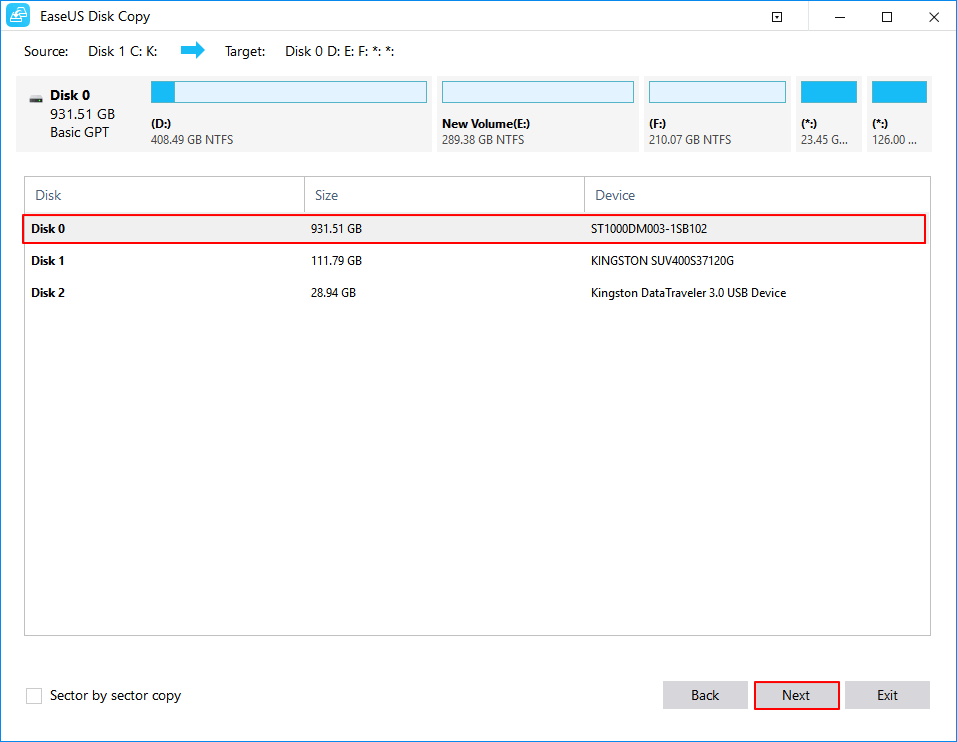
Step 2. Select the destination disk.
Note: The destination disk should be at least the same big or even larger than the source disk if you want to copy or clone the source hard disk.
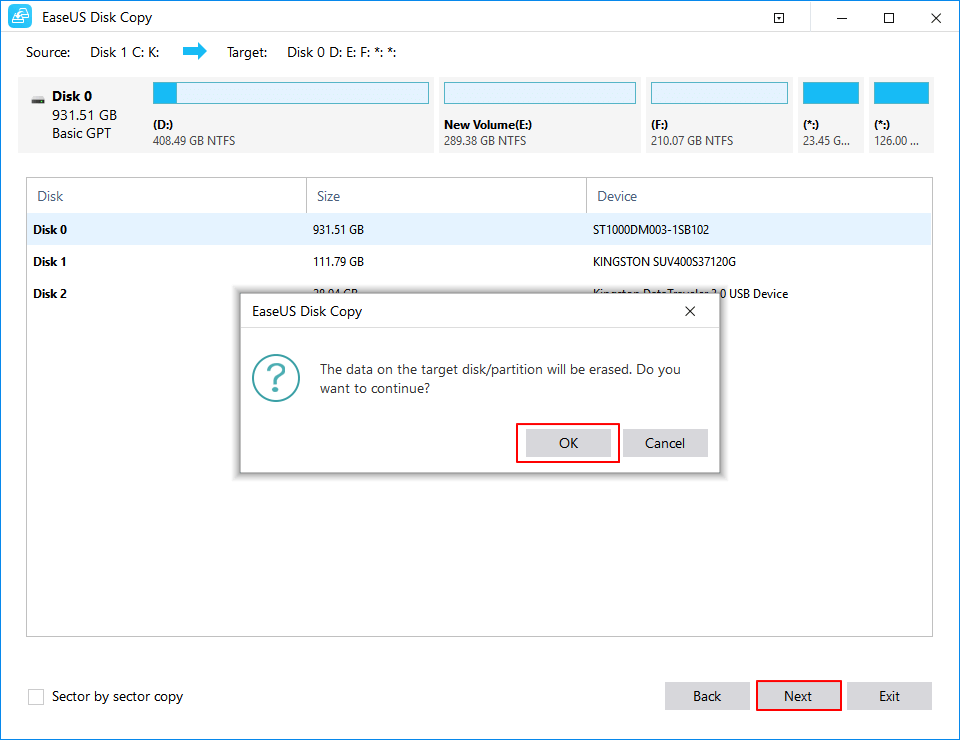
Step 3. Click "OK" to confirm if the program asks to erase data on the destination disk.
Step 4. Check and edit the disk layout.
If your destination disk is an SSD drive, do remember to Check the option if the target is SSD.
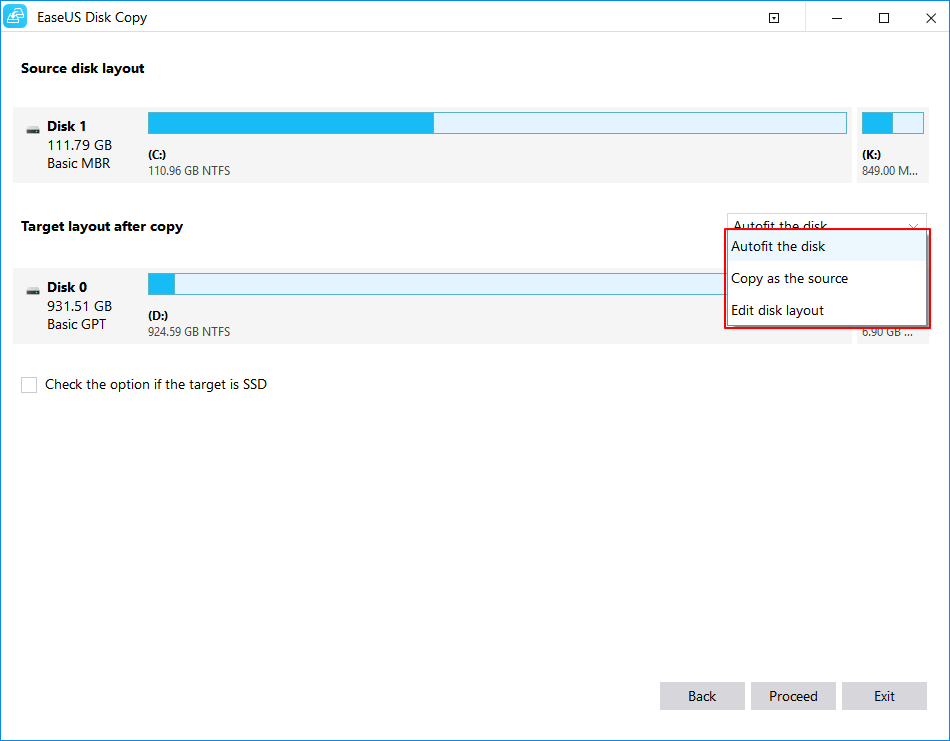
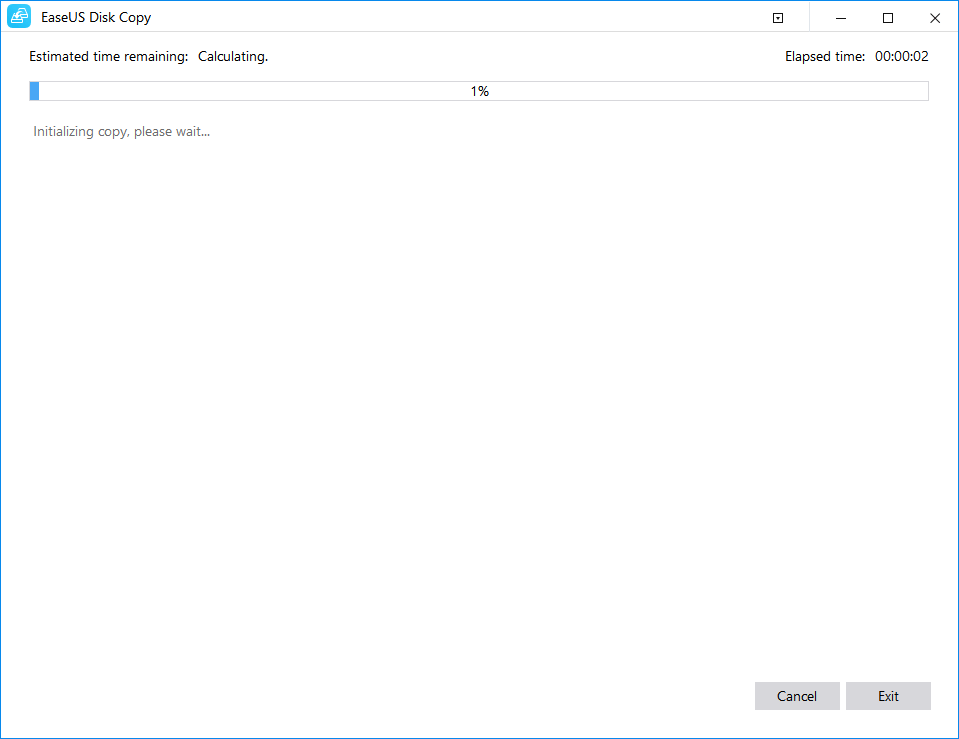
Step 5. Click "Proceed" to start the hard drive cloning process.
Step 4. Boot your PC from the cloned M.2 SSD
After cloning, you can follow these steps to boot your computer from the cloned M.2 SSD.
1. Shut down the system.
2. Go to the boot section, set the cloned SSD as the boot drive in BIOS.
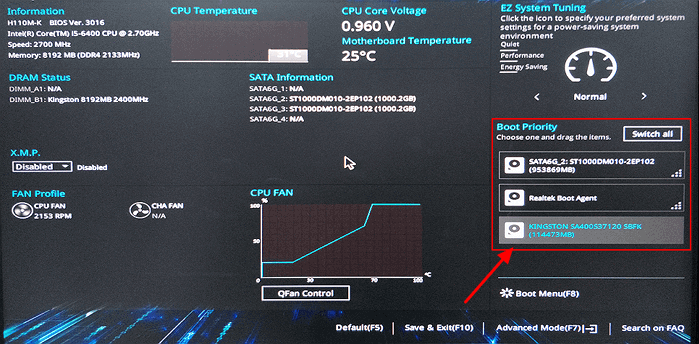
3. Select the Boot choice and make the cloned HDD/SSD the very first boot option. Afterward, keep the modifications you performed and select reboot.
If your system successfully boots using the cloned SSD, then you would be free to enjoy the high speeds as well as performance that it provides! Then you may think about erasing all of the information on the Disk and using it as a backup.
Conclusion
Many people choose to clone Windows to HDD/SSD because of their fast speed as well as low latency. A professional disk cloning program may be of great assistance in simplifying the procedure. It allows you to replicate an HDD or SSD to another HDD/SSD with a few clicks, or perhaps even transfer simply the operating system.
Furthermore, it would still be a free backup as well as restore program that may assist you in protecting your disk as well as data by establishing a disk duplicate on an external storage device. If something goes wrong, you may recover the virtual disk to a replacement hard drive and then use it to change the previous one.