An SSD is designed to offer one of the best performances for the best storage capability. But have you ever noticed an issue where you have a cloned SSD, and it fails to boot? On this page, you will find the best and reliable methods to make SSD bootable after the clone.
Why cloned SSD won't boot in Windows?
The cloned SSD won't boot problem can be caused by several reasons. It may either be due to the issues on the cloned SSD itself or the disk cloning process, for example:
- The SSD is connected to the PC as an external disk.
- The cloned SSD is not set as the first boot option.
- BIOS boot mode is incompatible with the SSD.
- System partition was not set as an active partition.
- Incomplete disk cloning process, missing boot partitions, or boot components.
5 ways to fix cloned SSD won't boot problem
Let us check out the most effortless process available for fixing the error of cloned SSD won't boot. Based on what is causing the error on the cloned SSD, you can apply any of the following five options.
Fix 1. Correctly Install the Cloned SSD with a SATA Cable
Fix 2. Change Boot Order in BIOS to boot from the cloned SSD
Fix 3. Setting BIOS to boot from UEFI or Legacy
Fix 4. Set System Partition as an Active Partition
Fix 5. Clone HDD to SSD using reliable disk cloning software without booting problems
Fix 1. Correctly Install the Cloned SSD with a SATA Cable
A proper connection of the SSD with the computer is the key factor to assure the proper boot. Connecting the SSD to the computer through an appropriate connection method may be necessary.
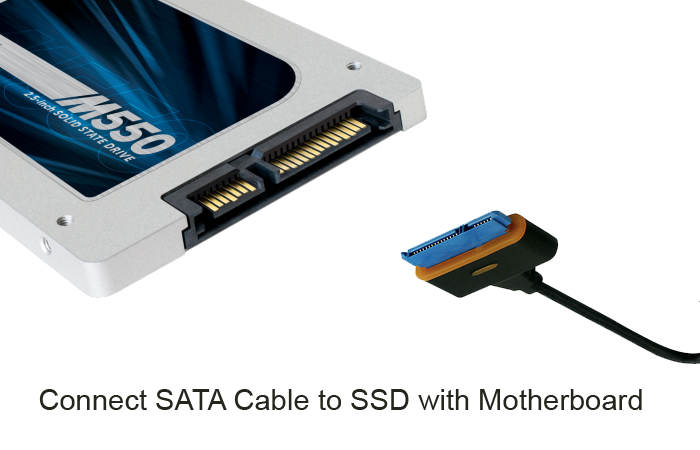
Disconnect the SSD and connect it in the right way. Using a SATA cable instead of a USB connection can be one of the practical solutions. The SATA cable will ensure a proper boot process than a USB connection.
Here is what you need to do –
- Remove the USB cord or cable if you have connected it to the cloned SSD
- Reconnect it with the SATA cable.
Fix 2. Change Boot Order in BIOS to boot from the cloned SSD
The first boot device should be selected as the SSD that you have connected. If you have an HDD along with the SSD or more than one SSDs, it is essential to configure the proper SSD as the first boot drive.
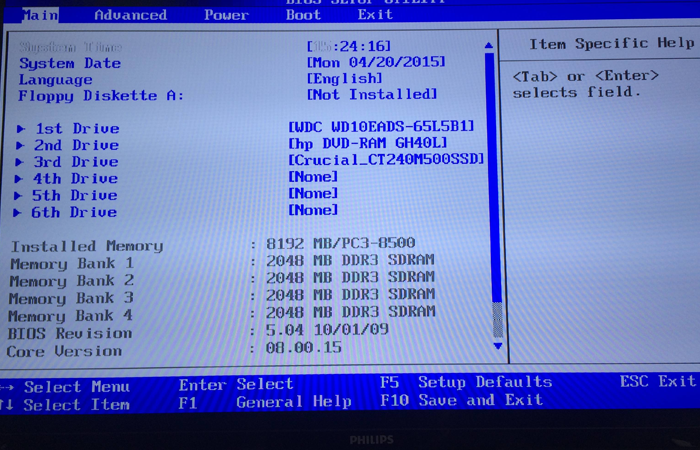
One needs to go into the BIOS or UEFI settings and configure the boot drive. You will also be able to configure a host of startup settings from here.
Here is how you can do it –
- Restart your computer to enter BIOS settings.
- Keep pressing the F2, F12, or DEL key to enter BIOS
- With arrow keys, select the Boot tab and select your cloned SSD.
- Press F10 to Save and exit from BIOS.
Fix 3. Setting BIOS to boot from UEFI or Legacy
If one has wrongly set the boot device in the BIOS settings, you will find that the cloned SSD won't boot. If you have more than one hard drive on the computer, setting the correct boot order is important.
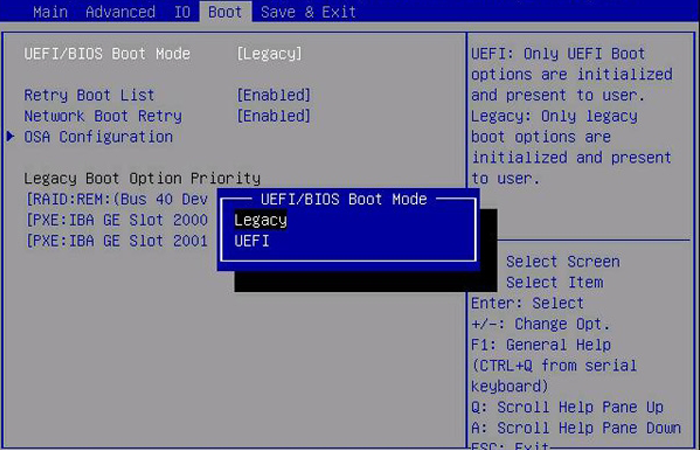
Based on whether you have legacy or UEFI, you will need to configure the proper boot mode for the SSD. To do this, go into the BIOS settings and select the Boot option. From there, choose the option to UEFI/ BIOS Boot Mode. Depending on the file system on the SSD, you can choose the appropriate one.
Follow the steps here below –
- Press the specific key for your computer to move into the BIOS setup
- Use the arrow keys to go to the Boot tab.
- Here, you can select the appropriate option for UEFI or legacy, press Enter key to select. And Exit from BIOS setup.
Fix 4. Set System Partition as an Active Partition
Under normal conditions, the system partition should be your active partition. The primary or system partition consists of the boot files required for Windows to startup. If Windows does not see the system partition as the active partition, it will not boot. To resolve this, you need to change the active partition.

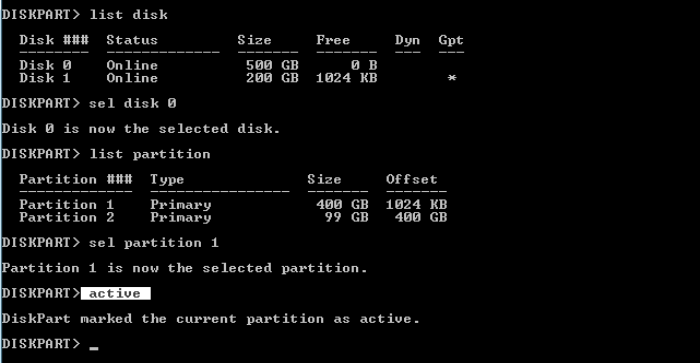
First, you will need to boot from the old hard drive and then insert the SSD into the hard drive enclosure and connect it to the PC. Once that is done, change the system partition on the cloned SSD as the active partition. You can use the diskpart commands from the command prompt to achieve this.
Follow the steps here below –
- Press WIN+R to open RUN box, type diskpart
- In the opened window type list disk
- Diskpart will list all the disks you have installed; type select disk ### where ### stands for your cloned SSD.
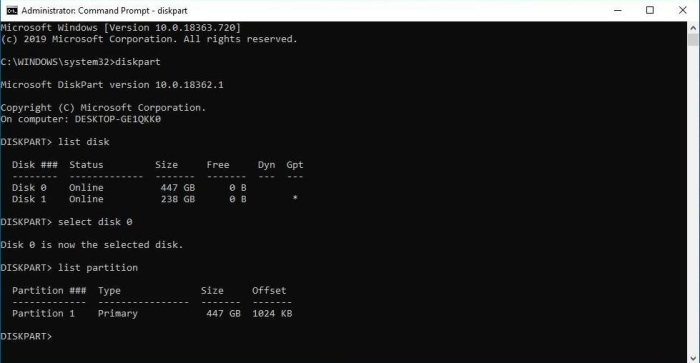
- Type list partition
- Type select partition ###
- Type active
Fix 5. Clone HDD to SSD using reliable disk cloning software without booting problems
The cloned SSD may not boot when you have some issues during the disk cloning solution, such as an incomplete cloning process, missing boot partitions, or other problems with the boot components. An excellent way to avoid such circumstances would be to use a reliable and efficient disk cloning tool.
EaseUS Disk Copy Pro is one of the most trusted tools that has earned a name. It is one of the professional and safer disk cloning utilities that lets you make a full copy of the hard drive. You would be able to upgrade to the larger hard drive without reinstalling Windows.
Some of the features that would make it a formidable option can include:
- It can help clone your failing hard drive. You can copy all the data right away without reinstalling the Windows operating system.
- It should be your best bet for cloning your hard drive when you want to upgrade your drive to a larger size.
- If you have an HDD and want to upgrade to SSD, the Disk Copy Pro software can be a great option.
- It offers sector-by-sector cloning to avoid any missed files.
- You can resize the partitions when copying the data.
Price: It starts $19.90/Monthly.
Compatibility: Windows
How to clone HDD to SSD using EaseUS Disk Copy
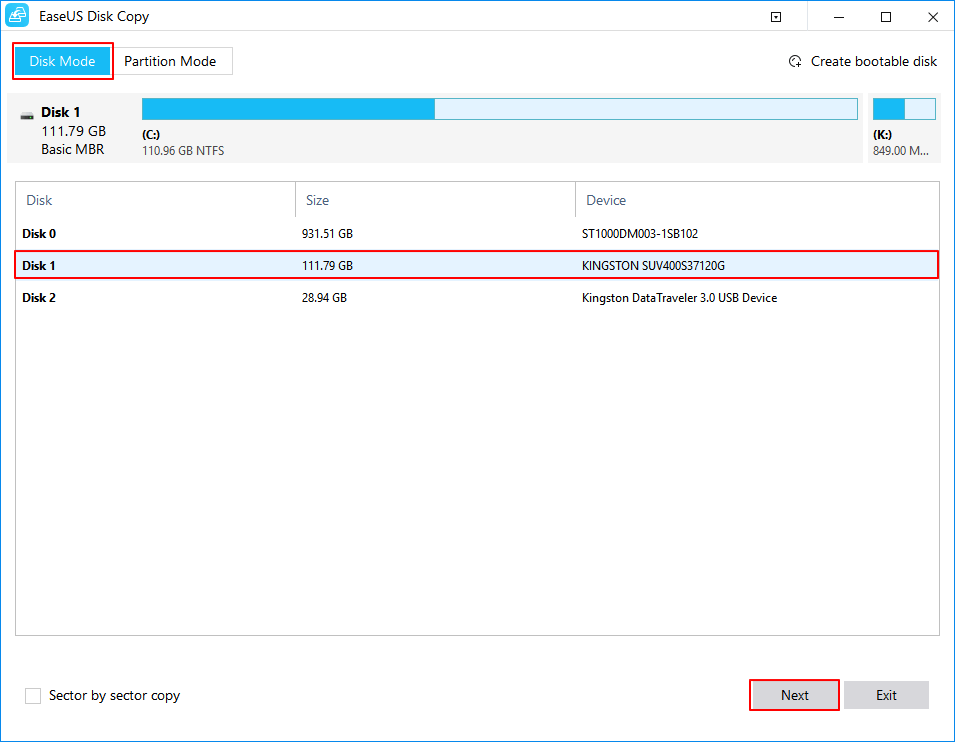
Step 1. Download, install and run EaseUS Disk Copy on your PC.
Click "Disk Mode" and select the hard drive that you want to copy or clone. Click "Next" to continue.
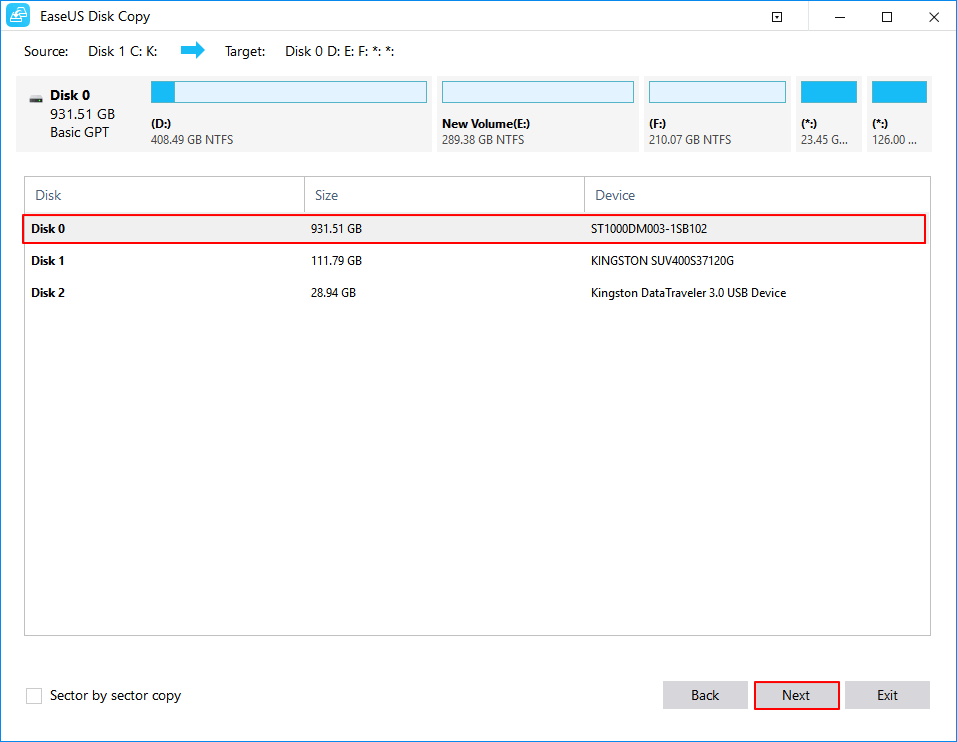
Step 2. Select the destination disk.
Note: The destination disk should be at least the same big or even larger than the source disk if you want to copy or clone the source hard disk.
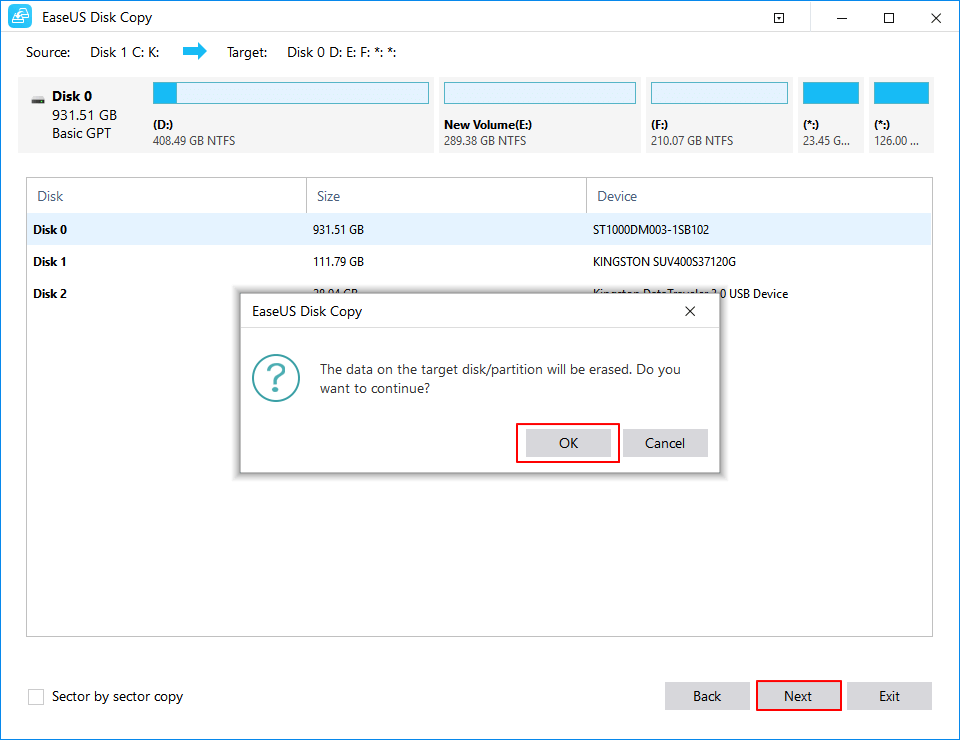
Step 3. Click "OK" to confirm if the program asks to erase data on the destination disk.
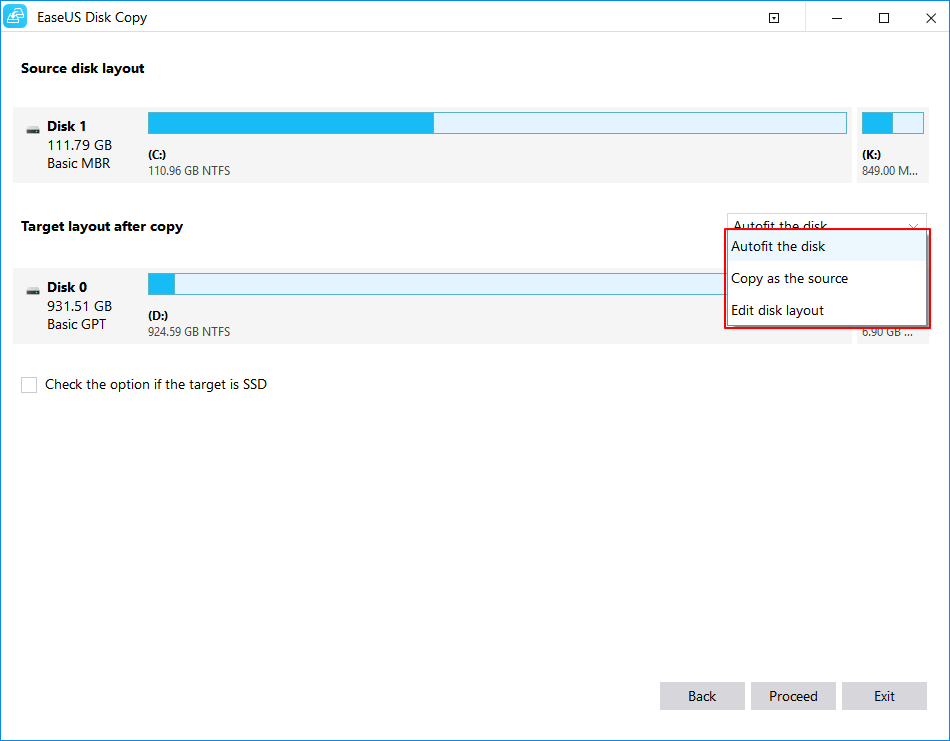
Step 4. Check and edit the disk layout.
If your destination disk is an SSD drive, do remember to Check the option if the target is SSD.
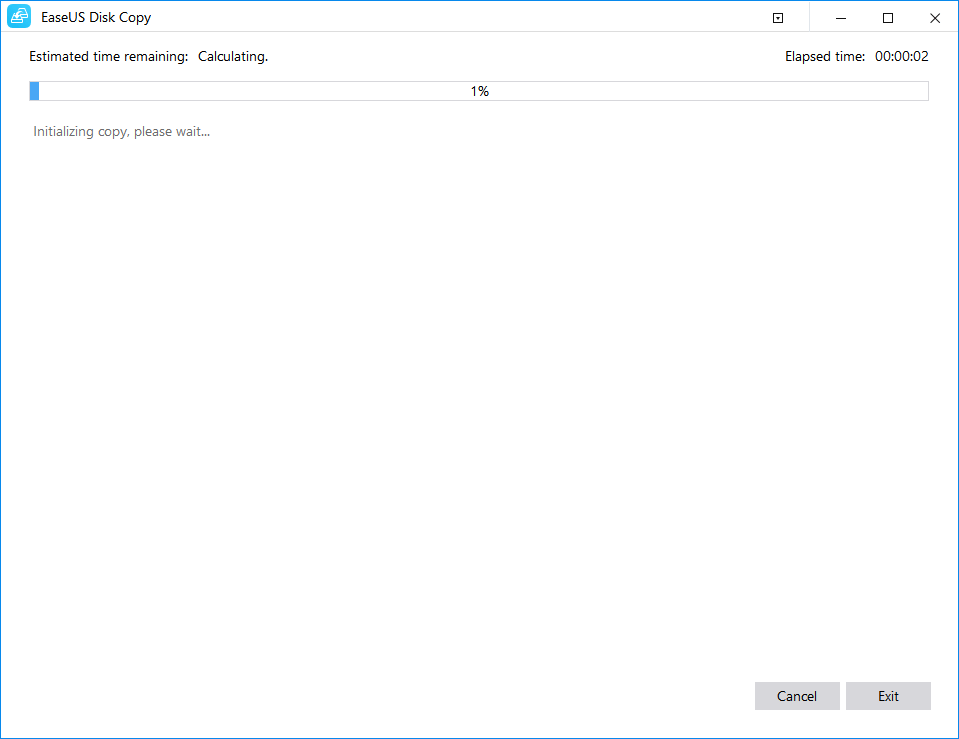
Step 5. Click "Proceed" to start the hard drive cloning process.
The Closing Thoughts
Well, the issue of cloned SSD won't boot can be quite annoying. However, fixing it should not be a huge concern if you follow the proper procedure. You can use the fixes outlined here to ensure good booting for your cloned SSD.
If you find all the fixes fail and there is no way to make the cloned SSD boot, you may re-clone it using reliable software such as EaseUS Disk Copy Pro. The capable and efficient tool should indeed be quite effective in your goal.