Screen recording is a useful tool that you can use for a variety of purposes. You can record your meeting to watch later, as well as your games and YouTube videos and tutorials. However, sometimes an error message stating "can't record screen Windows 10" displays, and your screen recorder does not function on Windows 10. There are several causes for this.
We'll look at the causes of "can't record screen windows 10" in this article. We'll also recommend a third-party tool that can fix the error right now. Let's take a closer look.
Why Can't Record a Screen in Windows 10
Windows 10 comes with a feature of Screen record. You can effortlessly record anything on your screen, but, at times, it suddenly stops working. You're undoubtedly curious as to why the screen recorder in Windows 10 isn't working. The following are some of the reasons why people can't record screens in Windows 10:
- You do not have a suitable window open to record
- You might have content restrictions on your system
- You might have limited system storage
- Look for system updates
- The screen recorder is not upgraded to the latest version
- Limitations imposed by the developer
- Power save mode is on
- Program is crashing
- Too many windows are open
- Windows do not meet the minimum requirement or screen recording
Safe and Reliable Screen Recorder- EaseUS RecExperts
When the default system recorder is unable to screen record, you seek a reliable solution that not only seamlessly screens the recorder but also is dependable, allowing you to use it more readily and frequently. EaseUS RecExperts is a secure and reliable screen recorder for this purpose. It can quickly resolve the issue of can't record screen Windows 10. EaseUS RecExperts can capture videos and audio from the camera, as well as record them.
If you are in a zoom meeting, EaseUS RecExperts can record it. It can also be used as a screencasting tool, taking screenshots of your computer. A screenshot can also be obtained while the video is being recorded. It also allows you to trim and adjust the screen-recorded video's length. It also has the ability to record screens on both Windows and Mac.
The following are some of the key features that make EaseUs RecExperts a better choice:
- It can record the entire or a specific part of the screen
- It is also capable of recording multiple screens simultaneously
- Records audio from screen and microphone
- It can capture faces from a web camera
- Auto split files
- Provides scheduled screen recording
- Supports MP4, MOV, AVI, MP3, PNG
EaseUS RecExperts is an excellent tool for resolving the issue if you can't record screen in Windows 10. You can rely on not just screen recording but also video trimming, editing, and modification that fit your requirements. This third-party tool efficiently records your screen for you.
Price: It starts $19.95/Monthly.
Compatibility: Windows and Mac
How to Record Screen with EaseUS RecExperts?
As of now, we have mentioned that EaseUS RecExperts is a viable solution if you can't record screen windows 10. For your convenience and better understanding, we have listed the steps on how to record the screen with EaseUS RecExperts. Let's look at the steps to screen record with this third-party utility in detail.
Step 1. Configure the Screen Recording Options
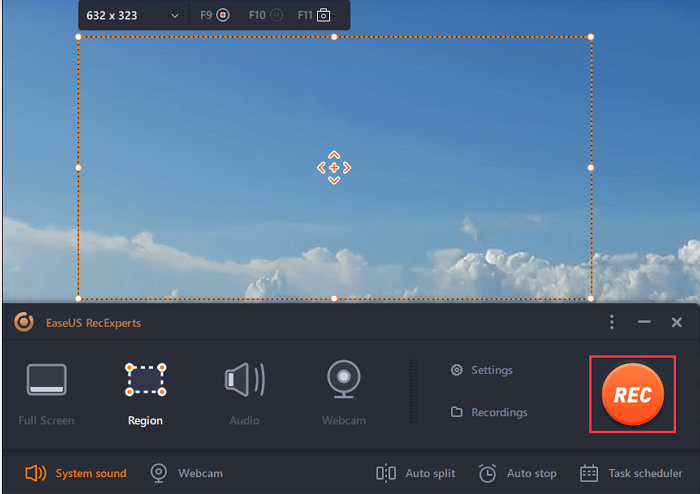
To begin, launch EaseUS RecExperts on your Windows 10 computer. Here you can see the various options available to you based on your screen recording requirements. You can pick between a complete screen or a specified area of the screen by clicking on "Full Screen" or "Region."

You can also select the audio source by clicking on the "Sound" icon. In addition, the "webcam" icon at the bottom of the icon bar allows you to record the video immediately. You can even screencast it.
It also has an incredible feature to split the recording file after screen recording. You can simply click on the "Auto Split" option. It will automatically split the file according to the time and size you have chosen already.
Step 2. Select the Recording Settings
Now that you've set up the basics, you can move on to the next step. You can choose from a variety of advanced settings.
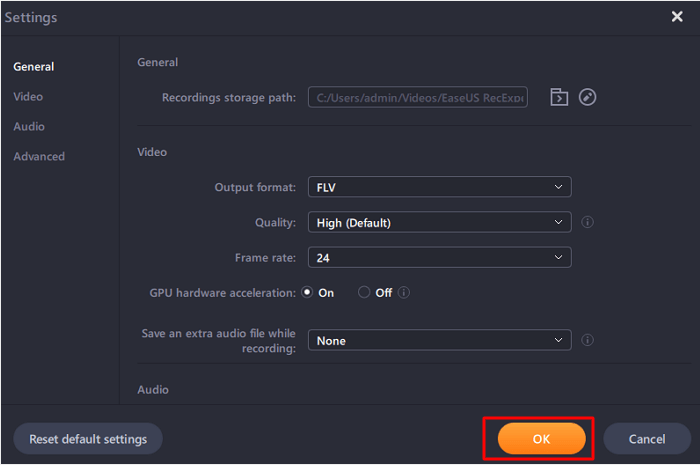
Open the Menu by clicking on "Settings." You can choose the format of your screencast on the Menu, as well as any additional options that you wish that are appropriate. When you've found the option you want, click "Ok" in the bottom right of the Menu to save your changes.
Step 3. Start the Screen Recording
You'll now be back on EaseUS RecExperts' main interface. By pressing the "REC" button, you can now access the screen you want to capture and start Screen Recording. It will begin recording everything that appears on the screen, whether the entire screen or a portion of it.
Step 4. Stop or Pause Screen Recording
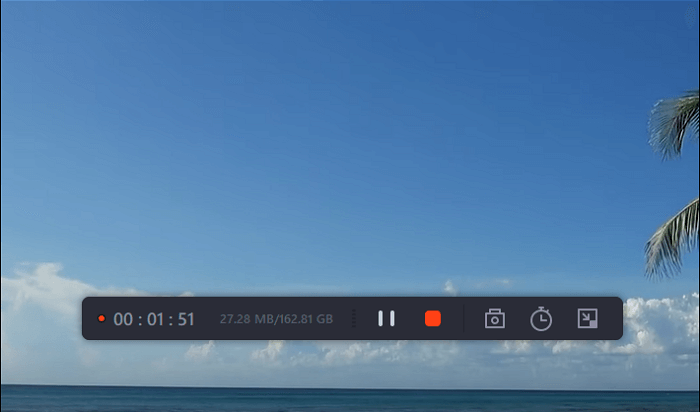
A toolbar will appear. You can pause or stop the recording, and you can even take screenshots while screen recording and set a certain time for the recording to begin or end automatically.
Step 5. View Your Recordings
EaseUS RecExperts allows you to keep all of your recordings in one place once the screen recording is finished.
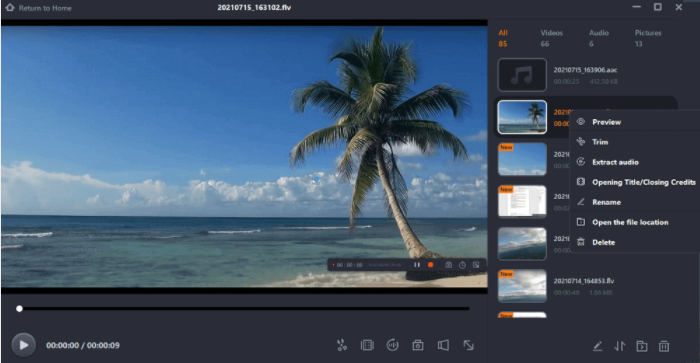
You can also preview, and edit your recorded file.
Wrapping Up
To wrap up the discussion, so far, we have discussed the can't record screen windows 10 error in detail. We have mentioned the possible reasons behind the error when the screen recorder can not work in windows 10. We have also mentioned the ways you can fix this error. The best and most reliable solution to fix this error is to use a reliable and safe third-party utility. We suggest you use EaseUS RecExperts. It is not only reliable, but you have numerous useful feature that makes your screen record process seamless and easy. Having multiple editing and screen record feature makes EaseUS RecExperts a preferable choice, and the best part is that it is 100% secure. Download it today and try it.
Price: It starts $19.95/Monthly.
Compatibility: Windows and Mac
