Today, screen recording has a wide variety of uses, ranging from making professional video tutorials, marketing your business to online customers, recording a new change for your favorite game, or even creating courses online.
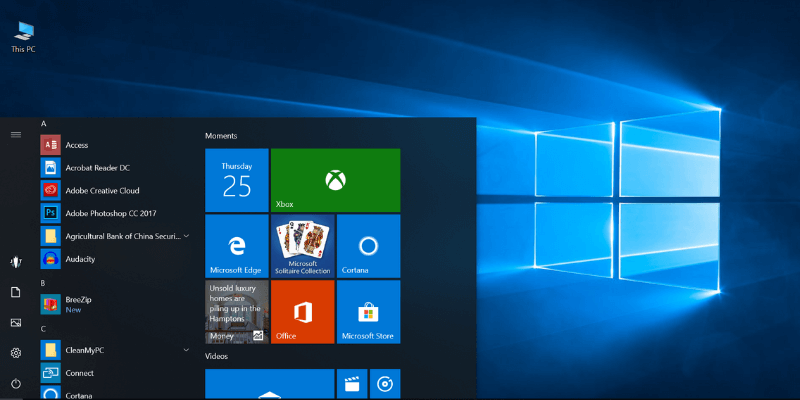
With increasing advanced features, a lot has been made easier for this software to be used to create a lot. Not only does one need to get a screen recorder software/application, but there is also a built-in screen recorder that comes with Windows 10. You can design the built-in screen recorder to capture PC and gaming sessions on your Windows 10. You can also check for the duration of each screen recording on the Game Bar's settings.
One beautiful thing is that you do not have to use software to handle this through the Xbox game bar; you can create a video tutorial, record your screen activity, and do other numerous things.
How to Use Windows 10 Built-in Screen Recorder
Screen recording using Windows built-in application is not a big deal at all. If you are ever going to use this, there are steps you must follow intuitively. The windows 10 built-in screen recorder is very accessible and easy today navigate from start to finish.
However, the major disadvantage of using the built-in screen recorder on your Windows 10 is that the screen recorder cannot capture some programs, such as the file manager.
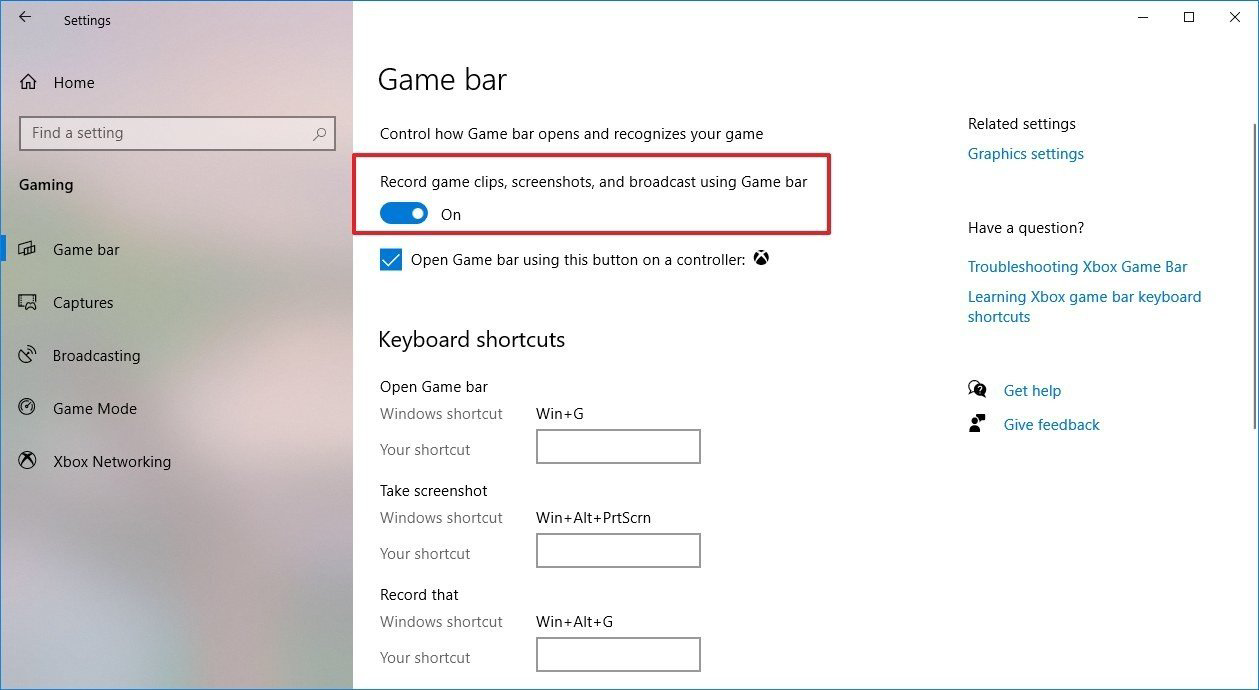
Step 1: Select the Start menu and then click on Settings
Step 2: In the settings window, click on Gaming.
Step 3:Go to game mode, and enable it.
After executing the steps above, the following steps shown below will lead you into the recording session.
Step 4: Open the app that you intend to record
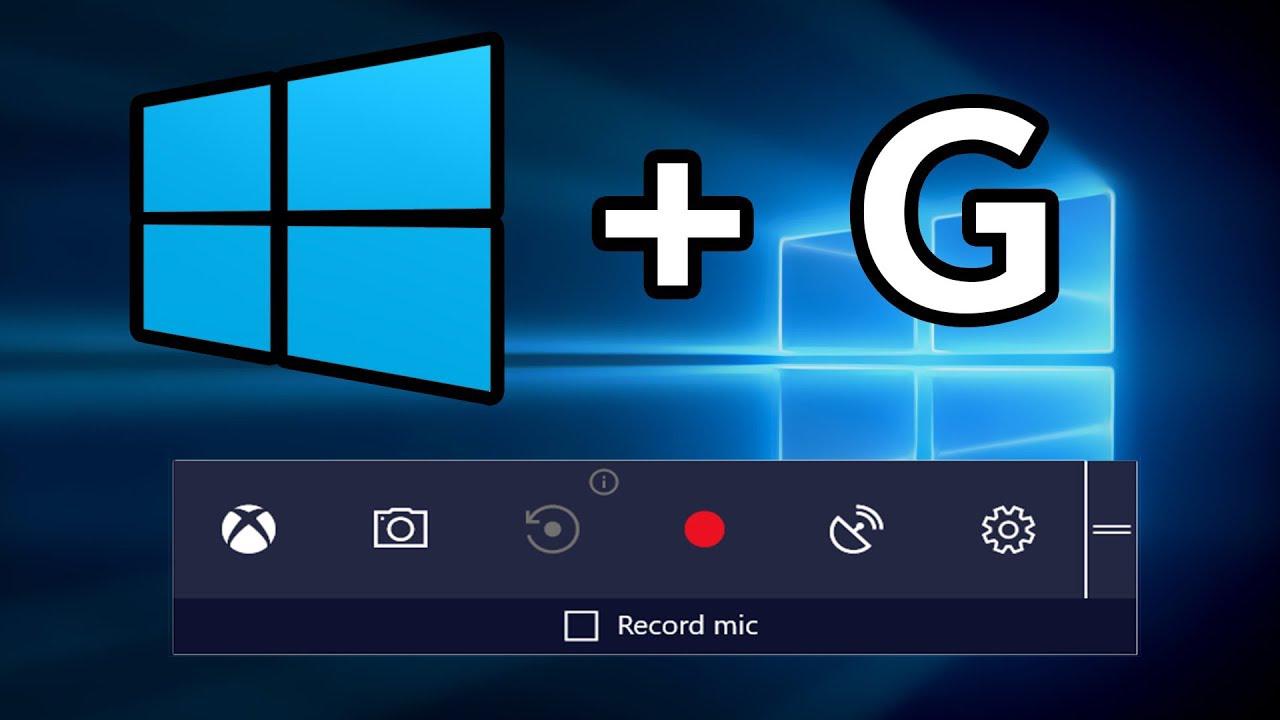
Step 5: Press Window Key and G at the same time. This command will open the Game Bar.
Step 6: Load the Game Bar by clicking on the check box
Step 7:Start recording by clicking on Windows + Alt + R.
Step 8:There is a recording bar colored red, and by clicking on it, you are stopping the recording session. Note that your recorded files are saved and will be in the Videos folder in the subfolder Captures. Alternatively, find the recorded videos in the Xbox app under the Game DVR menu. The built-in screen recorder does not allow complete editing. However, you can trim videos to any length you want.
It is imperative to note that the Xbox does not only record screens for videos but also has the screenshot tool. To do this, click on the camera icon on the Game bar or by pressing Win + Alt + PrtScn on your screen.
6 Best Professional Screen Recorders
There are many applications and software online and many opinions about them. This may confuse you, but your selection should not be based mainly on external features and price. Check its pros, cons, and its compatibility.
Most importantly, read reviews from people. The best professional screen recorder will save recorded images and videos in HD quality. With the app, you can capture games, Skype, and webinars, and you can record from external devices such as WebCam, Phone, and Xbox with the software.
Here are some key features to check for before you purchase: the editing feature if it allows annotating in videos and images if it has a friendly user interface if it enables users to put webcam over recording, if it supports microphone recording if it produces HD recording if the software support AVI and MPEG4 movie recording at the least.
Here are 6 of the best professional screen recorders you may want to consider:
1. EaseUS RecExperts
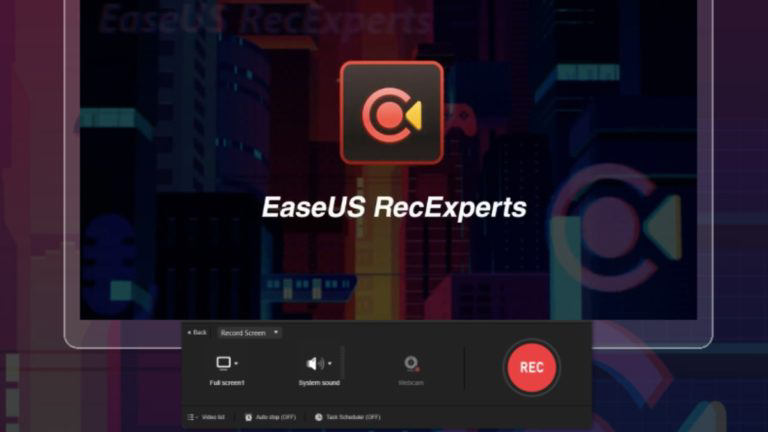
This screen recorder software is very easy to use. With its capture flexibility, you can record any area of the screen and record video and audio simultaneously. One can also record webcams over videos. It produces high-quality videos and has extensively advanced editing features such as adding texts, adding lines, and trim. You can also create customizable shortcuts on EaseUS RecExperts. If you want to schedule recordings, you can do this here, and it supports various formats such as SWF, WMV, FLV, AVI, M4V, and ASF. The screen-recorded videos can be shared/exported easily to Google Drive, Vimeo, YouTube, etc. EaseUS RecExperts costs a token of $19.95/month, $39.95/year, and $69.95 for a lifetime.
Pros
- It has a simple interface
- It is extremely friendly.
Cons
- The free trial allows only 2 minutes of video capture.
Price: It starts $19.95/Monthly.
Compatibility: Windows and Mac
How to use
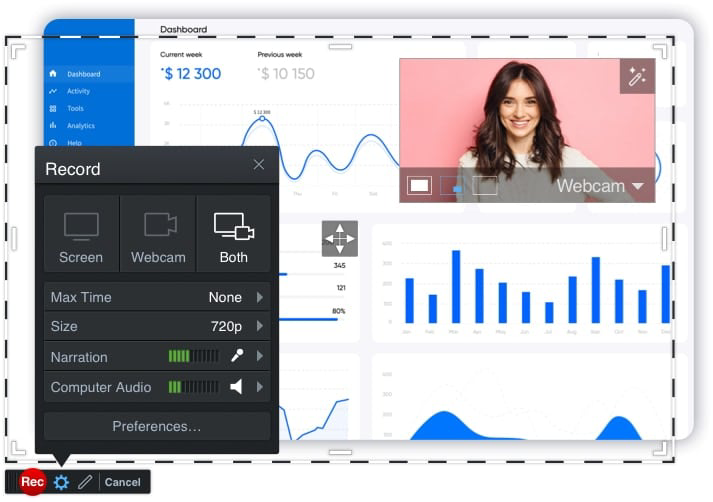
Step 1: Launch the EaseUS RecExperts software on your computer.
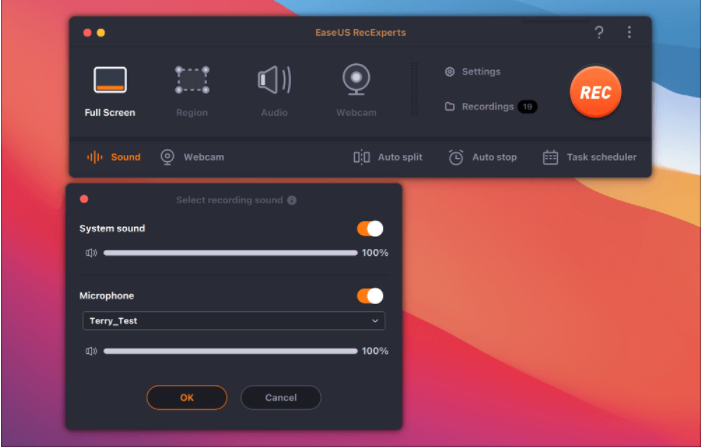
Step 2: You can either click the "Full Screen" option (for recording the whole screen) or select "Region" (for customizing the recording area). Upon that, choose the recording area with your mouse. If you want to record video with audio, you need to click the "Sound" icon on the bottom-left corner.
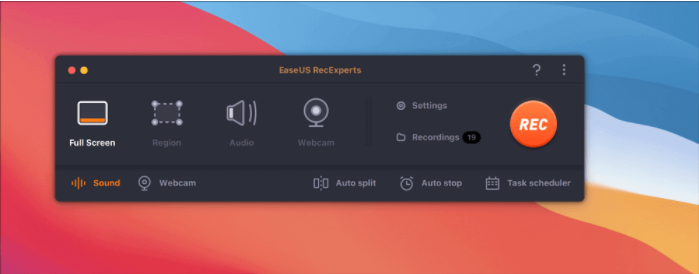
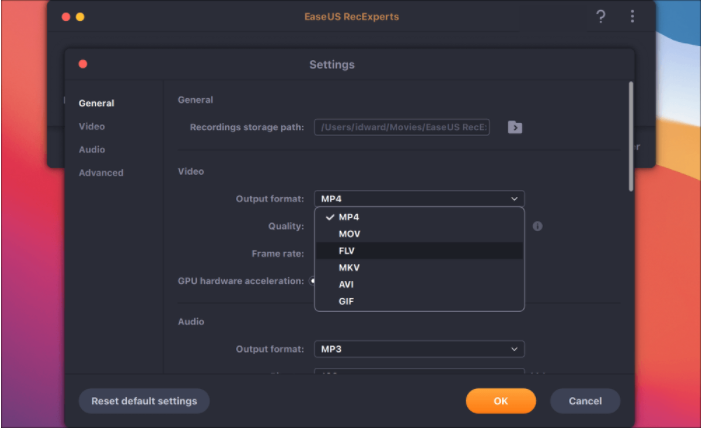
Step 3: Click the "Settings" button to apply more options and select the corresponding specification based on your needs. When finished, click "OK".
Step 4: Hit the "Sound" button on the bottom-left corner and open the system or microphone sound if you prefer to record audio and screen simultaneously. With that, select "OK" to ensure the audio options.
Step 5: Click the "REC" button to start recording. And click the red button on the timing bar to stop recording when it finishes.
You can find the recording videos in the "Recordings" which is located in the main interface. Select the video and edit it as you want.
2. Camtasia
You can use this screen recorder for advanced video editing. With this screen recorder, You can tweak video after recording with ease. Camtasia comes with tutorial videos to guide users on how to use it. It costs about $300, and give a 30-day free trial before you may think of advancing.
Pros
- It records tasks with ease
- It is not complex in use.
Cons
- It is expensive
Click here to visit the site
3. Loom
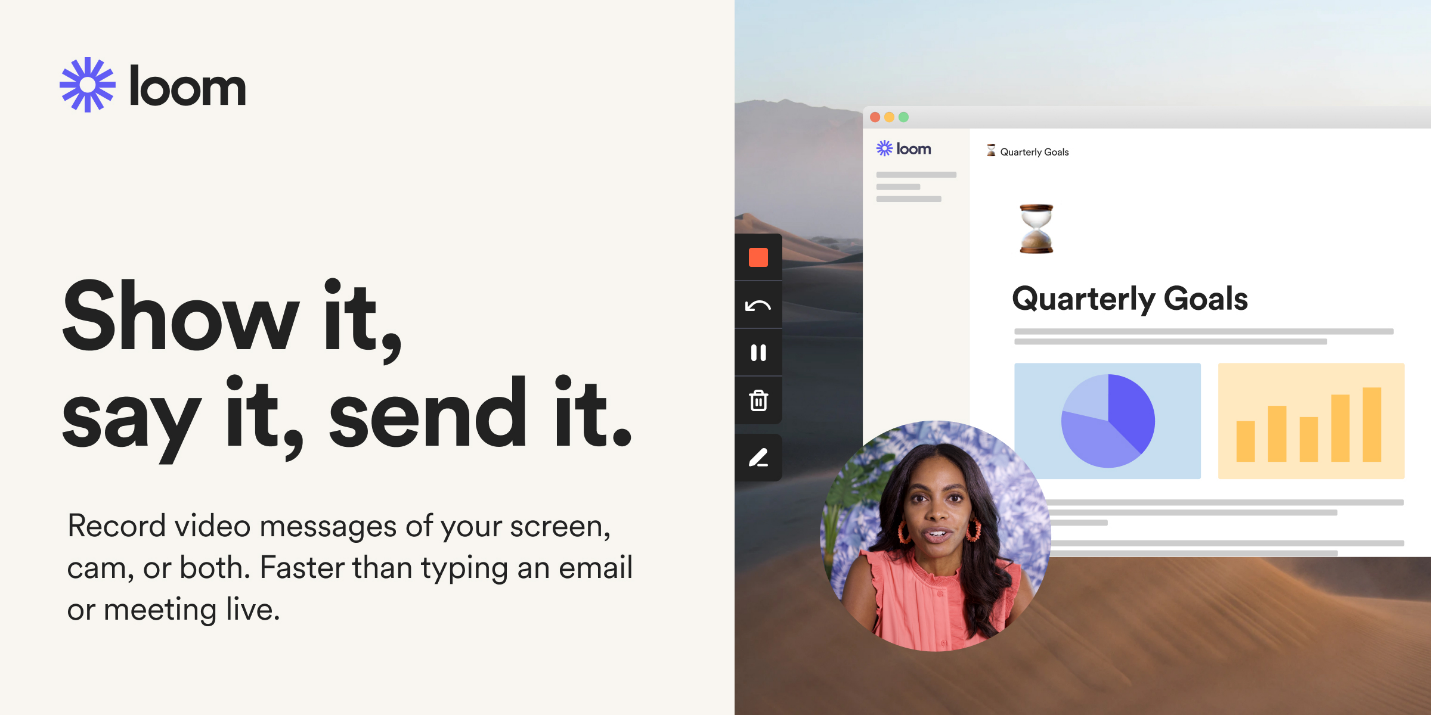
Loom is another great screen recorder that records screens and shares quickly to another device, individual, or folder. You can upload the videos to loom. Also, there is room for editing on Loom.
Pros
- Allows editing.
Cons:
- The space is limited, and you may want to subscribe to a plan of $8/month for unlimited use.
Click here to visit the site
4. ScreenCast-O-Matic
This comes with the free and paid version. Of course, the paid version has more outstanding features than the free. The free version allows a video recording of up to 15 minutes, but the paid version offer is unlimited for the lengthier one. It records full screen or part, and the webcam and zoom. You can save the recorded video in different formats such as AVI, MP4, or FLV files. ScreenCast-O-Matic offers different paid plans. For example, the deluxe plan costs $1.65/month, while the premium plan costs $4/month.
Pros
- The paid version has a lot of features,
- It is easy to operate.
Cons
- The free version is limited
- It has a watermark on it.
Click here to visit the site.
5. OBS Studio
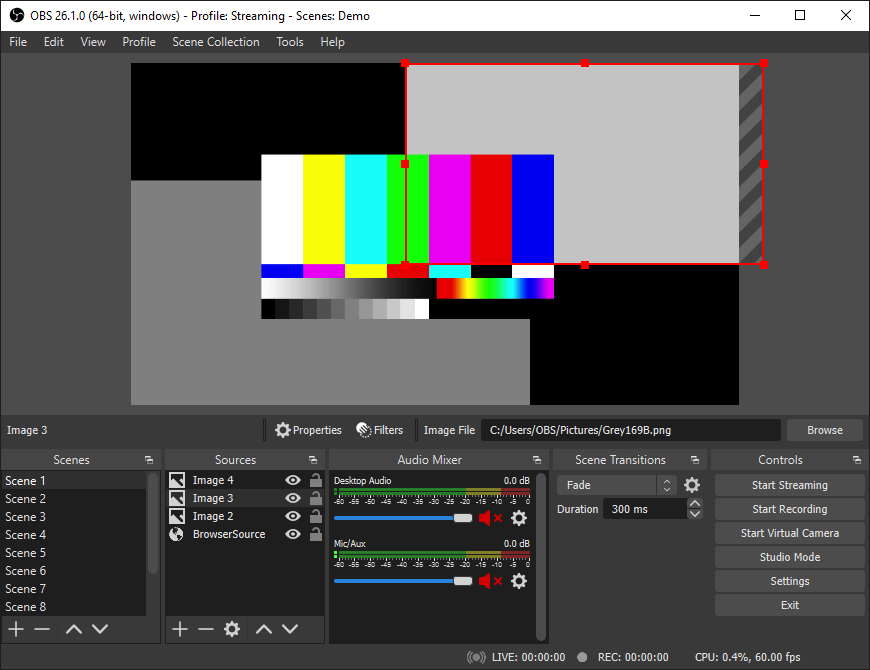
The OBS studio screen recorder is extraordinary in use. Users do not have to pay a dime to access its numerous screen recording features. One can record videos of wide length, and on top of that, it does not leave a watermark on videos. It has the feature to record a whole or part of the screen, screencast, and save in various formats like MKV, MOV, TS, FLV, and M3U8.
Pros
- OBS Studio is free and has no limit for length.
- It also leaves no watermark.
Cons
- It is not easy to use.
- Majorly, it does not have an editing tool.
Click here to visit the site.
6. VideoProc
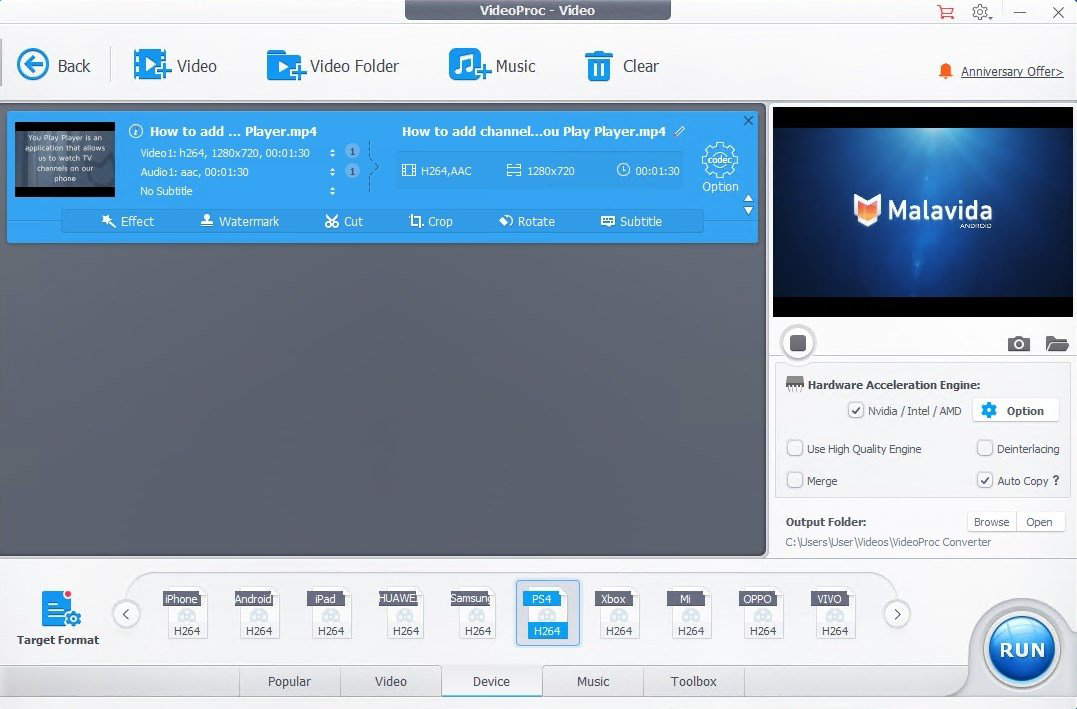
Just like the rest of them listed above, this has an excellent feature which makes it widely in use. The screen-recorded videos can be shared on Facebook, websites, and even YouTube. It can merge files and add subtitles whenever. There is the full version of the VideoProc offering top-notch features for recording and editing. VideoProc costs about $29.95/year.
Pros
- It has a lot of features
Cons
- It is a bit complex.
Click here to visit the site.
Conclusion
There are certain features to look out for before purchasing a screen recorder. For one, identify what you want to use it for, i.e., what purpose you want the screen recorder to serve. This is a crucial aspect most people are negligent. The EaseUS RecExperts may be the choice to get you excellent on-screen recording for a ridiculously fair price.
Price: It starts $19.95/Monthly.
Compatibility: Windows and Mac