We will be discussing the problem regarding the audio service is not running Windows 10. We will make you know the causes of this audio service error and offer the appropriate solution.
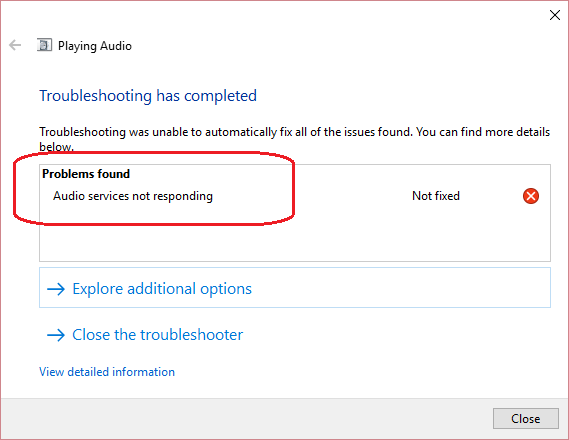
For several Windows users, the Audio Service is not working issue is quite prevalent. It enables the computer to perform without any sound. When you run media or play games on your desktop, you will not hear any audio through the headsets or speakers. Also, you can receive an alert informing you about the issue with your audio services. This problem annoys the users and gets difficult for them. The error can cause by one of the following factors:
- Corrupted or damaged audio driver
- Faulty speakers or sound cards
- Outdated audio drivers
However, several easy solutions can assist you to overcome the error. So, let’s know about each of the fixes individually.
8 fixes to the “Audio Service is Not Running” Problem
Fortunately, an issue with Windows sound can quickly resolve with some simple steps. To resolve "the audio service is not running" issue, you must follow all the 8 stepwise instructions mentioned below.
Fix 1. Change Your Computer’s Volume
Sometimes, it might happen that the audio service issue is occurring due to the improper adjustment of the computer's volume. Several people who this issue has impacted have resolved it by just raising or reducing the volume on their computers. To utilize this method to resolve this matter, follow the instructions below:
- Press the "sound" button present on the bottom-right corner of your screen. You will notice the volume slider opened.
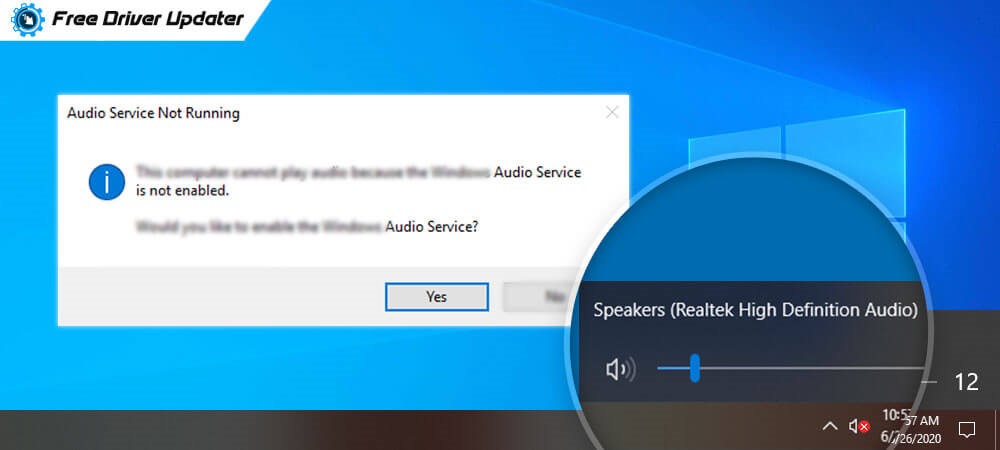
2. If it displays an "X" beside the sound icon, you need to slide the volume bar slider to raise or reduce the sound. It will remove the "X" symbol, and you can easily eliminate the issue.
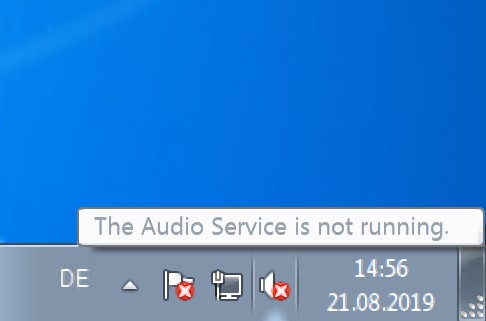
Fix 2. Restart Windows Audio Service
Restarting the audio service and any of its two dependencies (from the three dependencies) is another extremely efficient approach. It assists the Windows users to get rid of the audio service that is not running Windows 10. Ensure that all three are scheduled to start immediately when your machine starts up. So, follow the step-by-step instructions outlined below:
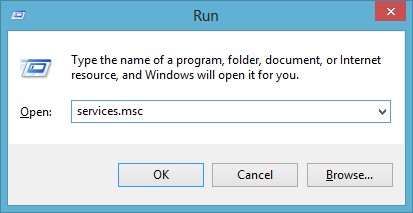
- Open the "Run" dialogue box and type "services.msc.”
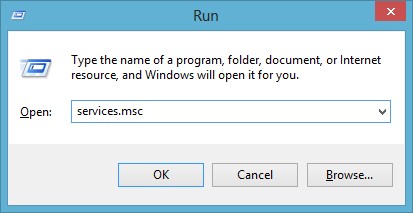
2. You will see a new window opened on your screen. Now search for the following options:
- Windows Audio Service
- Windows Audio Endpoint Builder Service
- Multimedia Class Scheduler Service
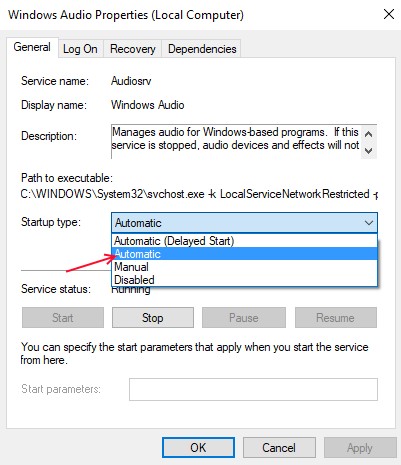
Double click on these options and change their "Startup Type” to Automatic.
3. You need to right-click on all these options and click on the "Restart" option from the drop-down list.

Fix 3. Modify the audio-related services settings
The audio service is not running Windows 10 issue is most commonly caused by the incorrect state of the Windows audio service or any of its dependencies. Improve the issue, and you can get rid of your issue. To change the audio-related services settings, follow these steps:
- Open your “Run” dialogue box and write in “service.msc.” Click on “Ok” to access the “Services” window.
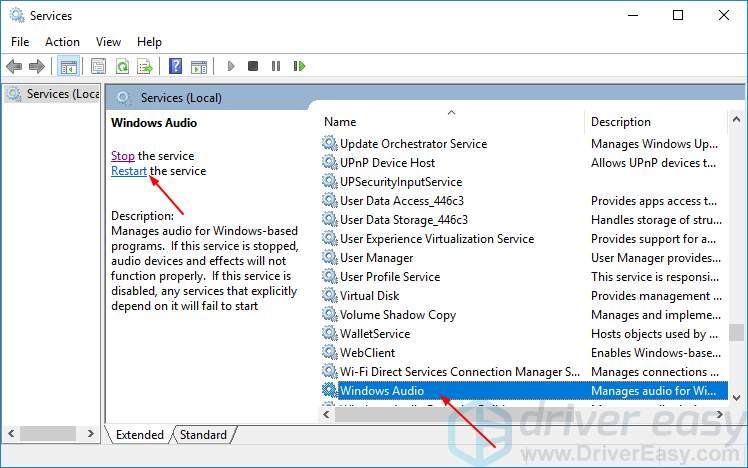
2. Look for the "Windows Audio" option and click on the "Restart" option.
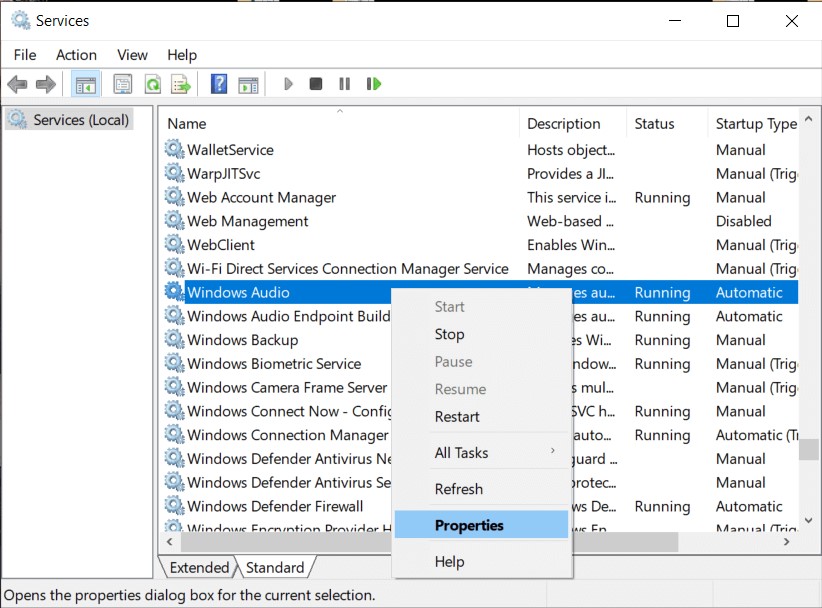
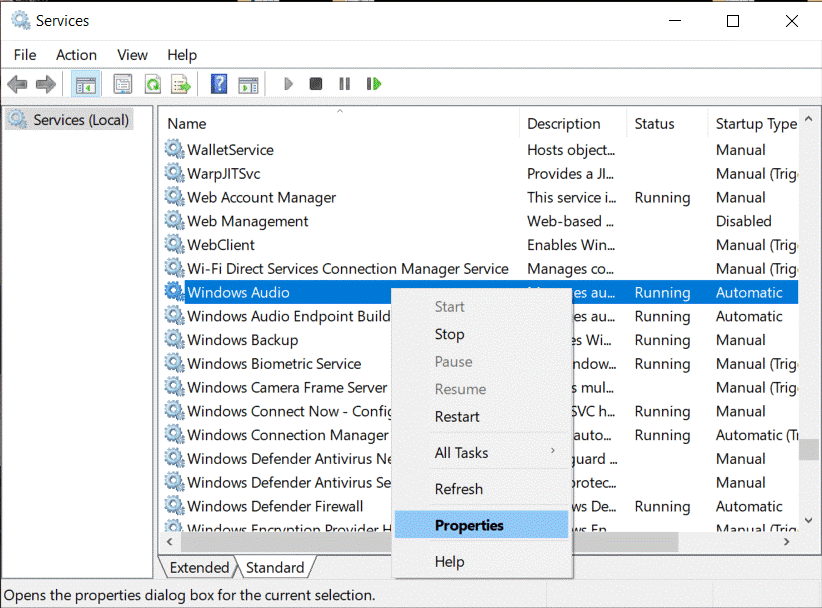
3. Next, right-click on the “Windows Audio” and click on Properties.
- Then, set its “Startup Type” to Automatic and click on the “OK” option.

5. Restart the other two options and change its “Startup Type” to Automatic. The options are:
- Windows Audio Endpoint Builder
- Multimedia Class Scheduler
Fix 4. Check Audio Components
You may also test your audio service components to determine whether they work properly. The following are the steps to check your audio components and resolve the audio service is not running are:
- Type "service.msc," and press Enter to access your Run dialogue box.
2. Navigate to the “Windows Audio Service” and right-click to select “Properties.”

3. Click on the “Dependencies” tab. Under the “this service depends on the following system components” option, ensure that all audio components are running.
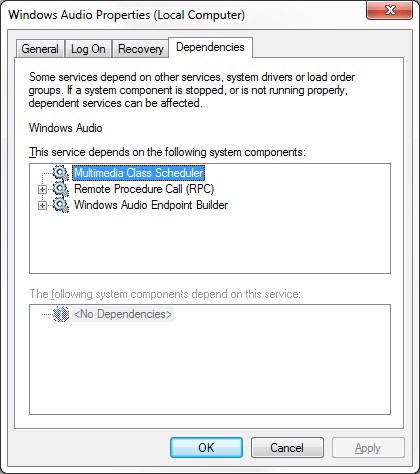
4. Lastly, restart the windows audio services.
Fix 5. Use the Command Prompt to Fix Local Account Configurations
In certain circumstances, the issue may be generated if you screwed up with a few of local account settings, so, in this step, we would execute some commands in the advanced command prompt to resolve this issue.
- Open the “Run” dialog box and write “cmd.” Click Shift+ Ctrl+ Enter to “run as administrator.

2. When the command prompts, type the following commands:
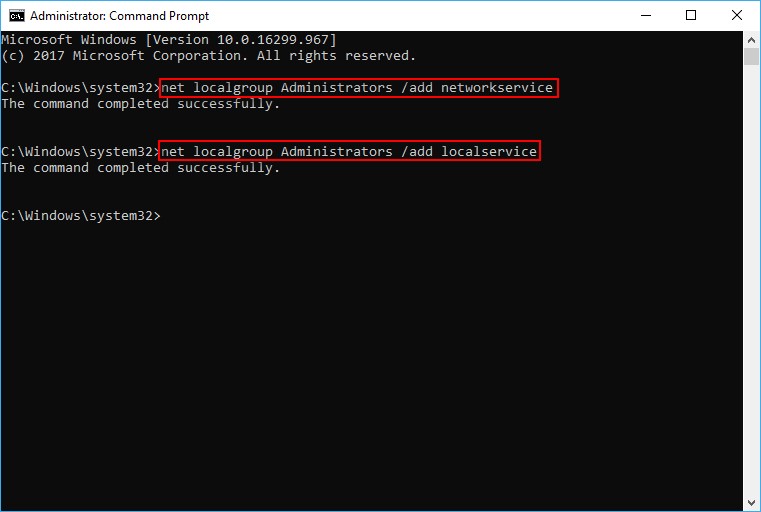
net localgroup Administrators /add networkservice
net localgroup Administrators /add localservice
SC config Audiosrv start= auto
REG ADD "HKLM\SYSTEM\CurrentControlSet\Services\Audiosrv" /V start /T REG_DWORD /D 2 /F
secedit /configure /cfg %windir%\inf\defltbase.inf /db defltbase.sdb /verbose
3. Hit Enter key to execute the commands. Once you are finished, check whether the audio service is not running issue is resolved or not.
Fix 6. Modify Your Computer’s Registry
You may always check your registry to see whether the error is there. If this is the case, you can resolve the problem by modifying the registry. Please keep in mind that you should only attempt it when you realize that incorrectly altering the registry might have major consequences. The specific steps are as follows:
1. In the Run dialog box, type “regedit” and hit the Enter key.

2. The Registry Editor will open and expand the following options individually:
- HKEY_LOCAL_MACHINE
- CurrentControlSet
- SYSTEM
- AudioEndPointBuilder
- Services
3. Now Select Parameters, look for the "ServiceDll” option and look out the “Data” column for information.
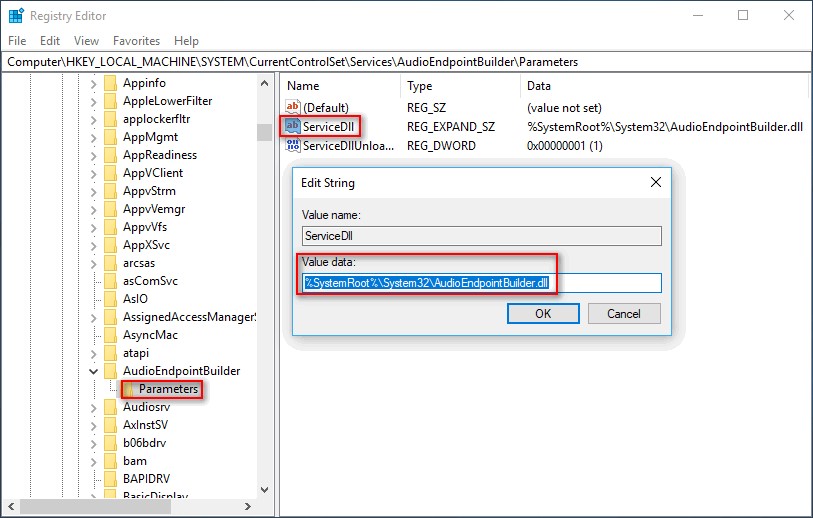
- If the information does not display “%SystemRoot%\System32\AudioEndPointBuilder.dll., modify it.
- Close your registry and restart your device.
Fix 7. Change the Log-on Settings
While audio settings seem logical to be consistent throughout all user accounts on a user's computer, this is not always the case. You must examine the log-on settings to ensure that the audio is set up for your user account:
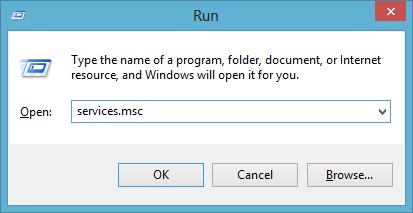
1. Type "Services.msc" in the Run dialogue box and hit "enter."
2. Right-click on the "Windows Audio service" and choose Properties.
3. When you click the "Log on" tab, choose the "Local System Account" option rather than "This Account."
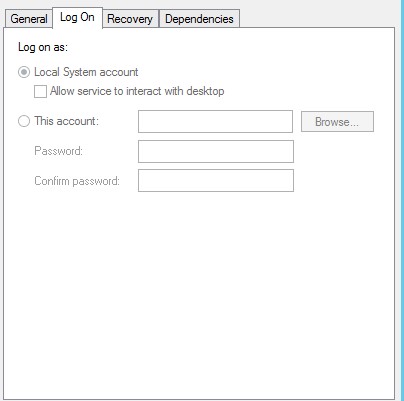
4. Select "Local System Account" from the drop-down menu. If the problem persists, then select "This Account" and enter "Local Service" within the text box.

5. After that, enter any password you want and confirm password boxes. Select "Apply" and afterwards "OK."
Fix 8. Check and update your audio drivers
This issue might be triggered by an outdated or faulty audio driver in Windows 10. You can either manually upgrade your audio driver or use Driver Easy if you're not comfortable messing with drivers. It will easily detect your system requirements and locate the appropriate drivers. So, here are the simple steps to using Driver Easy to fix the problem:
Price: Its 1 PC version costs $29.95/year, 3 PCs version costs $59.90/year.
Compatibility: Windows
Step 1. Download and install Driver Easy, then run it and click Scan Now.
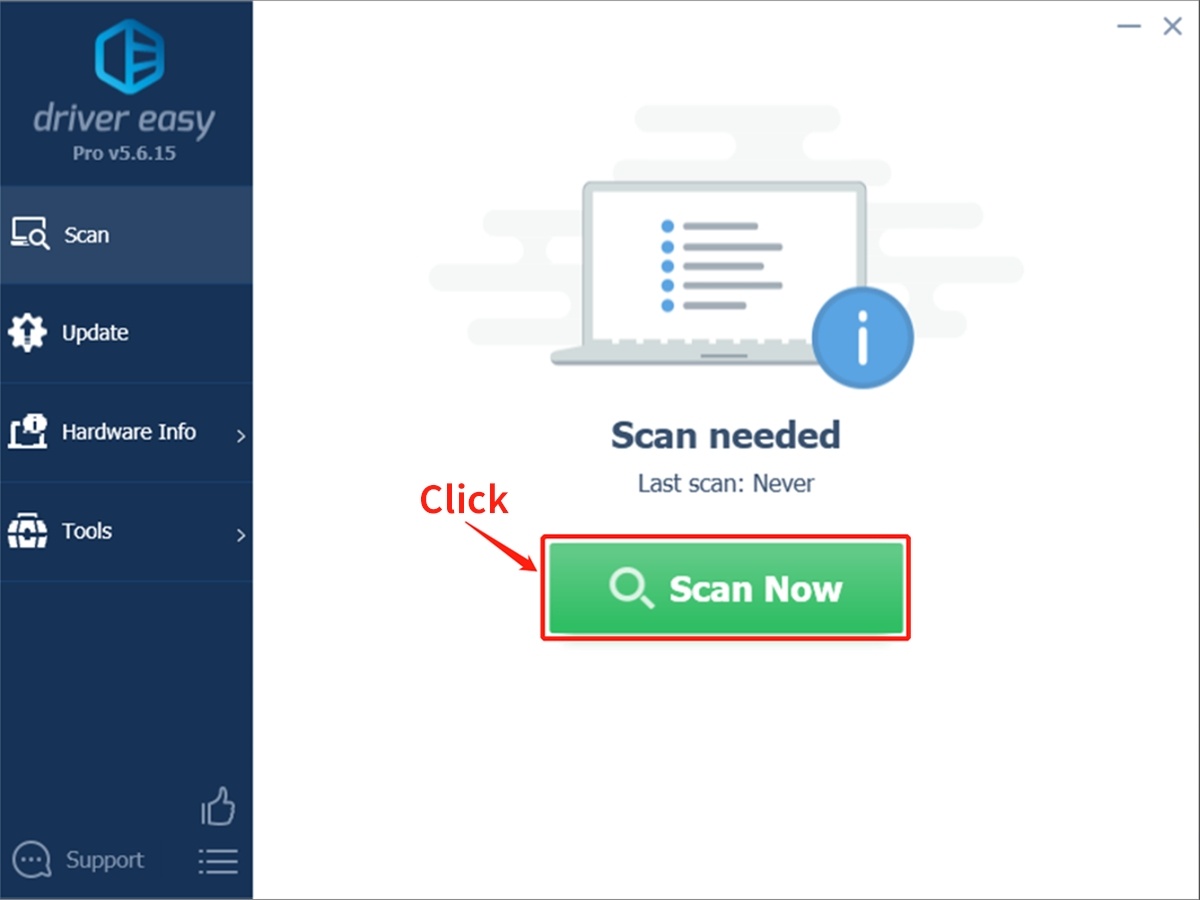
Step 2. Wait patiently until Driver Easy finish scanning your computer and listing any hardware with missing, outdated or mismatched drivers.
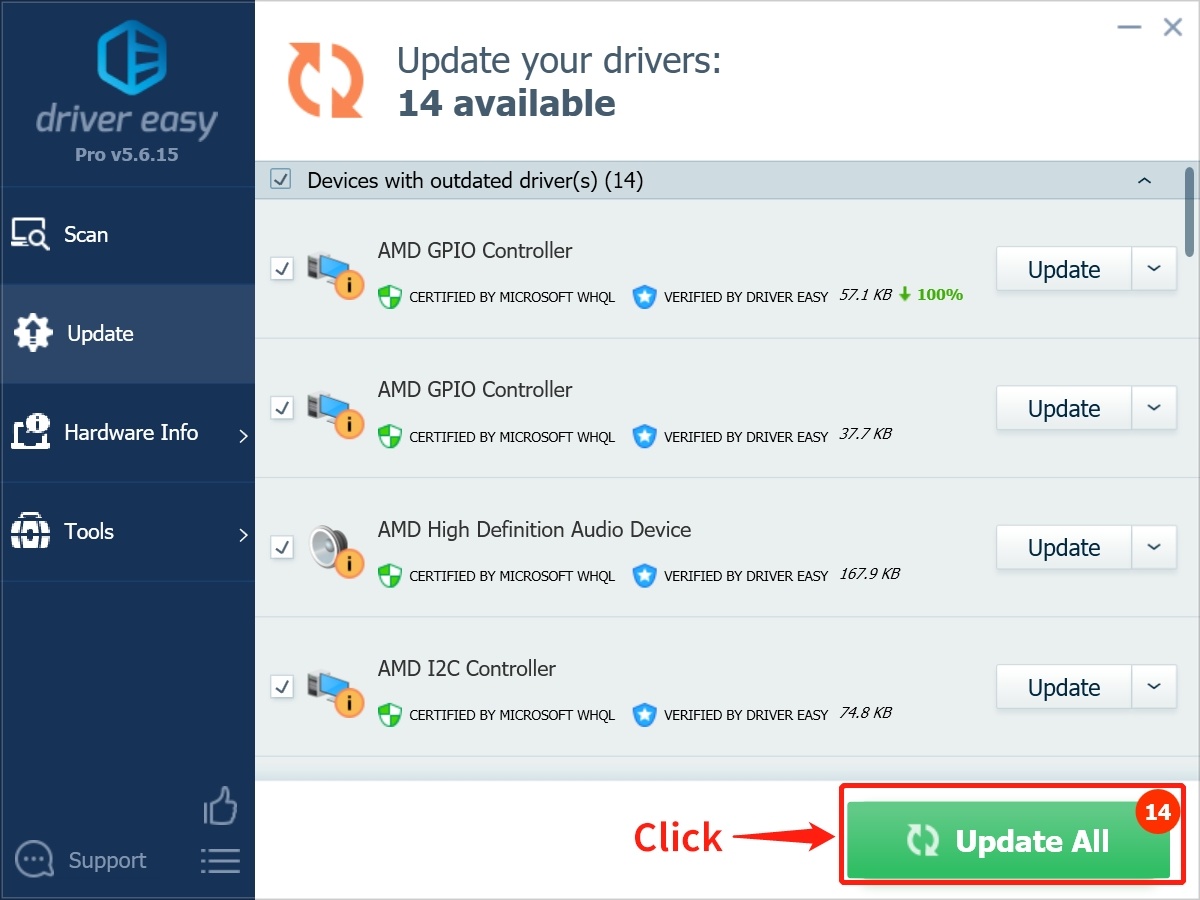
Step 3. Click Update All to download and install all the new drivers automatically.
Conclusion
We have listed the best eight solutions to help you overcome the audio service is not running Windows 10 error. Hopefully, our post has been of use to you, and we were able to provide the information you were searching for. So, without further ado, choose one of these to resolve this audio service issue.


